Our Simple and Advanced Marketing tools include an easy-to-use Email Designer to create professional looking emails without the need of a software developer or designer. Using simple “drag and drop” controls you can edit all the elements of the design, with no limitation to your creativity.
Here we look at creating and email step-by-step and show you how to get the most from the designer.
Email Templates
On opening the Campaign Wizard (or selecting the Simple Campaign options in the Advanced plan) you are first taken to the Email Templates page. Our Templates are simple, user-friendly layouts that you can easily edit by adding or removing sections to create your own design. If you prefer, you can work from a blank page and design your email from scratch.
Clicking on any Template will open the Email Designer.
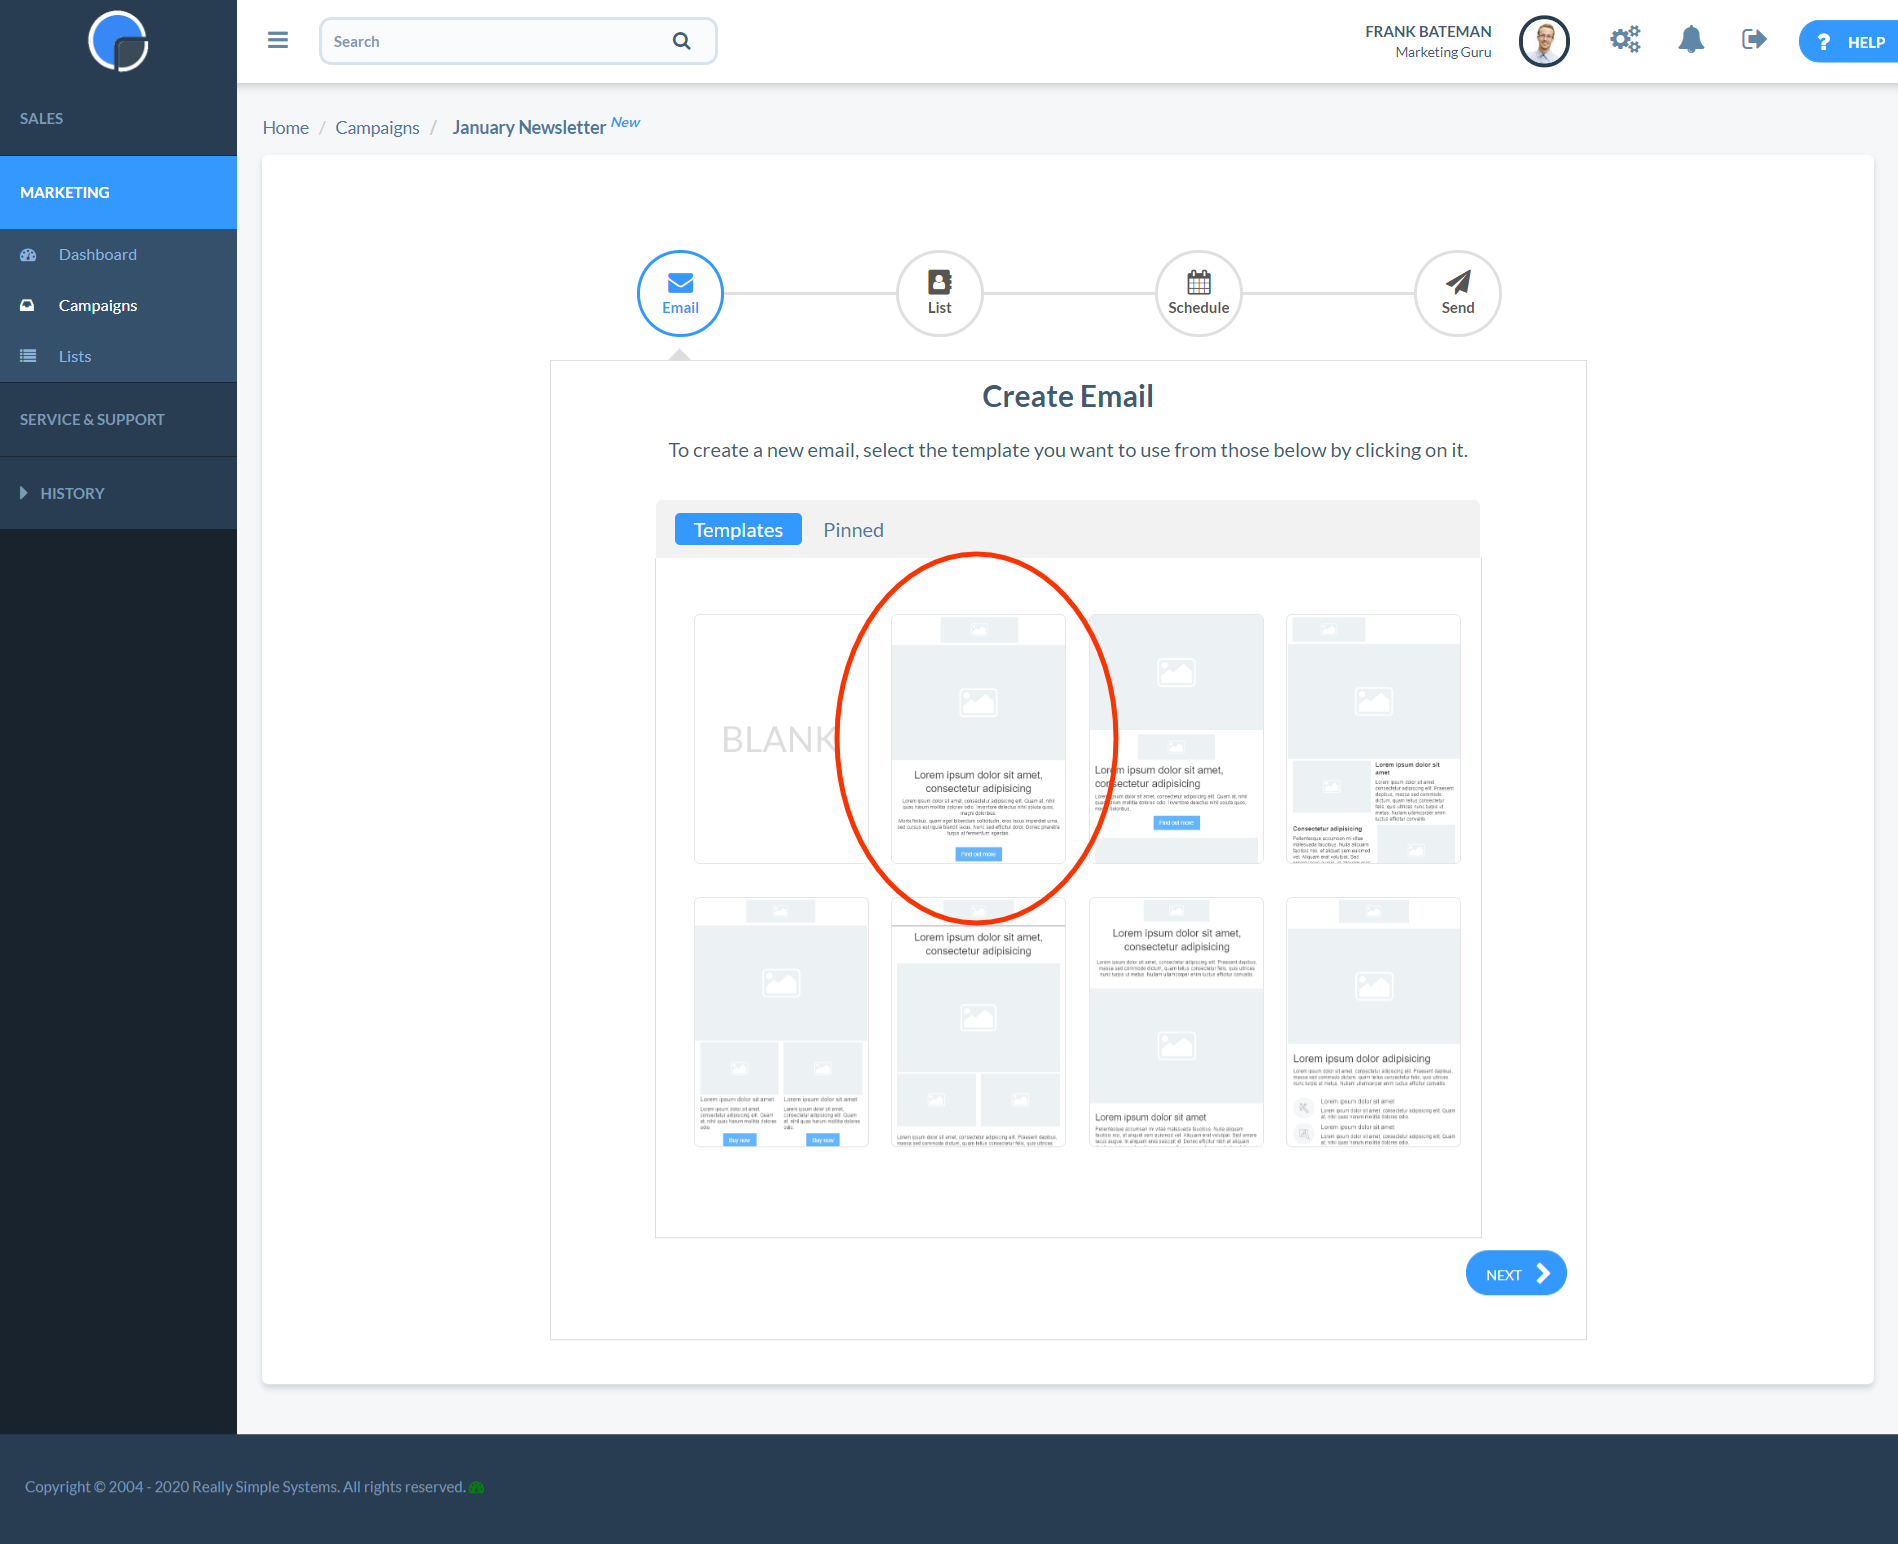
You can save your edited templates and emails to the “Pinned” section by clicking the “pin” icon in the Email Designer, at the top next to your email name.

Settings Tab
With the Email Designer open, you’ll see your template appears on the left-hand side of the screen and there are 5 tabs on the right-hand side. When creating your email, we recommend starting with the “Settings” tab to log the details of your email so you don’t forget. However, you can return and edit at a later stage.
Give your Template a name, the system default is to the same as your Campaign name.
Next set the Subject for your email. The subject is what your email recipients will see in their inbox subject line, so make sure it’s something compelling to encourage your contacts to open your message!
Then add in your Sender name, most likely your company name, as well as your Sender email address and the Reply To email address. These can be the same or different. The system defaults to the user’s email address but these can be edited.
You can also add notes to your Settings page, maybe referencing details of the mailing.

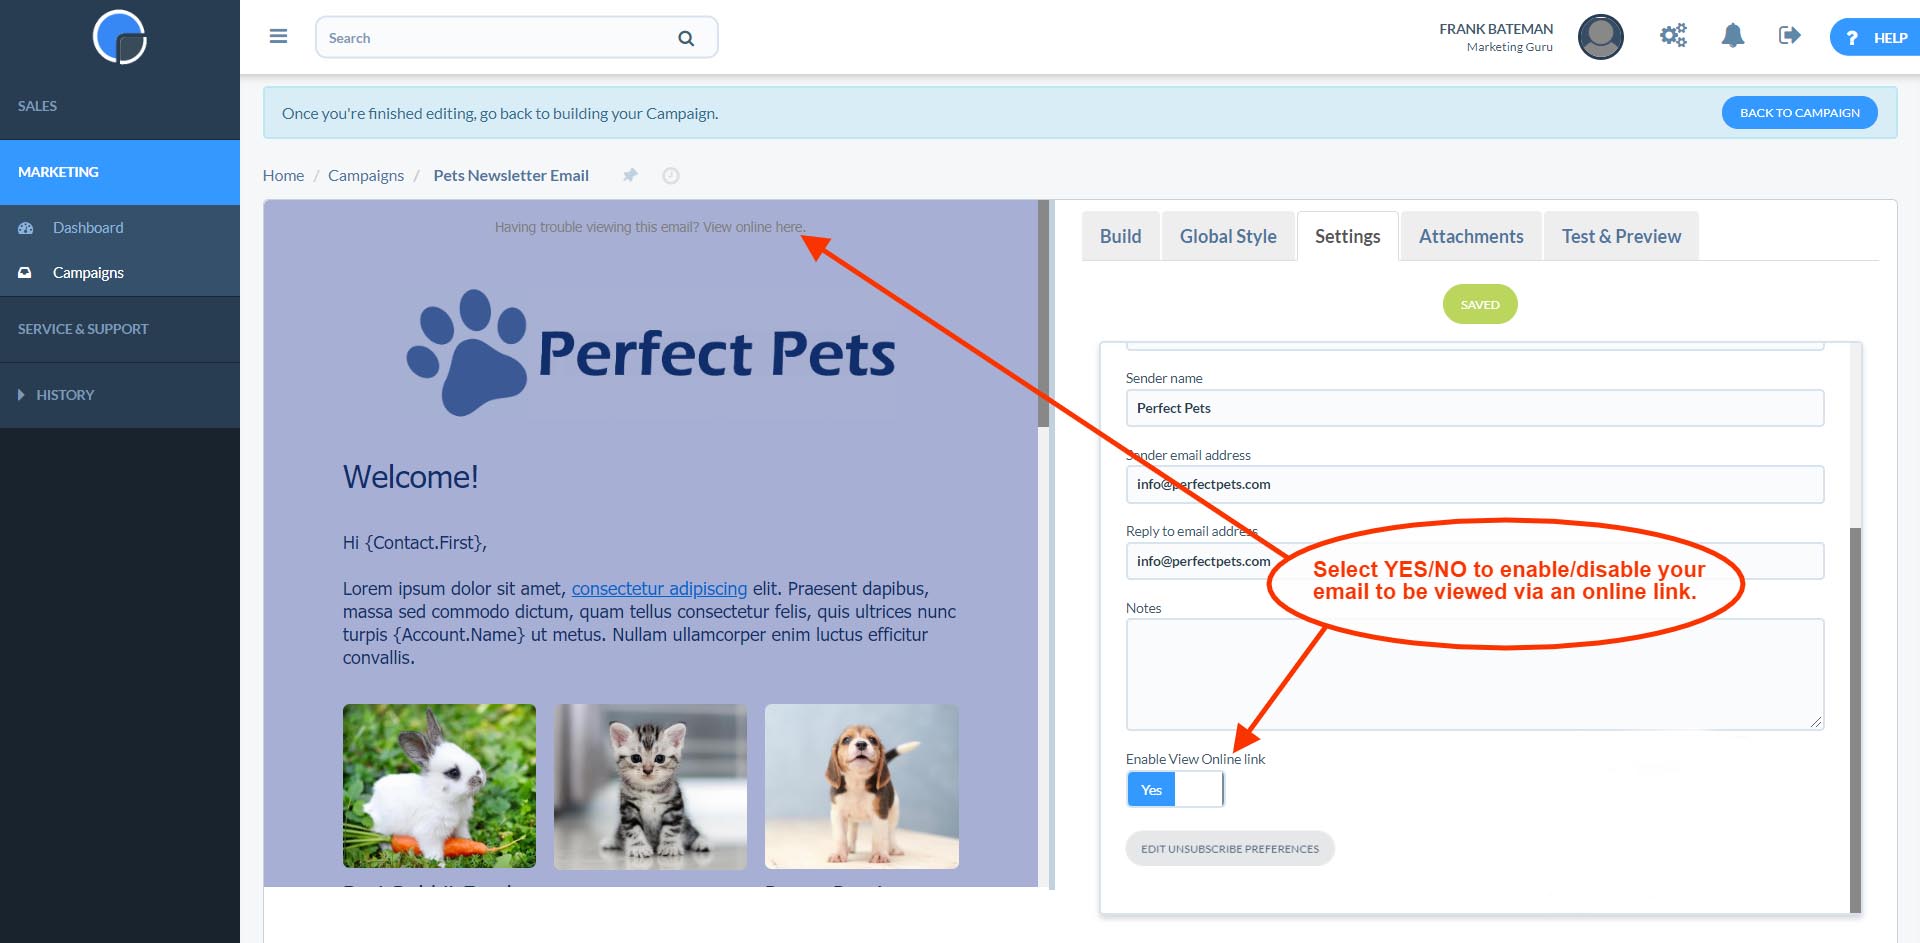
If you scroll down on the Settings tab you’ll find further settings.
There’s a toggle button to select YES/NO to display whether or not to give your recipients the option to view the email online.
The “Edit Mailing Preferences” button at the bottom of the page lets you create a landing page for unsubscribes. You can add your logo and a link to your website. This screen can also be accessed in Settings, then System Settings.
Global Style Tab
The Global Style tab lets you set the margins, font family, font size and colours for your overall email design. You can still vary the individual sections in the Build tab, if you wish.
You can set the background colours, font colour and link text colour using Hex codes or the colour picker. Hex codes are a colour format used online, usually displayed as a six-digit code preceded by a hashtag, for example white is #ffffff and black #000000. You can also select colours using the colour picker by clicking on the small coloured box. This will open the colour picker and you can then click in the rainbow panel to find the colour you want. If you wish to use the same colour else where, copy and paste the hex code displayed.
Then save your changes.

Build Tab
The Build tab is where you can let lose your creative side!
You can add more sections to the template by “dragging and dropping” them, using your mouse, from the Build tab to the design panel. If you wish to remove a section, simply click on it and this will display a small “X” in the top right corner. Click on the “X” and this will remove the section.

Editing the Build Sections
Having added a section to your design, clicking on it will open the appropriate control panel on the right to edit it.
Within each section there are further design options with tabs for Content, Style and Settings.
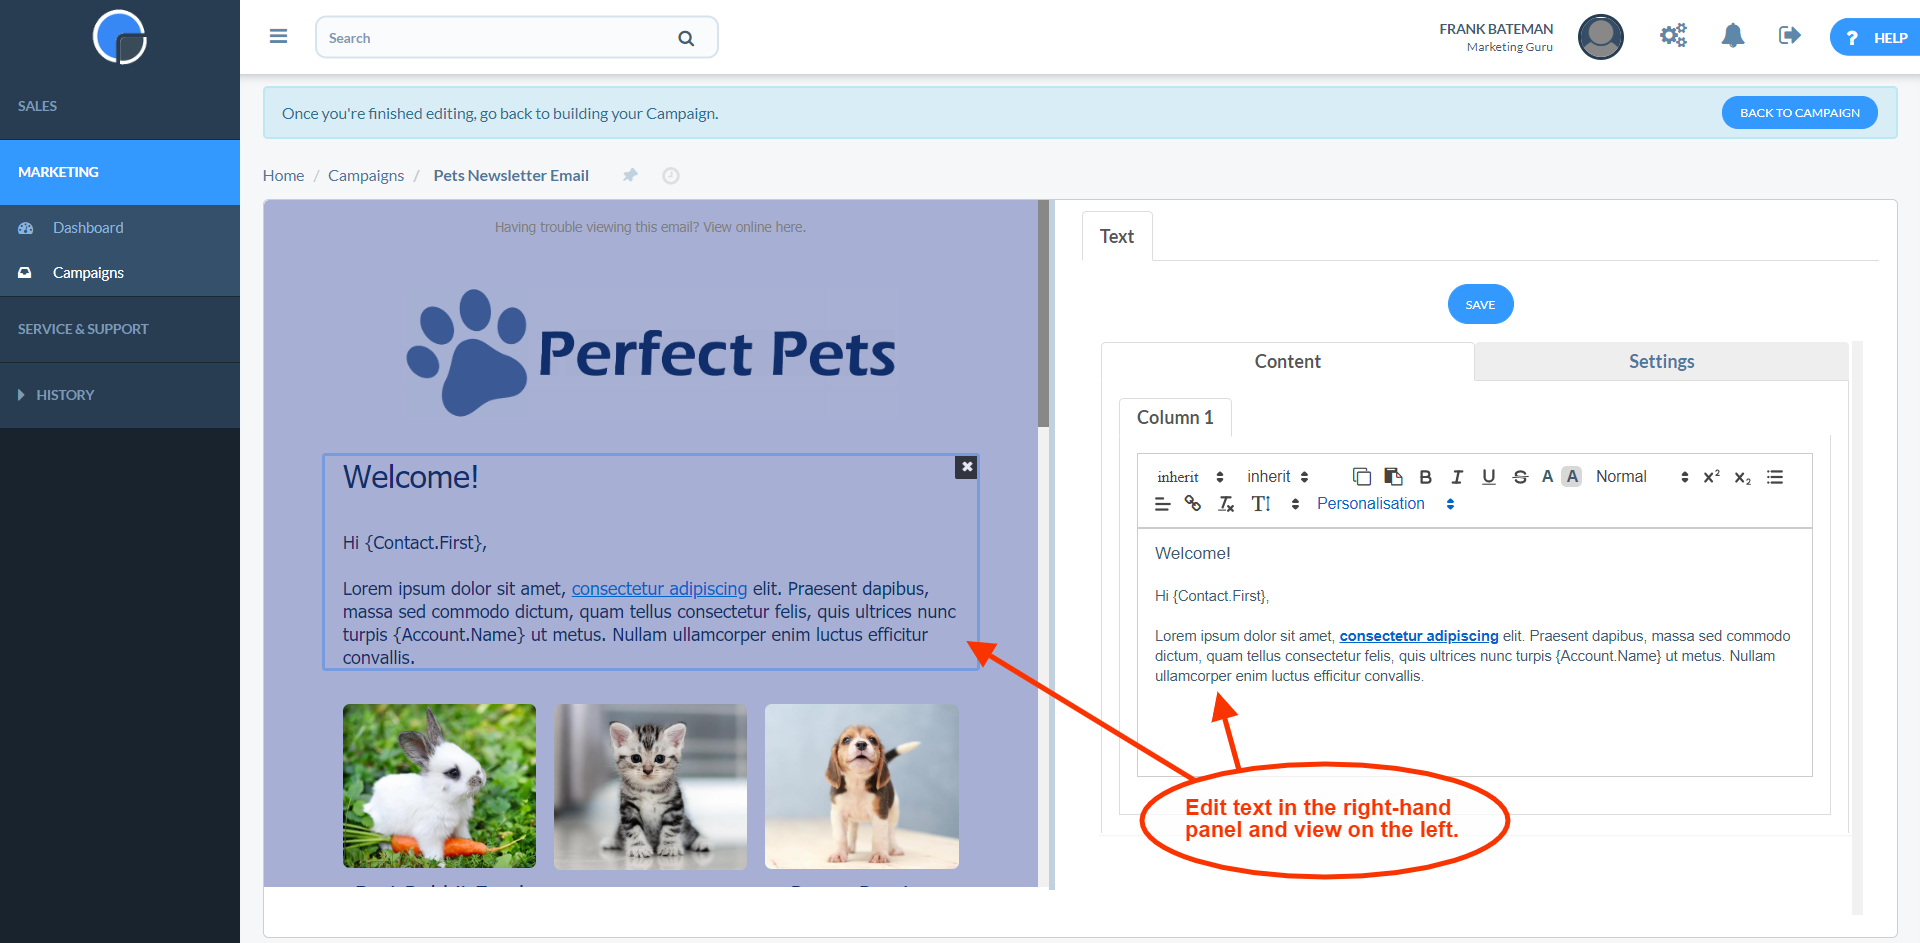
The Content tab allows you to add and edit the text panels, images, links etc.
The Style tab allows you to control the alignment, corner radius, border width, image size, button colours etc.
The Settings tab allows you to further edit the panel for example, collapsing the borders, switching the position of the elements, changing the number of columns, and removing the buttons.
Adding Text
Text Content
The Text elements within the sections can be formatted in much the same way as you would a Word document. In the Content tab, you can change the font family, colours, font size and alignment, add bullet points, headings, set fonts to bold, add underlines and italics.
If you wish to add a link to a web page, highlight the text you wish to link using your cursor then click on the link icon. Add your link URL to the pop-up box and save.
Personalisation
You can personalise your email by using the data from your CRM database. For example, you might want to address the recipient’s by their first name, or include their company name, refer to products they have previously purchased or other data you have collected. To do this position your cursor where you want the personalisation to appear and click the “Personalisation” button. This will display a list of fields from your CRM to select from, for example the contact’s first name will appear as {Contact.First}. Click on the term to add it to your email.
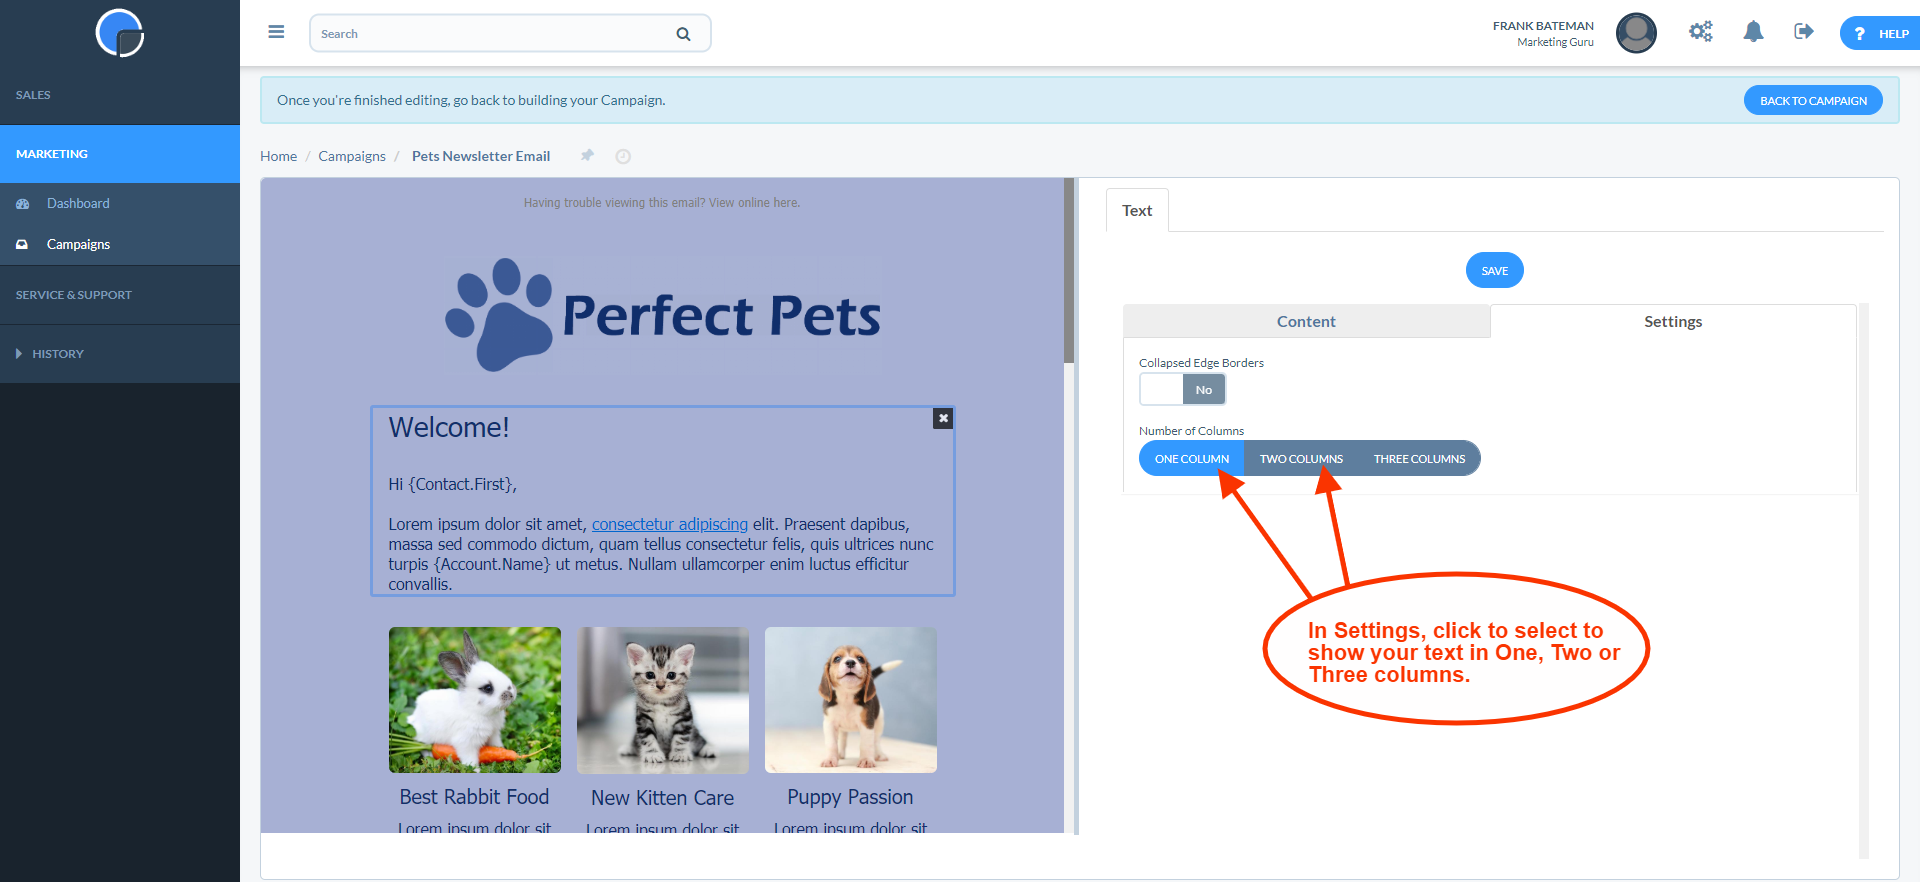
Text Settings
On the Settings tab, you have further controls to style your text box. Instead of having just the one full width column, you can change the section to include two or three columns.
Once you have finished editing click to save the changes.
Adding Images
Content
To add an image, click on the image section and go to the Content tab. Click “Select Image” and this will open your Media Gallery.
In the Media Gallery, click “Add New Image” to upload an image. With the image selected you can add tags to filter and search on your images. To add an image to your design click “Select Image”. This will add the image to your email design and take you back to the Content tab in the Build section.
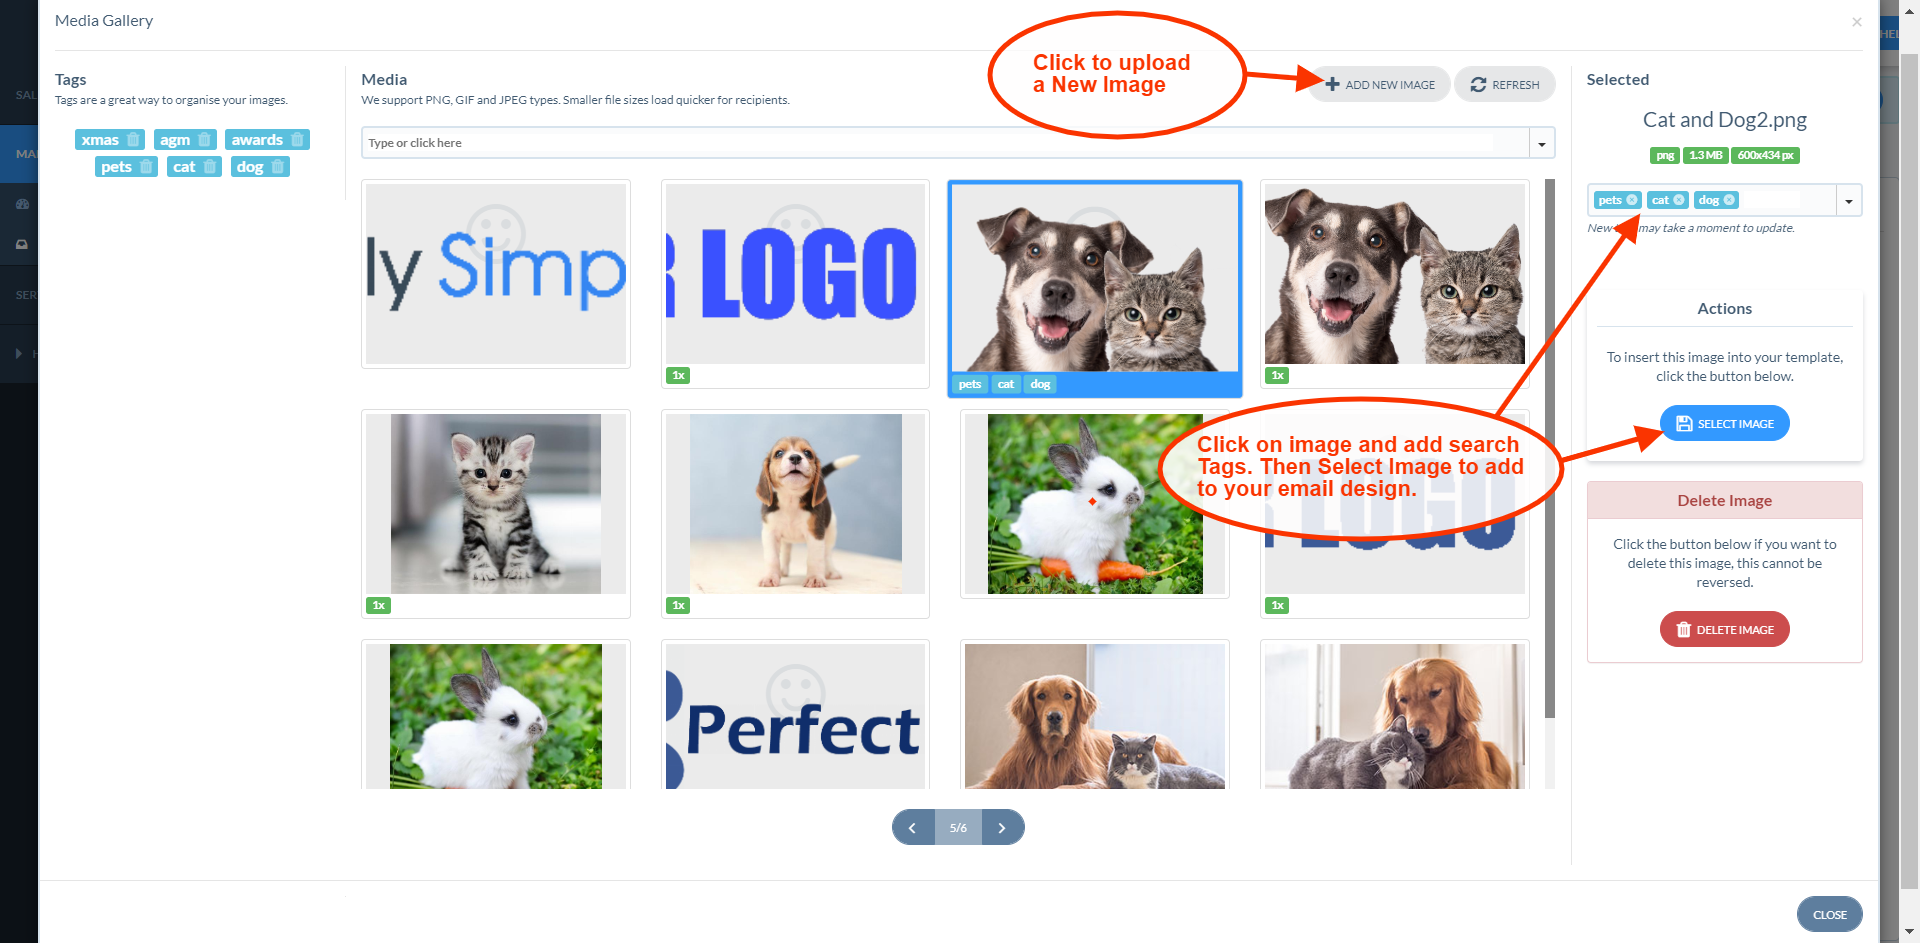
You can add a hyperlink to the image which will open a web page when your email recipient clicks on your image.
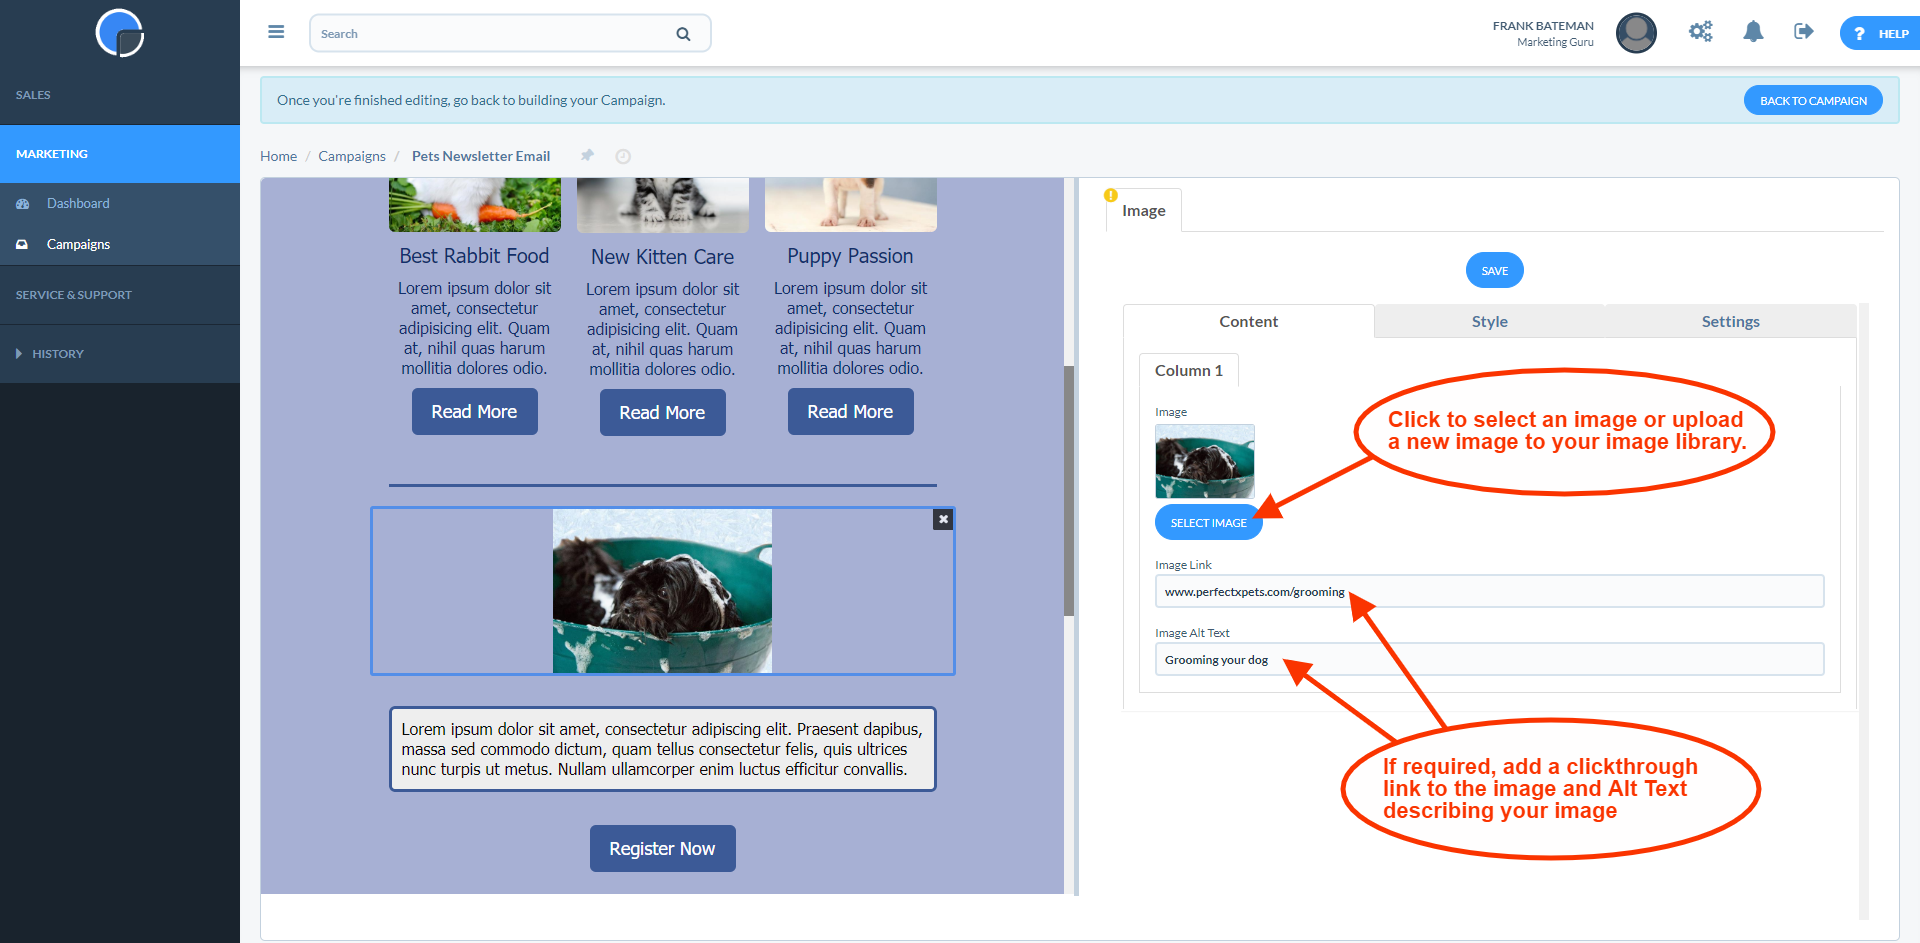
Image Style
In the Style tab, you can edit the size of your image using the slider control. You can also change the image alignment, background colour and corner radius.
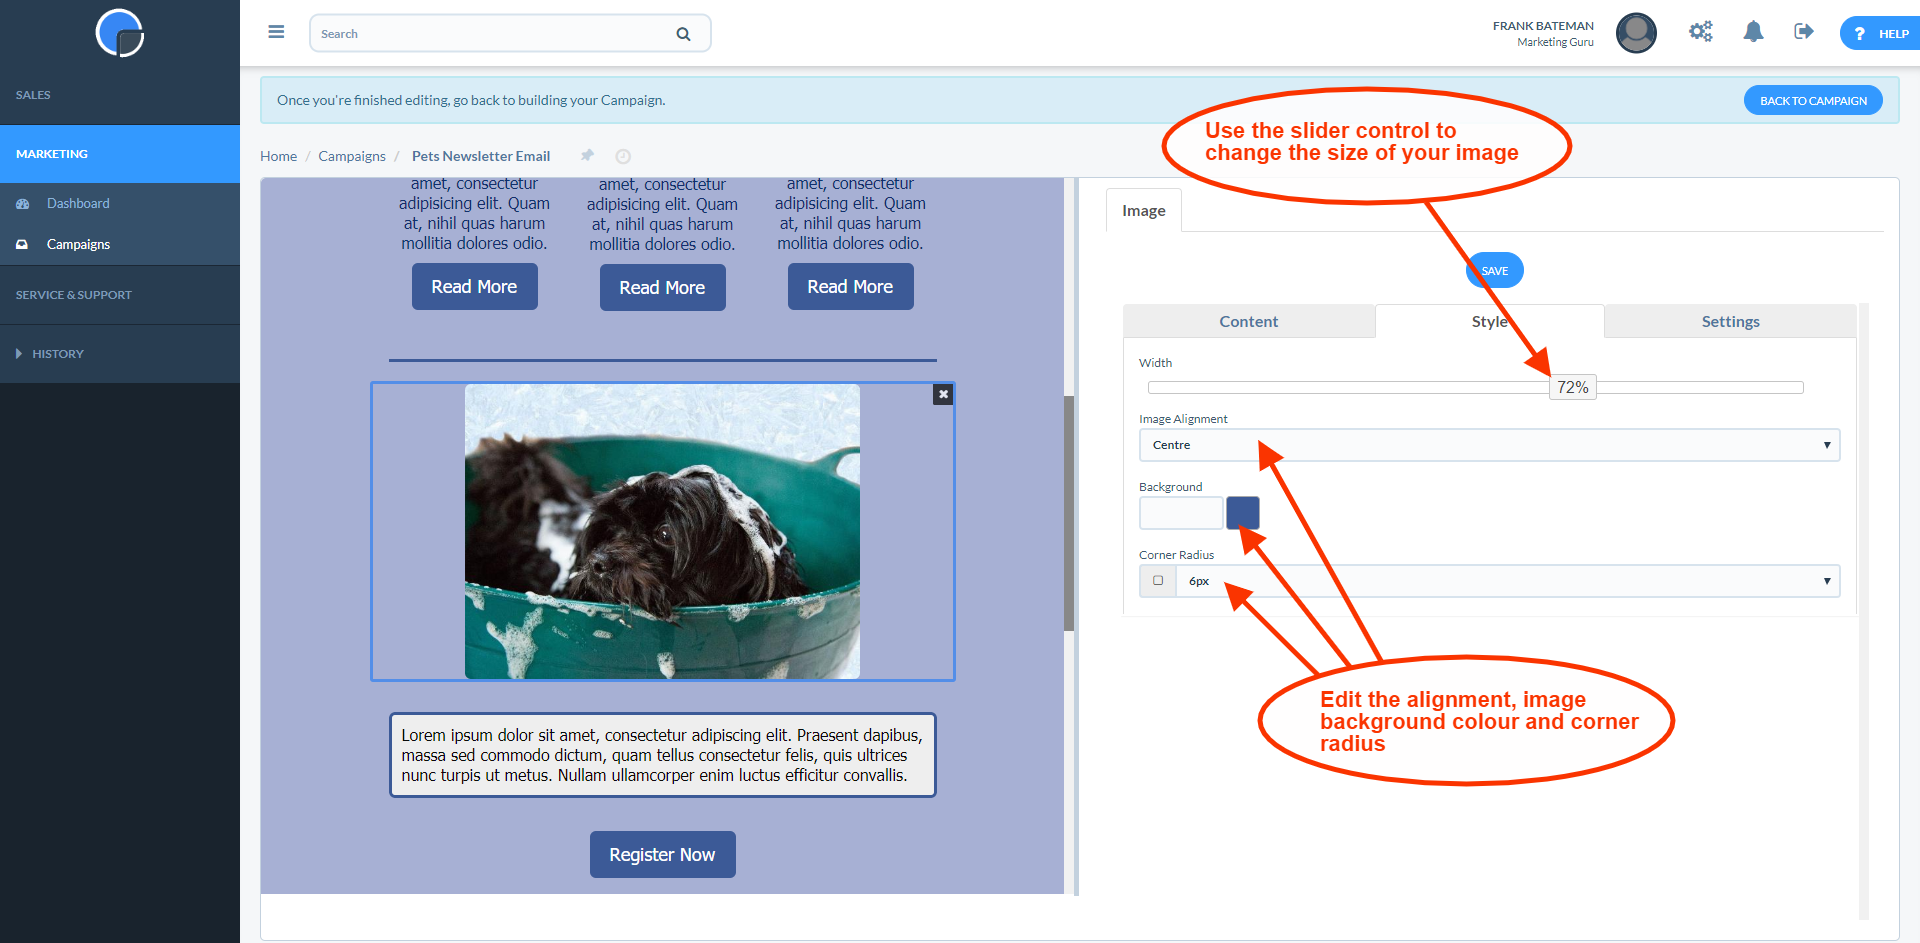
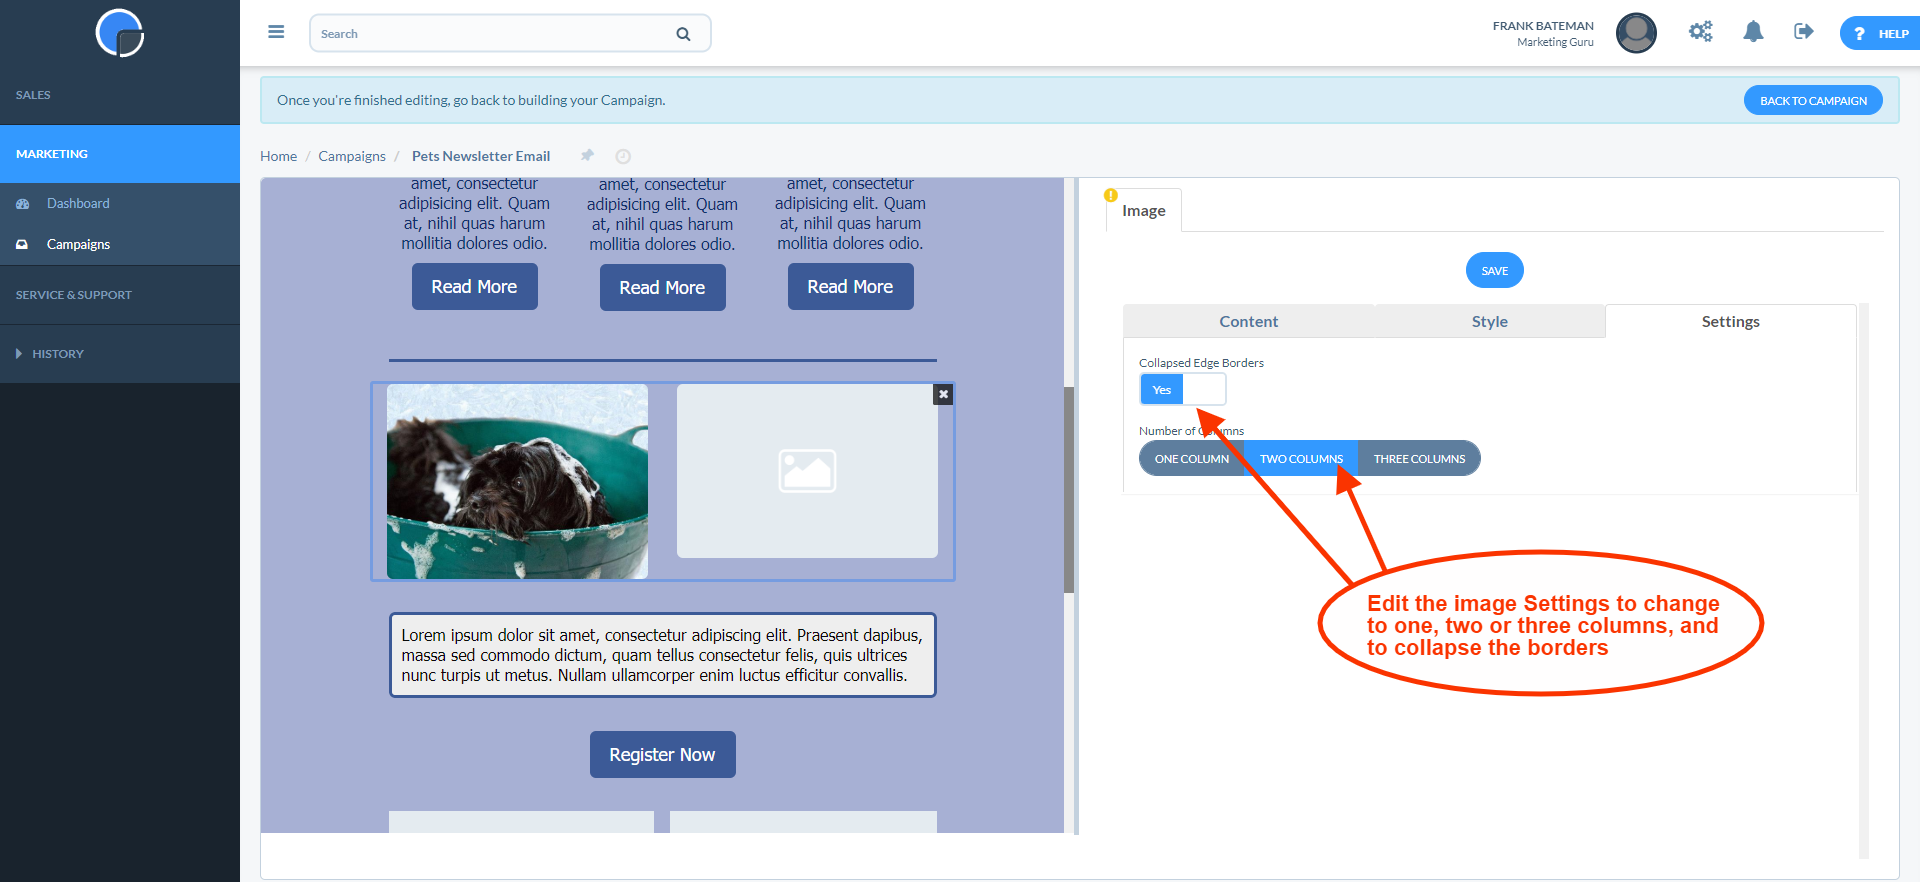
Image Settings
In the Settings tab, you can select to change your design to one, two or three columns, and collapse the borders so your images run to the edges of your design.
Editing Buttons
Button Content
In the Button Content tab you can add a hyperlink to a web page and add your button text.

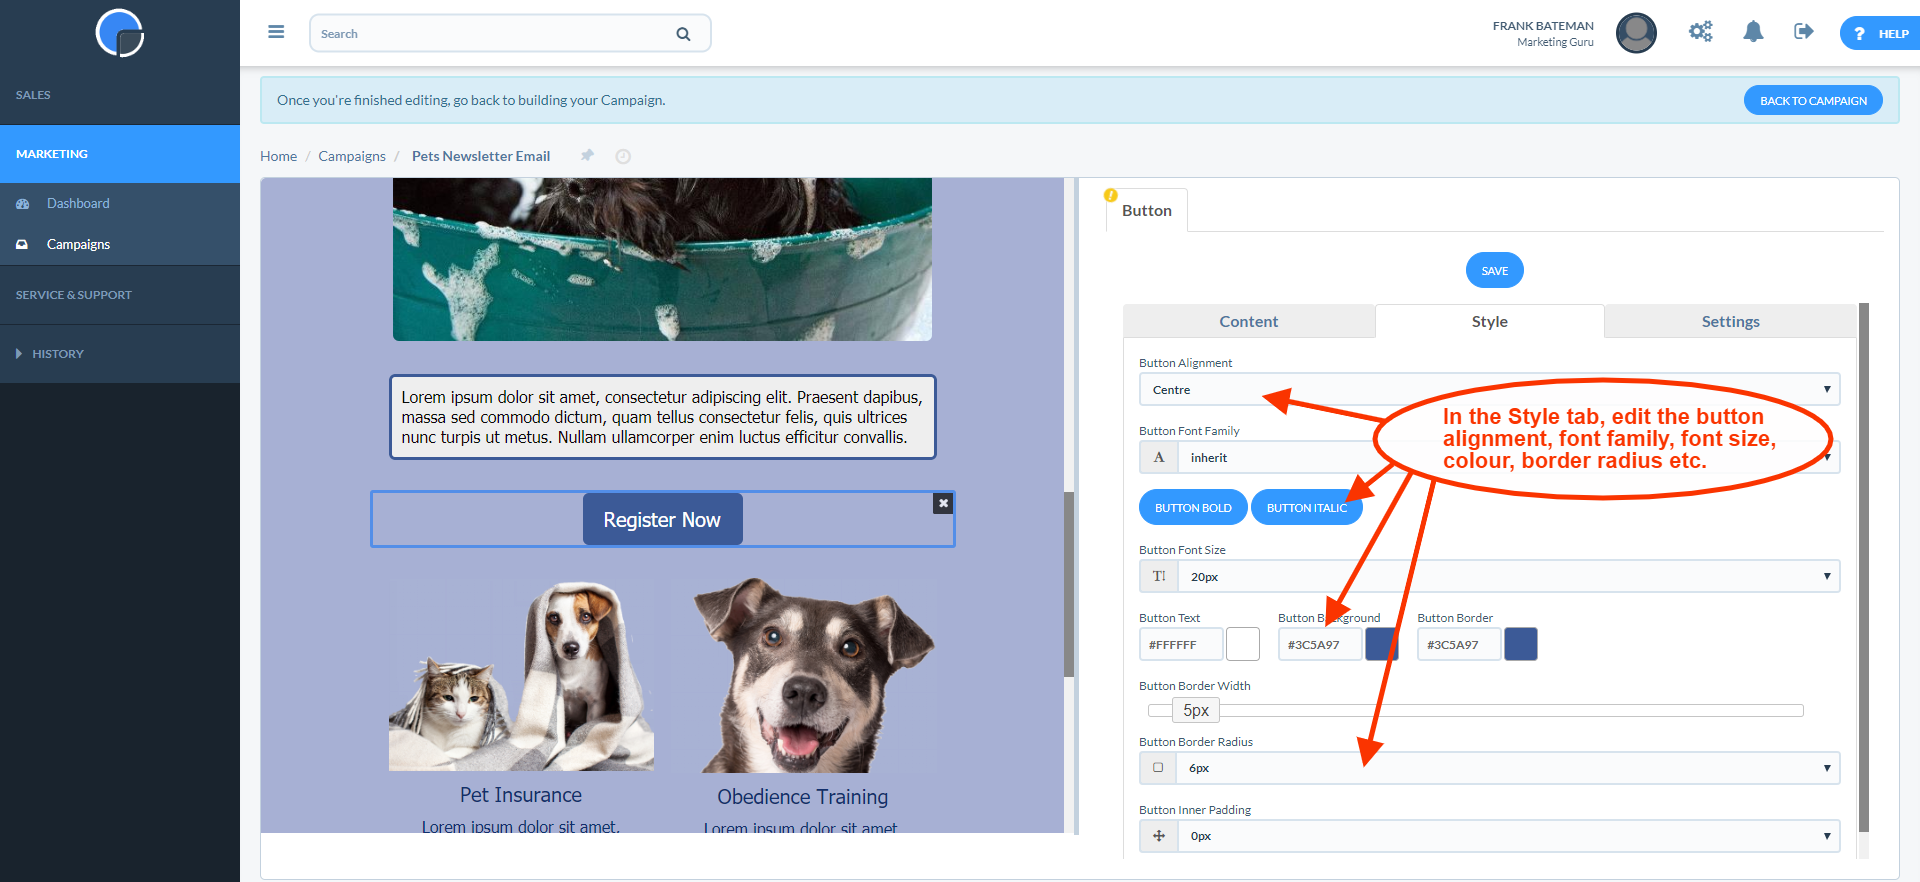
Button Style
In the Button Style tab you can edit the button alignment, colour, font, size, padding and corner radius.
Button Settings
In Button Settings, you can select to expand the button to the full width of the page and collapse the edges. Then save your changes.

Add a Video
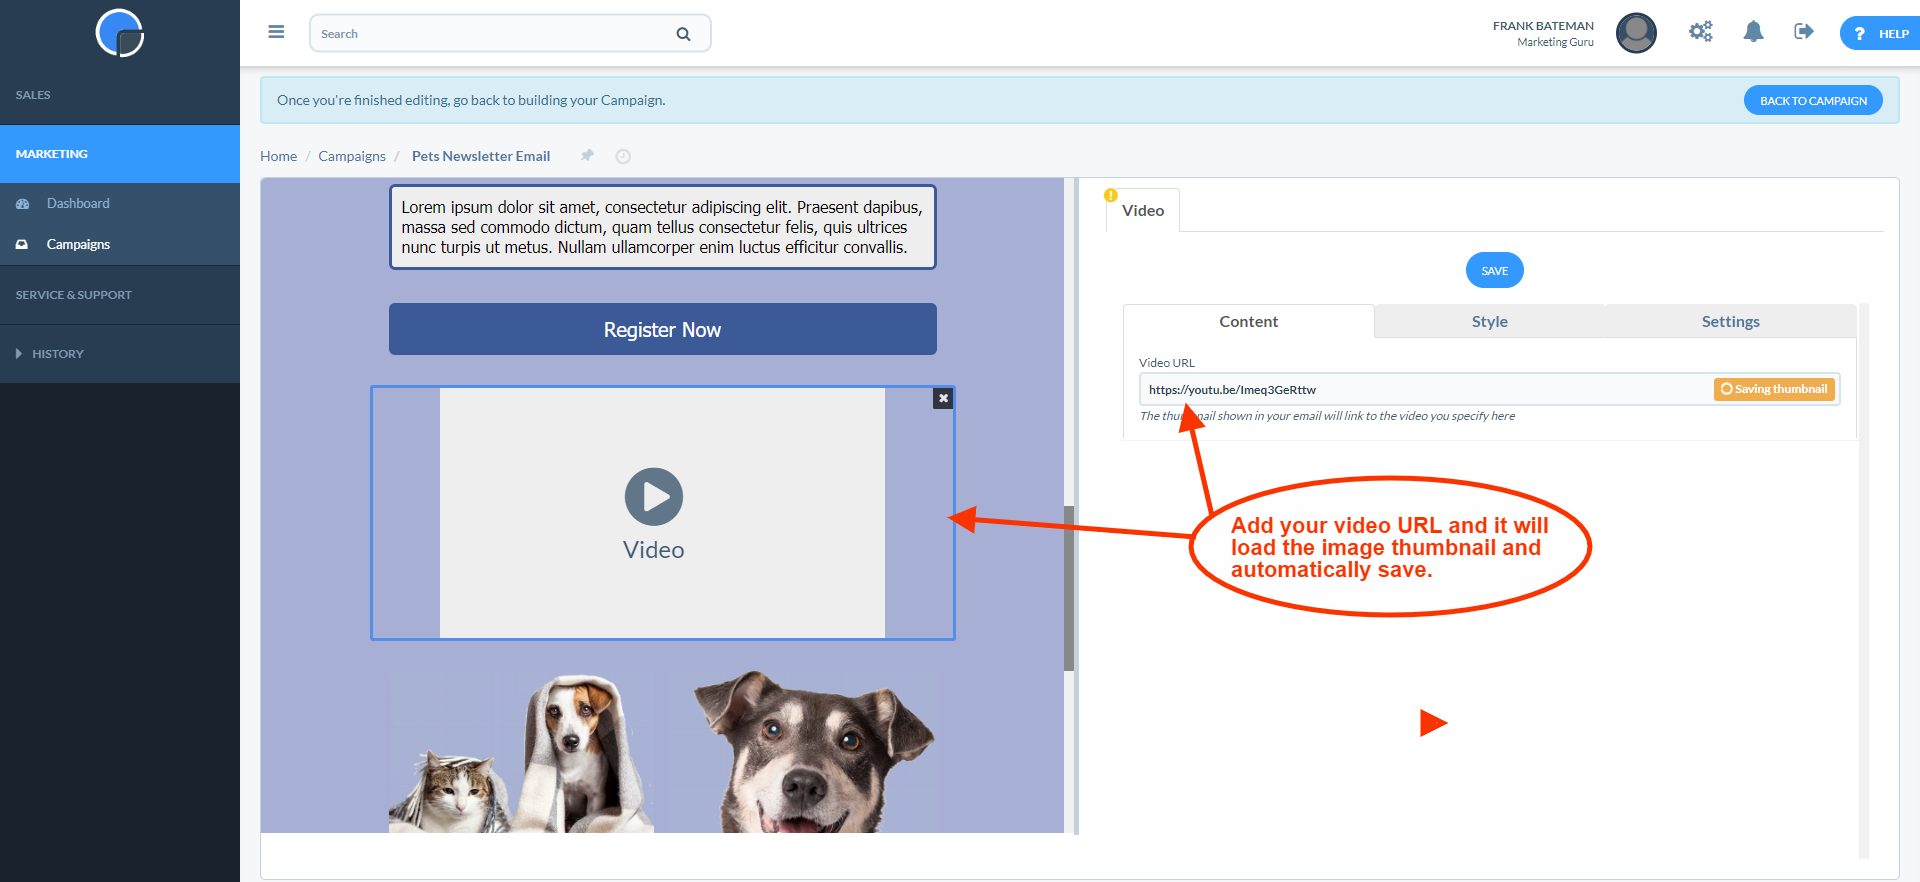
Video Content
With a video section selected, in the Content tab, add the URL for your video. This will automatically add in your video and the thumbnail image. You can add video that has been uploaded to YouTube and Vimeo.
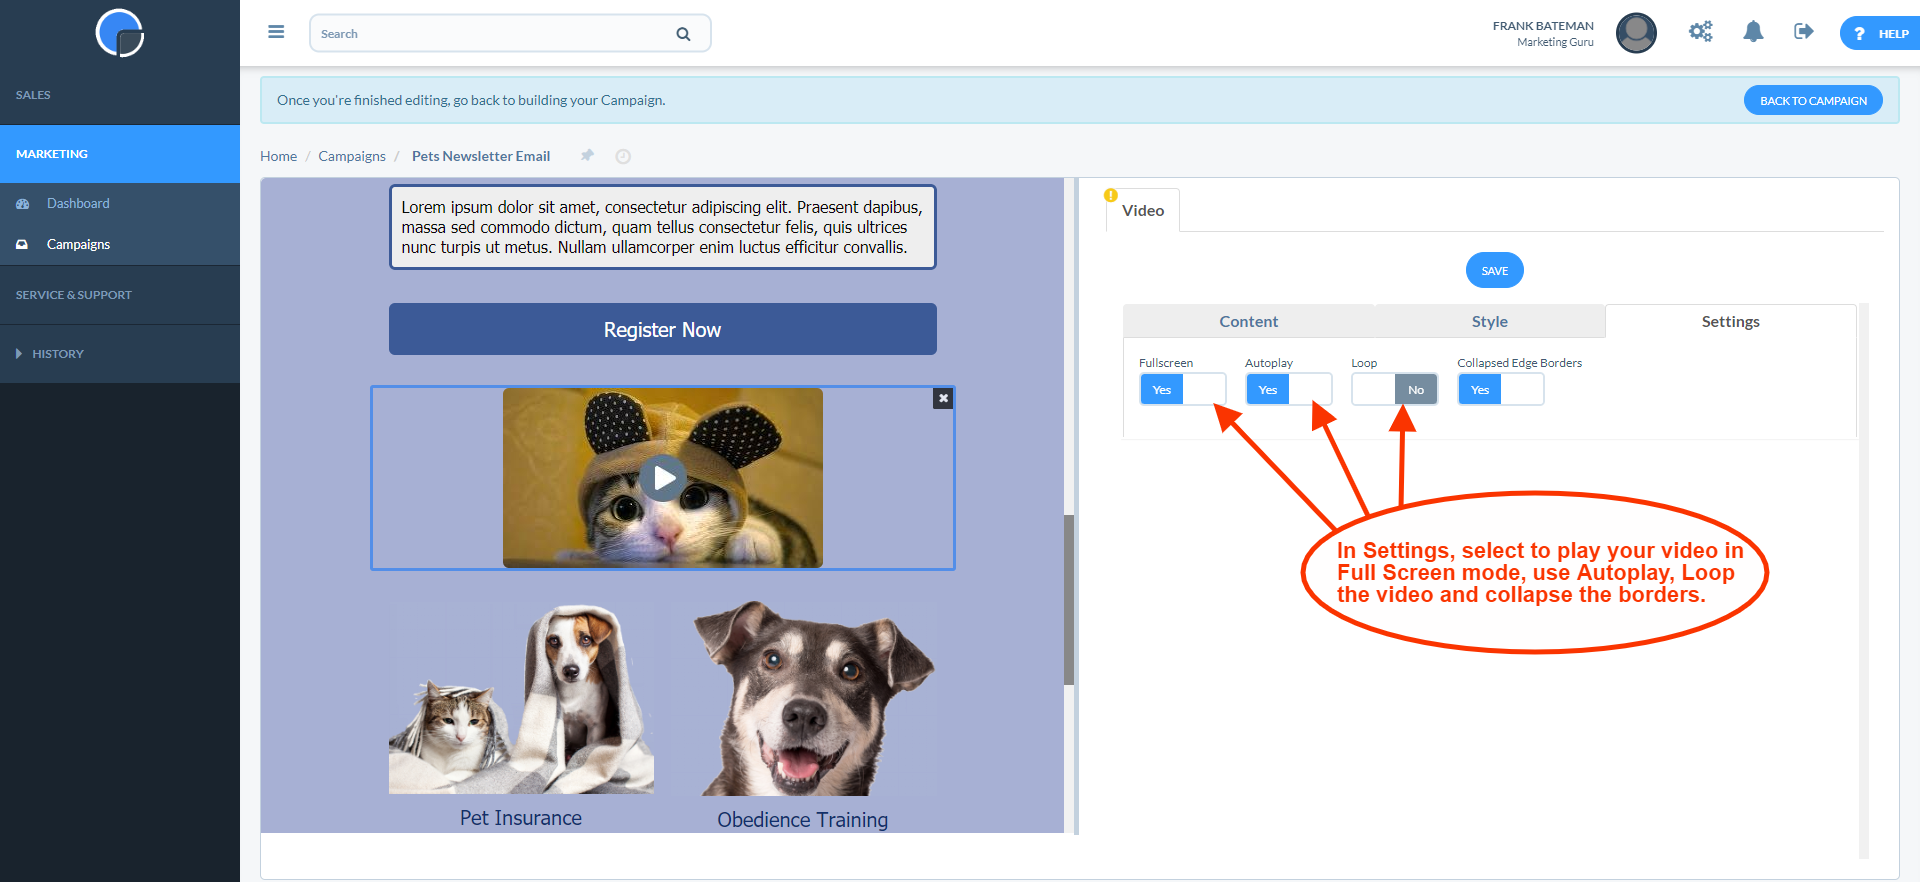
Video Settings
In the Video Settings tab, click to select the options to play your video in Full Screen mode, launch with Autoplay, Loop and to collapse the borders.
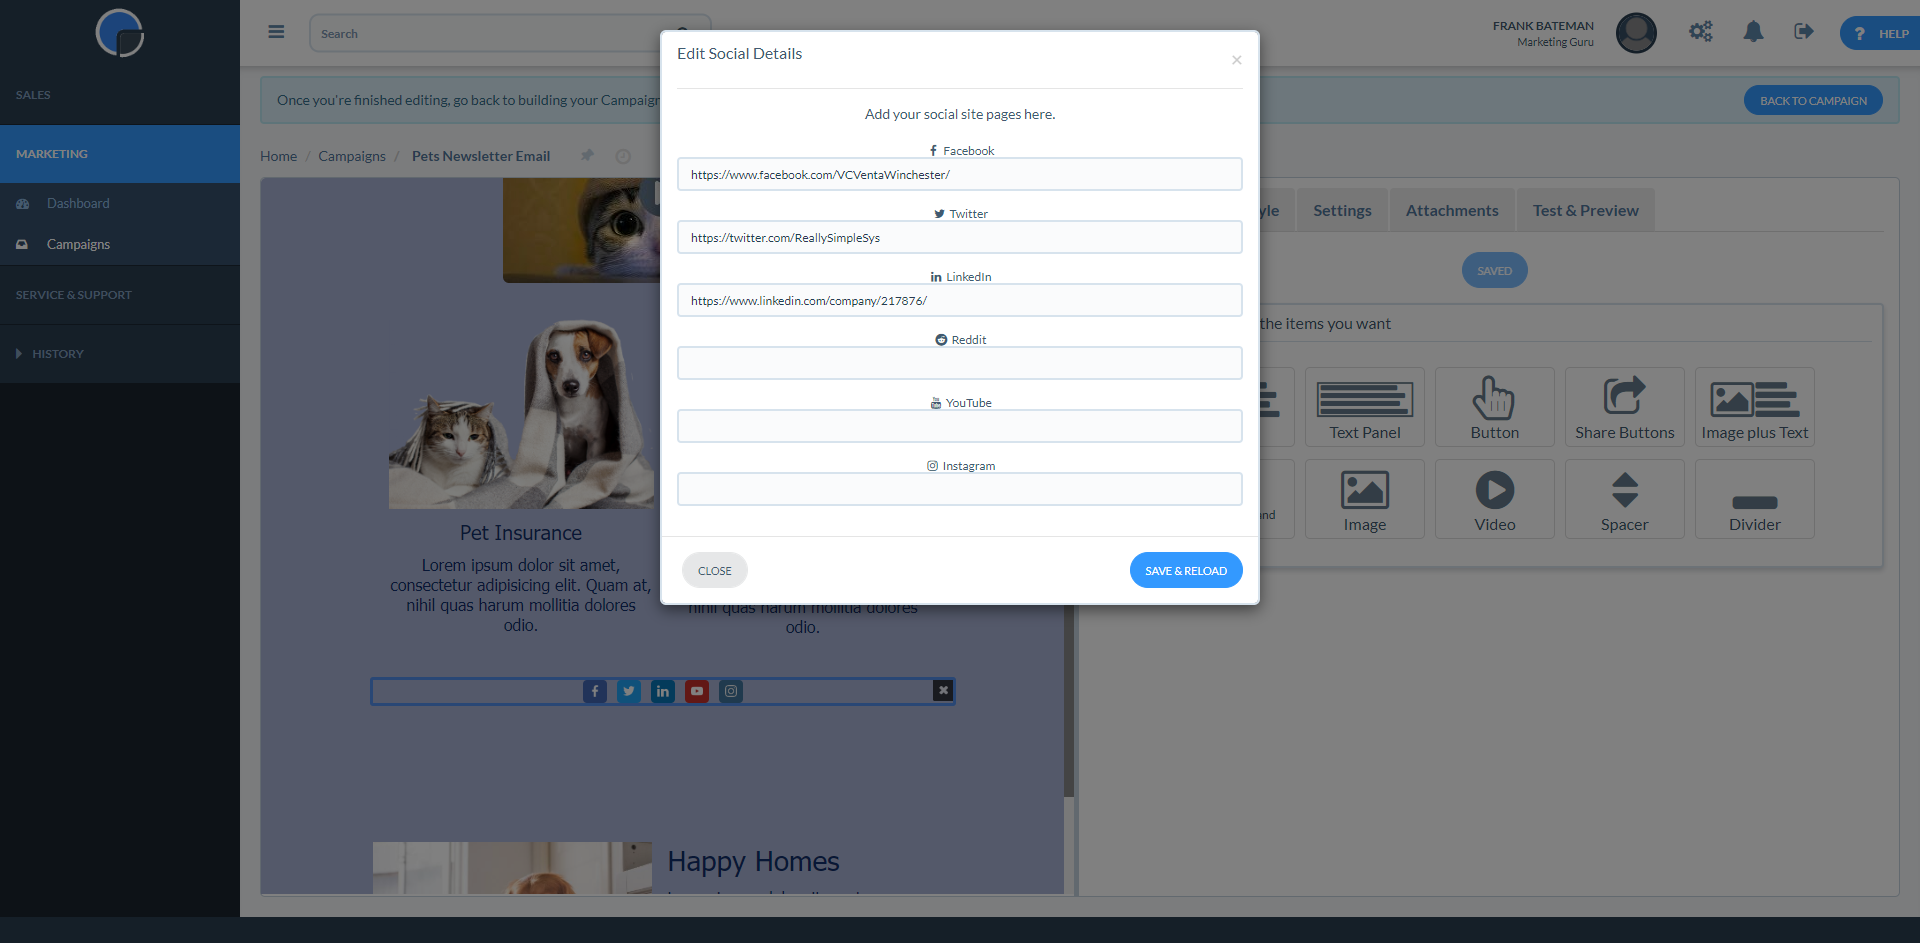
Social Media
With the Social Media section selected, you can set up your social pages by clicking the checkboxes to display the icons of those you wish to use. Once added, these will be available for all future campaigns.
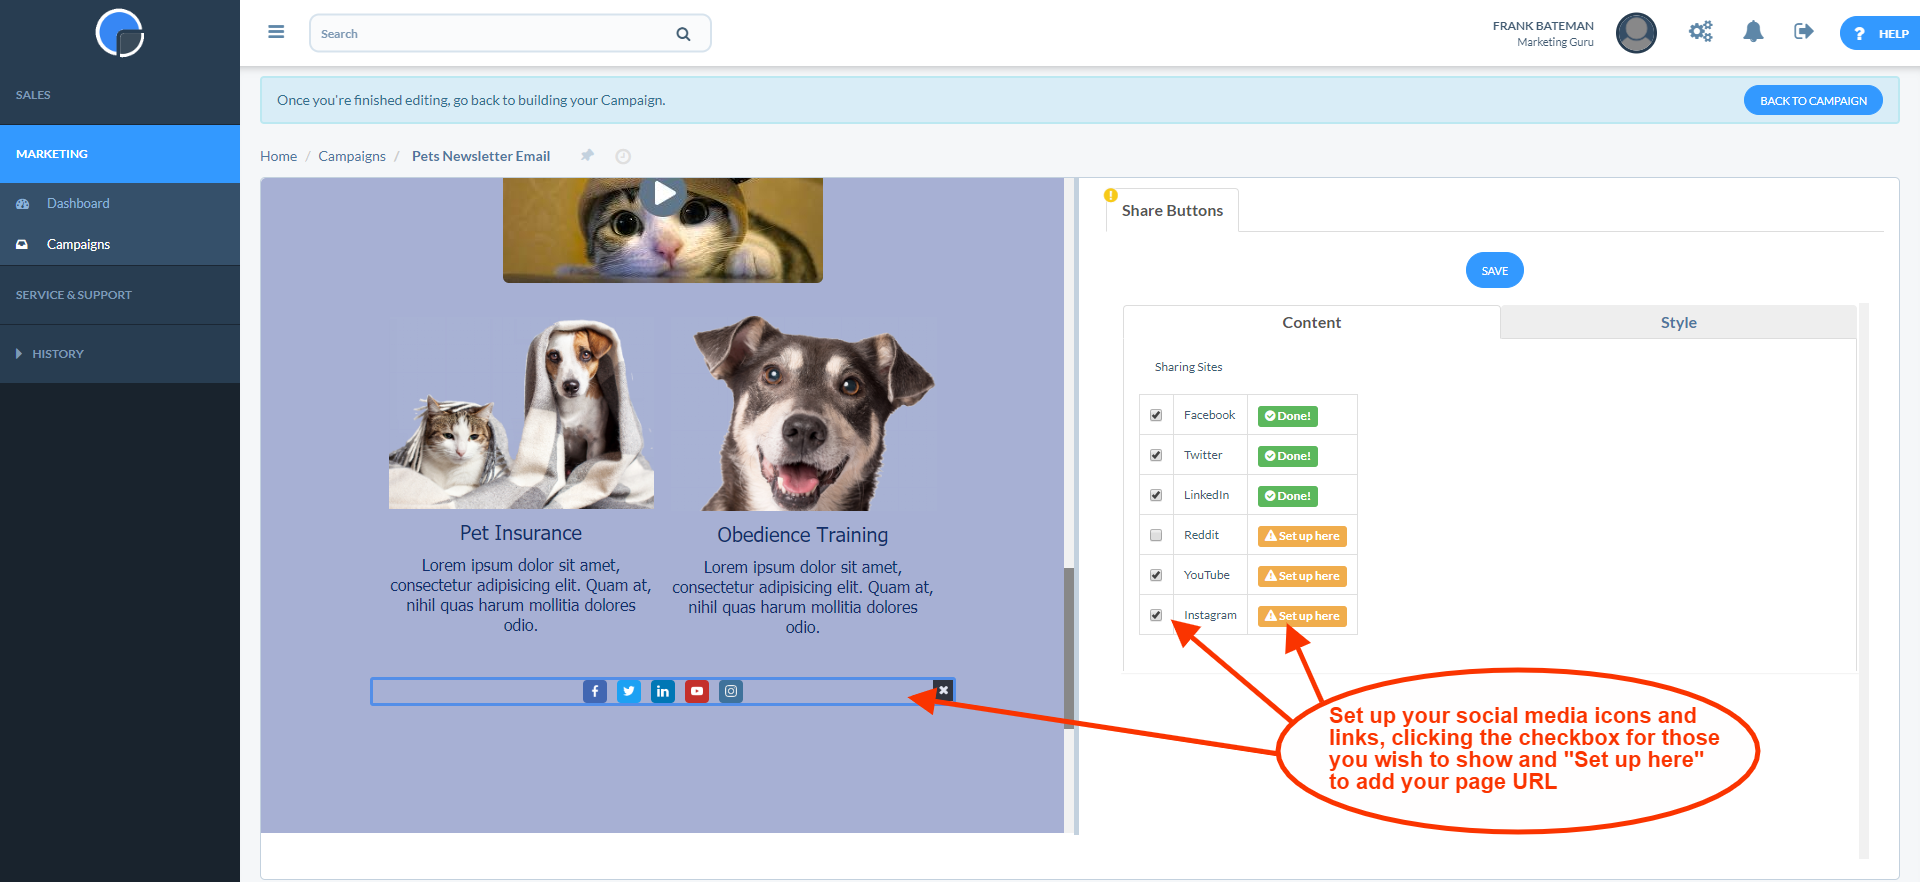
Clicking “Set up here” will take you to a page where you can add your social URLs and these will be saved for future mailings.
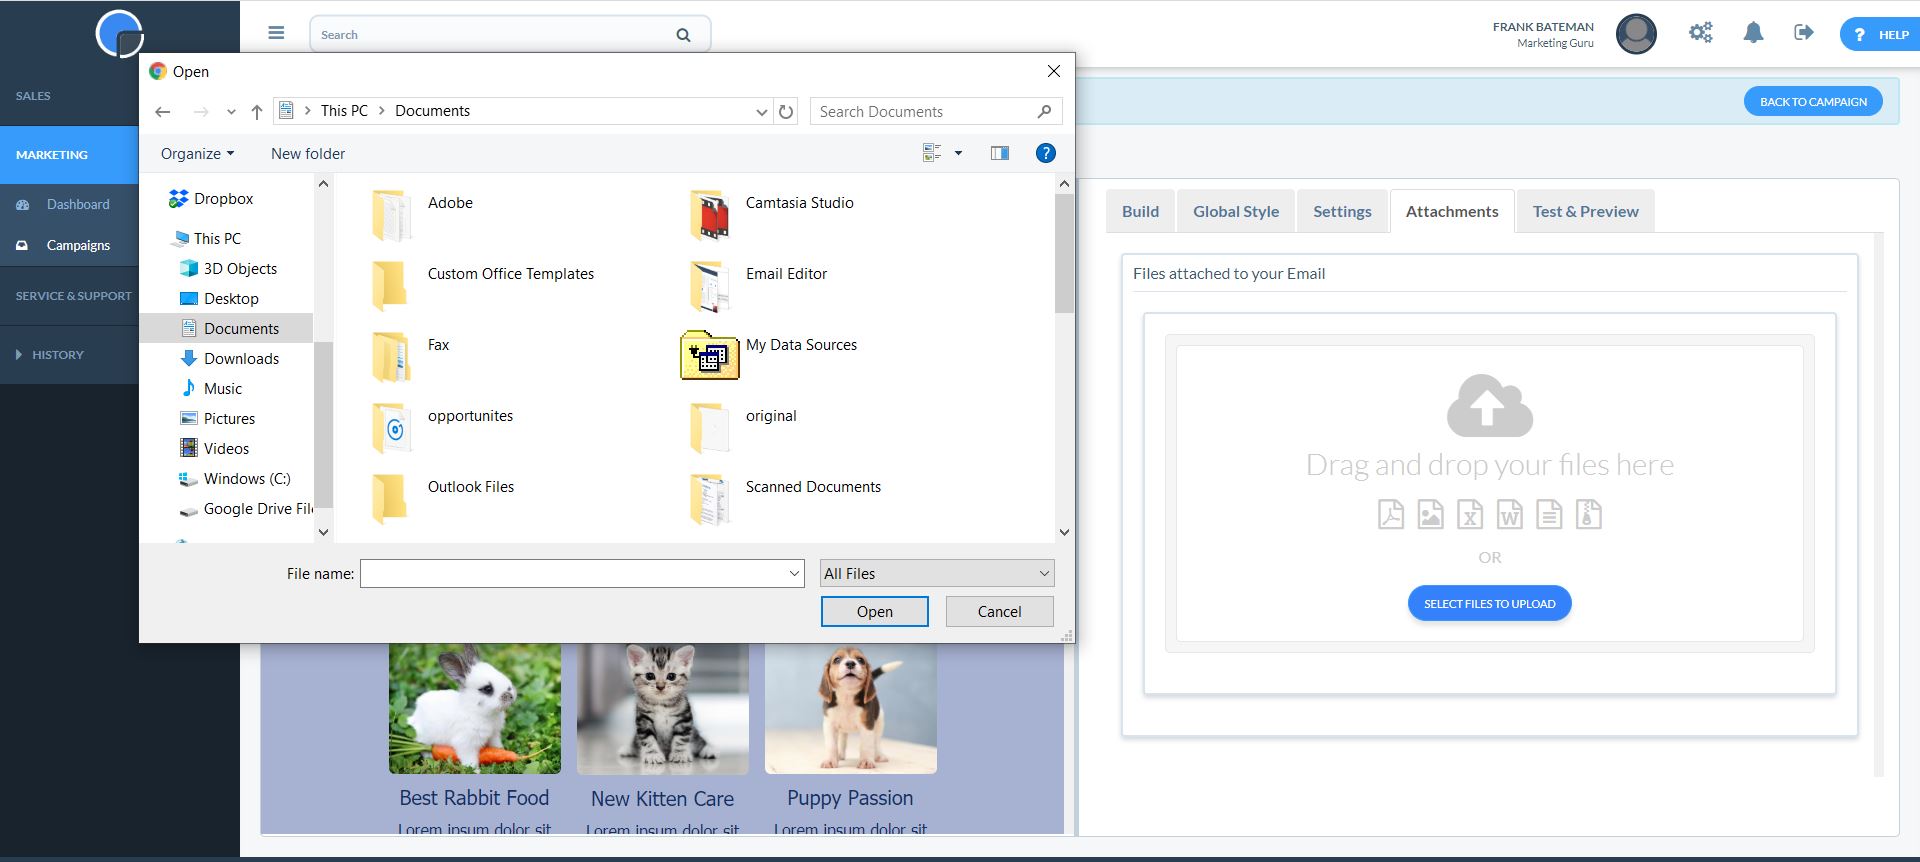
Attachments
Your Really Simple Systems Marketing tool allows you to add attachments to your emails. Maybe you’d like to add a PDF report, white paper or an image with your mailing – formats that are supported include zip files, Word docs, Excel spreadsheets, JPGs and PDFs.
In the Attachment tab, simply click “Select files to upload” and this will open your computer files to select from.
When you send the email your attachment will appear in the attachment window as normal.
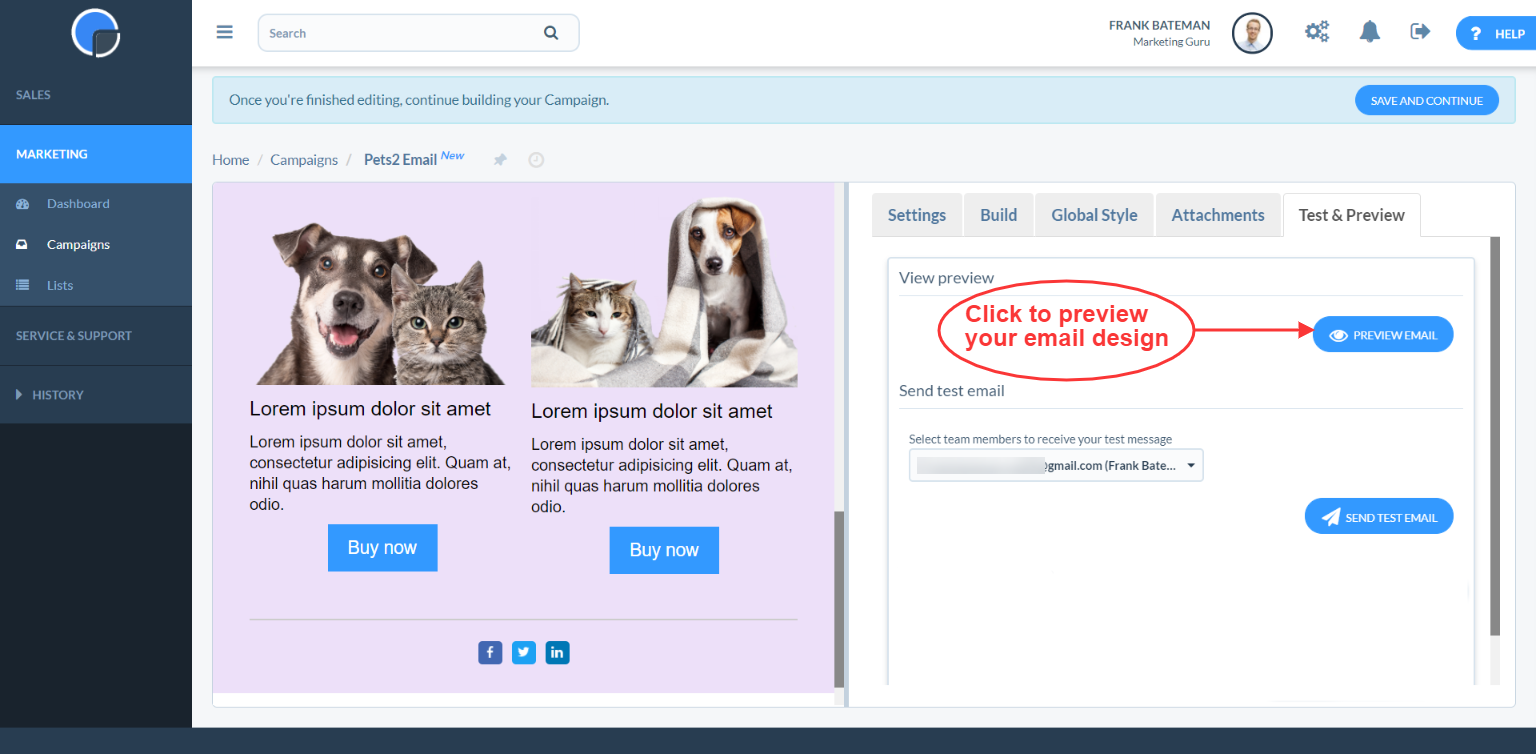
Test & Preview
In the Test & Preview tab you can check how your email will look, and send test messages to yourself and your colleagues.
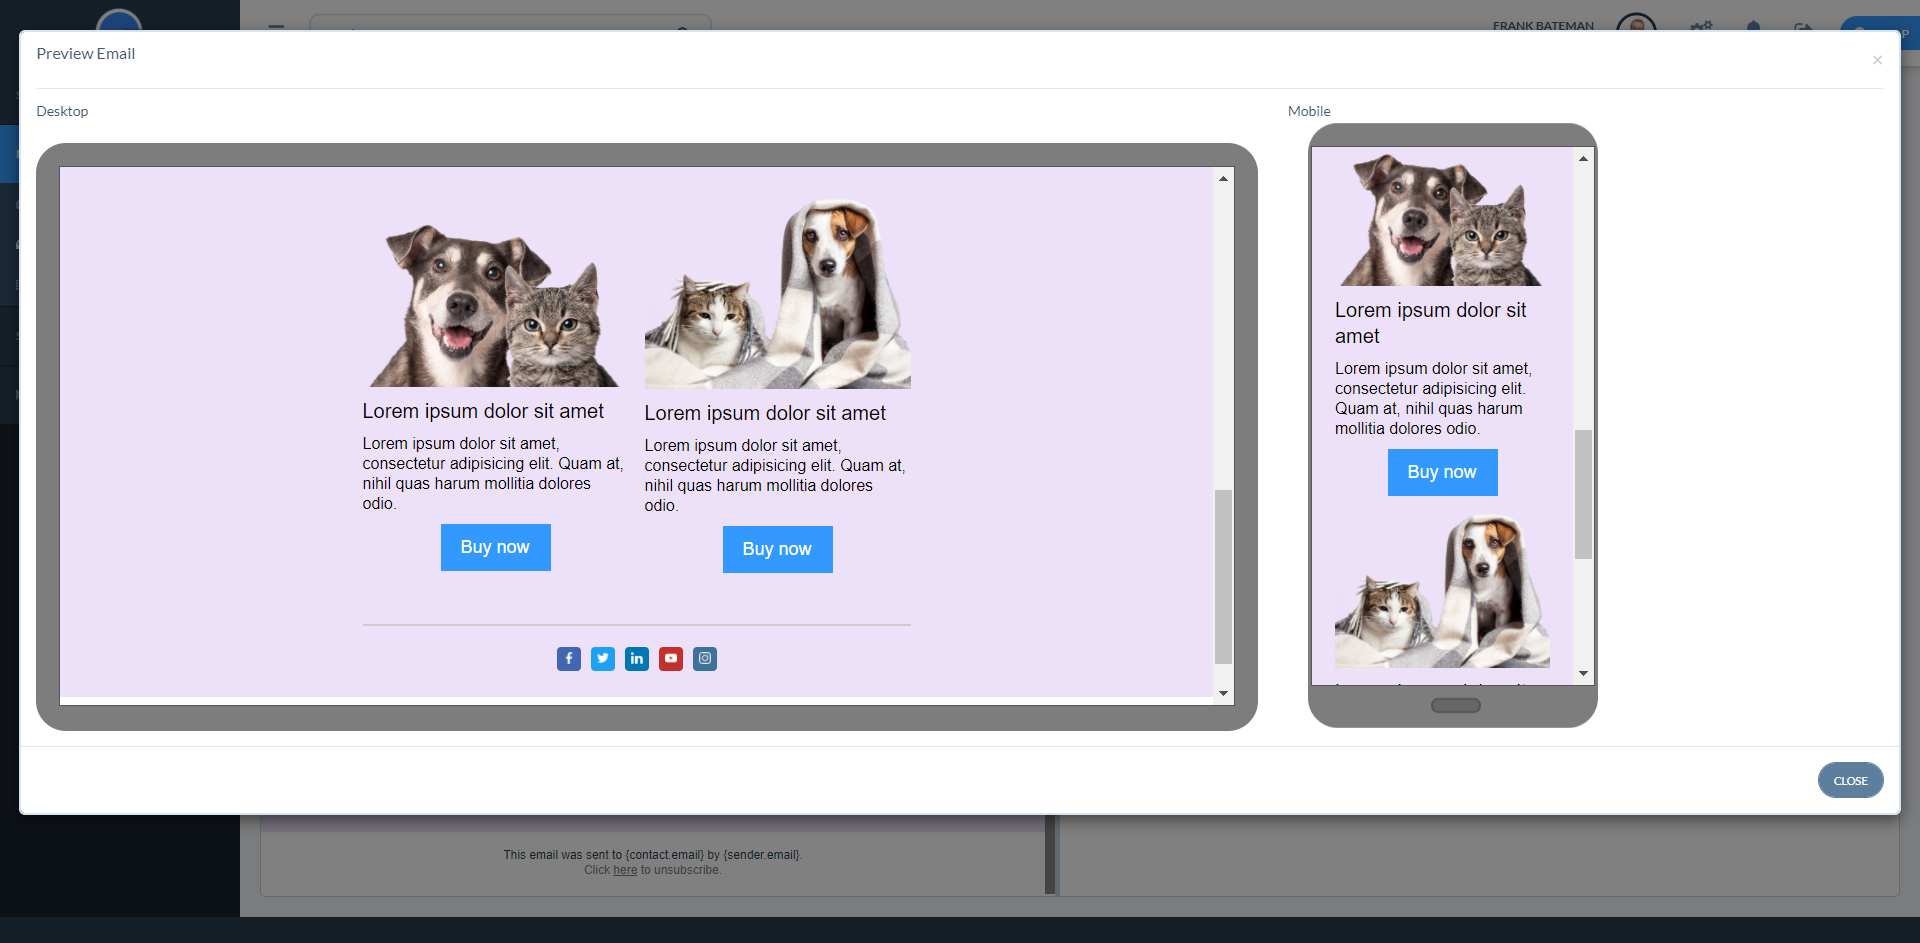
To preview, click the Preview Email button.
This will display a preview of your email for both a desktop format and for a smartphone.
To test your email, using the dropdown list of email addresses, select who you wish to send the test message to. You can send to yourself and to any of your colleagues.

Once you have finished, return to the Campaign by clicking the “Back to Campaign” button, or returning to the Campaigns Summary Grid from the main menu.