About Web Forms
The Web Forms feature lets you capture new leads online and add them automatically to your CRM.
You can design a Web Form in the CRM and add the code to your web site. Contacts entering their details to the Web Form will be automatically added to your CRM.
Web Forms work by automatically setting up a Web Transaction that will create a new Company Account, Contact and Actvity when the form is submitted online. Each Web Transaction can include multiple actions to process the data of your new inquiry. So, as well as creating an Account you can edit the Web Transaction to trigger a Task, or a new Opportunity.
Web Forms is included in the Advanced Marketing tool.

Create a Web Form
To create a Web Form, in your CRM go to Settings, then Integrations and open Forms. At first the page will be blank, so click ‘+ Add’ to create a new form.

Clicking ‘+ Add’ will open a new form with a standard form template that you can use or edit as you wish.

Form Settings
On the Settings tab you can set the general settings for your form. This includes entries for your form name and the form owner.
You have the option to Create an Activity in the CRM Account record when a contact completes the form, by setting the toggle button to “Yes”.
In the “Thank You Page” box you can add your own thank you message or add a URL for a web landing page. When the contact submits the form they will be taken to your Thank You Page.
Once you have finished editing the layout click “Save Changes”.

Add Form Fields
There are various different field types that you can use in your web forms and these can be mapped to the data fields in your CRM. You can add these to your form by dragging and dropping them to the layout screen. You can remove any unwanted fields by clicking on the section and then on the “X” in the top right-hand corner.
The form field options are:
Free Text lets you add a paragraph of text to the form. You might use this to add instructions on completing the form or maybe include a link to your terms and conditions.
Submit Button adds a button to the form that when clicked submits the data to the CRM. You can edit the button wording as required.
Dropdown List lets you add fields that are controlled by dropdown lists in your CRM. For example, Sector, Account Type or Country.
Checkbox lets you add fields to your form that are shown as a checkbox on your CRM. For example, Decision Maker, Hold or a custom field you have created.
Text Input lets you add a field to the form where the data will be added to the appropriate field in the Account or Contact record of the CRM. For example, the Name, Address, Telephone Number or Email Address.
TextArea Input free format text area that can be mapped to the Notes box in an Account or Contact record.
File Upload allows your web visitors to upload files or images to the form. As an example, if you create a form for recruitment, a visitor could upload their CV and a headshot photo.
Divider gives you the option to add dividers to the form. Should you wish to create a space rather than use a divider you can do this by changing the divider colour to the same as your form background.
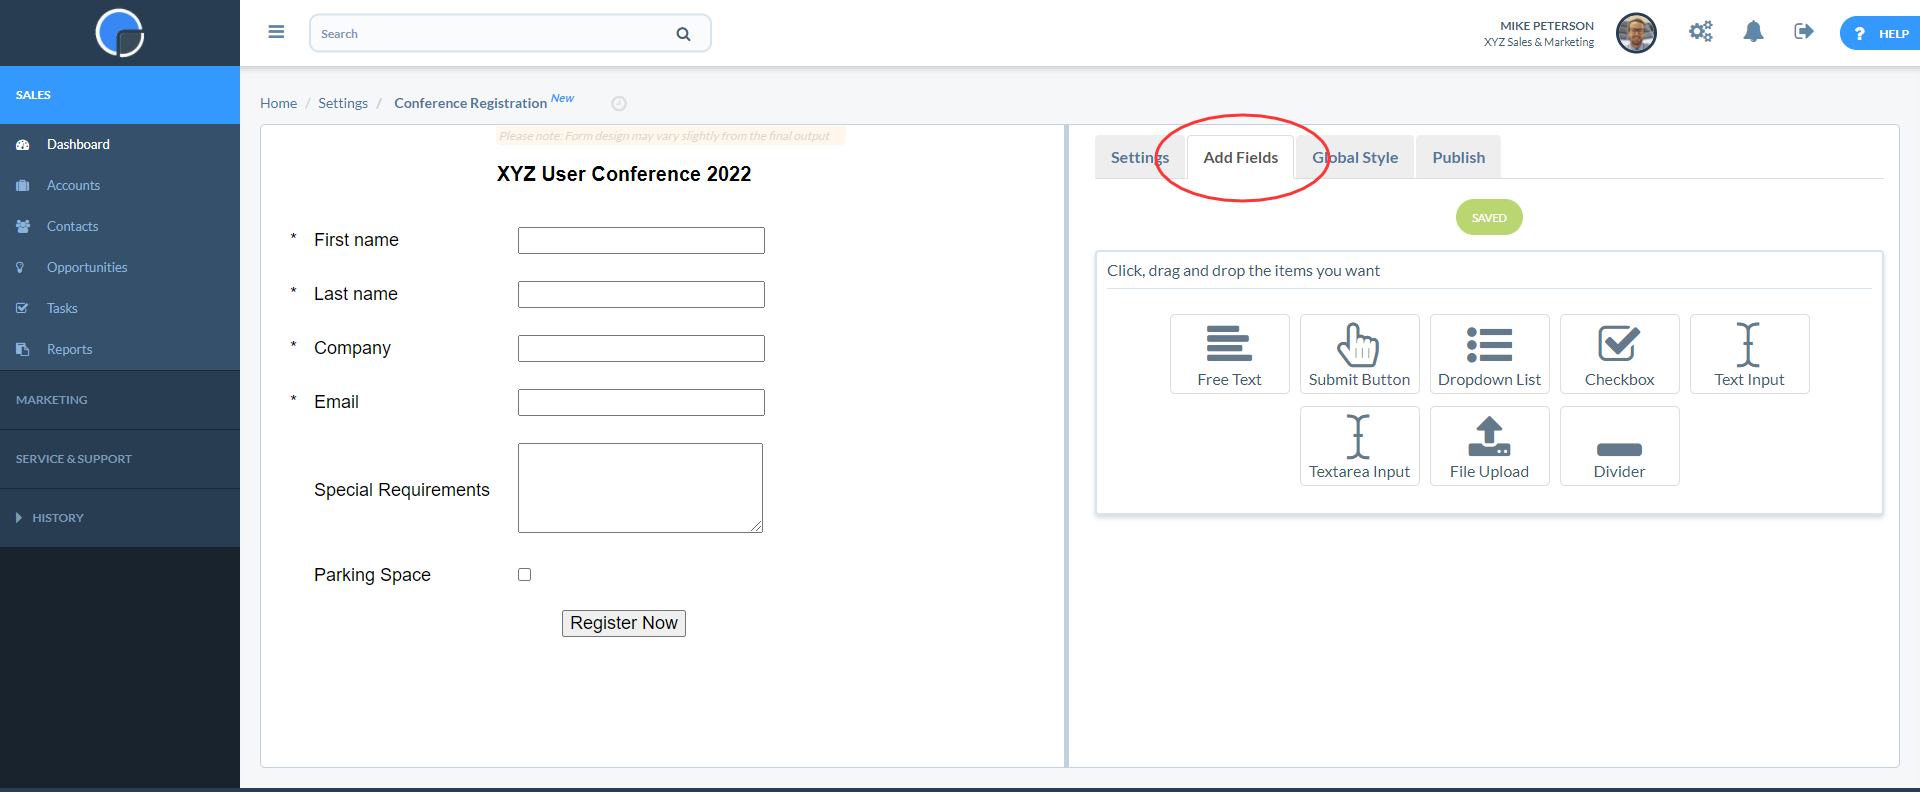
Once you have finished editing click “Edit Fields”.
Edit Form Fields
To edit a field, click on the field section on the left-hand panel and this will open the editing controls on the right. In Content, add a title for your field.
In Style, edit the font and margins.
In Settings, use the dropdown list to select the CRM field that your form field relates to. For example, Contact First Name, Contact Last Name or Email. You can also select whether the field is mandatory or not, and edit the minimum or maximum number of characters for the entry. Then save changes.

Global Style
The Global Style tab lets you set the margins, form background colour and overall form width,

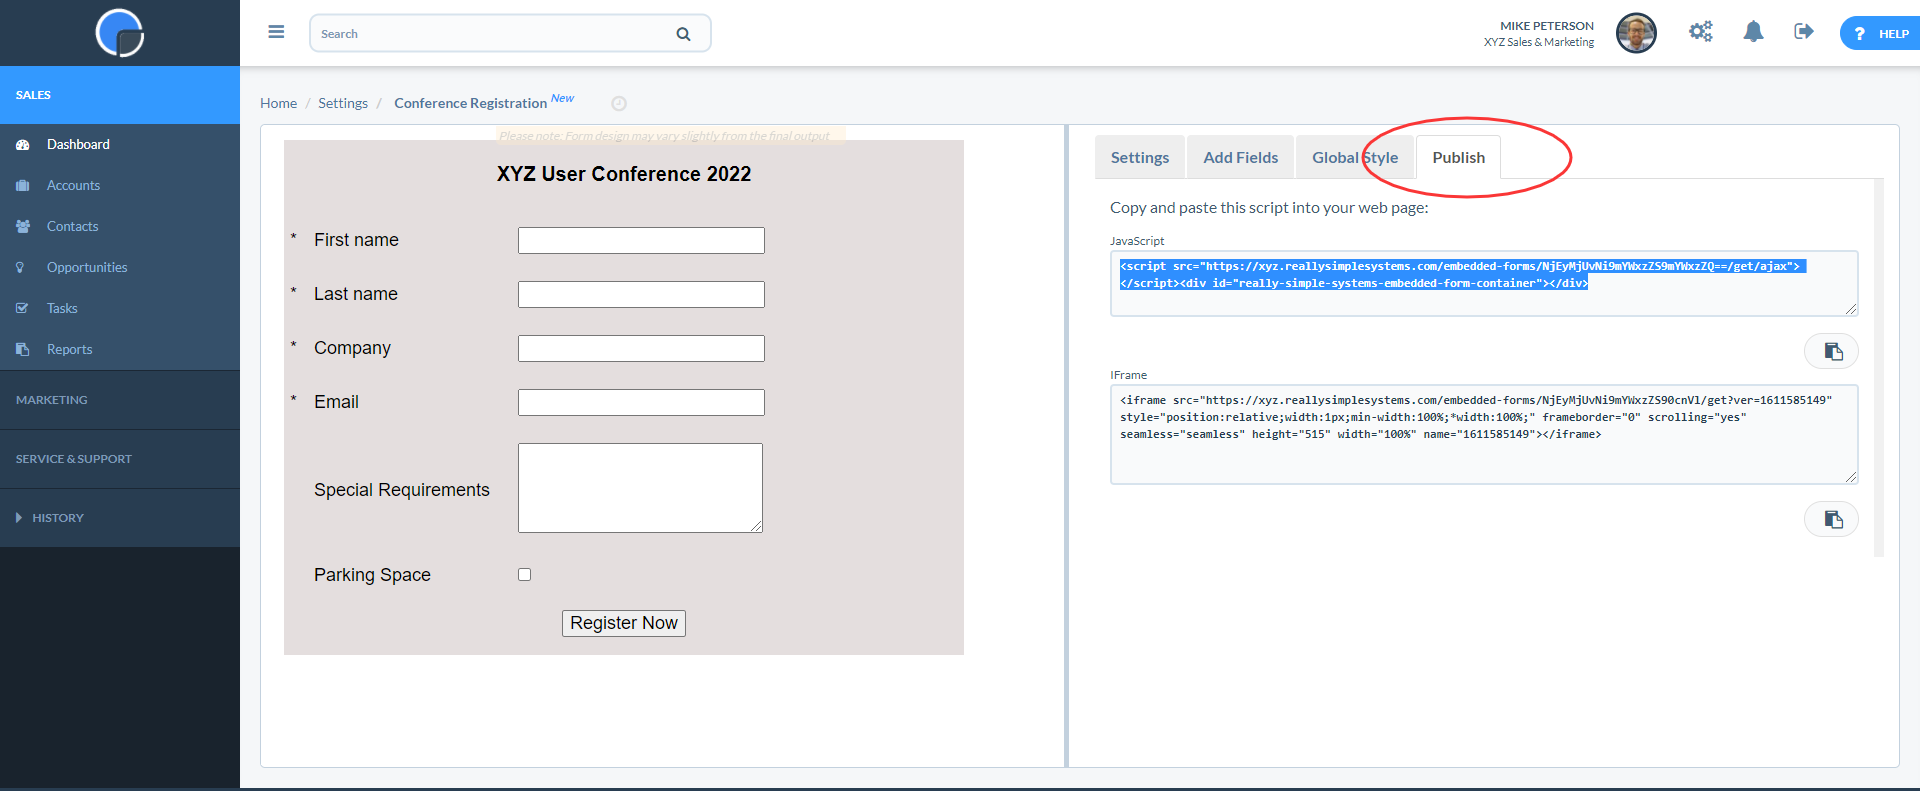
Publish
Having completed your web form design, you can publish it to your website by copying the JavaScript or IFrame code to your web page. On the Publish tab, simply copy the code and add it to the HTML code on your website. You may need the help of your web developer to do this.
N.B. The form will pick up any pre-set styling in your website. Please consult with your web developer if you want to override these settings.
When you put your web page live, you will see your web form. When your contact completes the form their details will be added to your CRM.
Going to your CRM, you will see that the new Contact has been added to your Accounts.

When you open the Account you will see that a record of the transaction has been added to Activities.
