A/B Testing
Your Really Simple Systems Advanced Marketing tool can be used to run A/B Testing to see how variations of your emails, or maybe the time sent, impact your opens and clickthroughs.
Create Your Emails
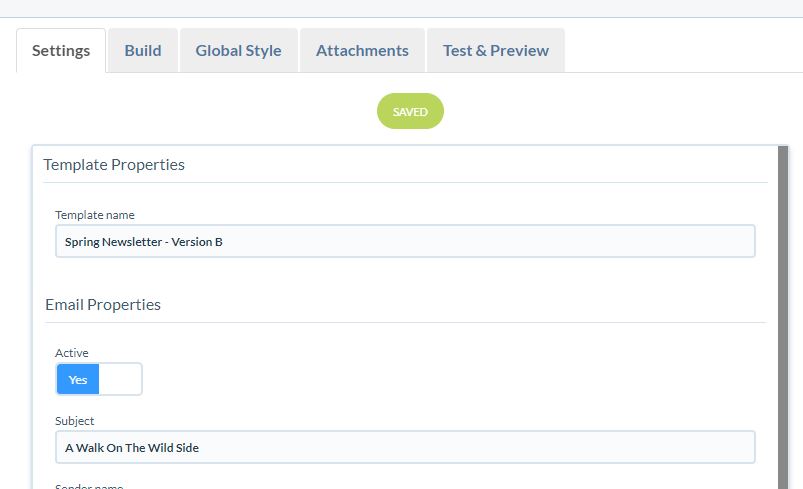
First, create and design your email as normal and on the designer Settings tab give it a distinguishable Template name, for example, Spring Newsletter – Version A.

Save your email and exit the email designer.
Then on the Email list, click the checkbox to the left of the email you have created – this will display additional functions. In the top right of the table, click the “More” button and then “Copy” to duplicate the email.

Click on the email name to open it and edit the name to create your ‘B’ version.
Once the email names have been edited, go to the email designer and edit the Version B email to how you want it. Maybe you are just changing the Sender Name or the Subject line, or maybe the email design itself.
Create a Campaign and Campaign Stages
Next, create a Campaign and a Campaign Stage for each version of the email.
In the Campaign Stage for Version A, make your contacts segmentation using the Data Filter and add them to the Stage. We’ll come back to the segmentation for Version B once this first stage has been scheduled.
Schedule Version A
Next, on the main menu, go to Send Emails, and open the Email Scheduler, then find your Campaign and “Version A” Campaign Stage from the dropdown list. The Member Status will automatically be set to “Selected”.
Below this you will see an option “Limit emails to” and this lets you select a how many of the contacts you have in the Campaign Stage that you want to mail. Ideally, for A/B testing you want to be mailing 50% of your contact selection in each version. In this example, I have 42 contacts in my Campaign Stage so I have selected to send Version A to 20 of them.

Next schedule when you want the email to send. This will change the Status to “Waiting” or “Queued” if the time is immediate.
Segmentation for Version B
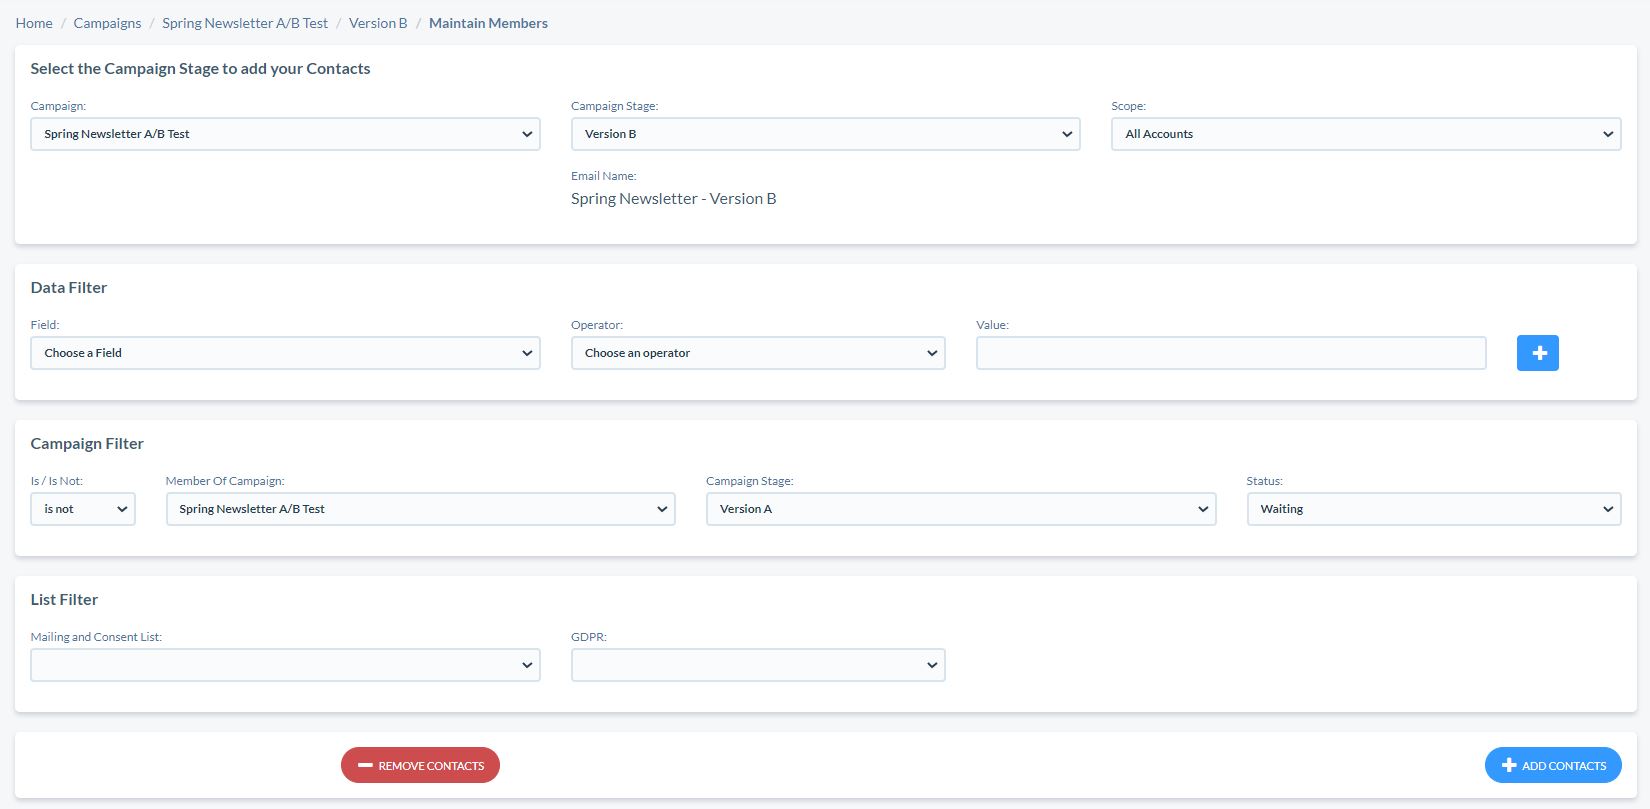
Back in your Campaign, open the Campaign Stage for Version B and click to Add Members.
This time, rather than creating the segmentation using the Data Filter, go to the Campaign Filter instead. This lets you select the group not already scheduled to send in Version A.
Here set the first box to ‘Is Not’ and find the Campaign and Campaign Stage, and set the Value field to “Waiting”. This will find all the contacts already in Version A that have not already been scheduled. Click “Add Contacts”.
Schedule Version B
Back in the Email Scheduler, find your Campaign again and the Campaign Stage for Version B. You should then see the remaining number of contacts with the status of “Selected” ready for you to schedule. Schedule your email to send as required.
