New video content is being prepared for this topic and will be added shortly.
As a feature in our Advanced Marketing tool, Consent Lists allow you to collect and record consent to receive your digital marketing messages given by the contacts in your Marketing database.
The feature enables compliance with international data protection legislation, including the EU’s General Data Protection Regulation (GDPR).
To view your Consent Lists, click Lists on the main menu or go to Settings, then System Settings.

The Lists summary grid displays all the Lists you have created, including your private Mailing Lists, for internal use only, and your public Consent Lists. Click ‘+Add’ to create a new List.

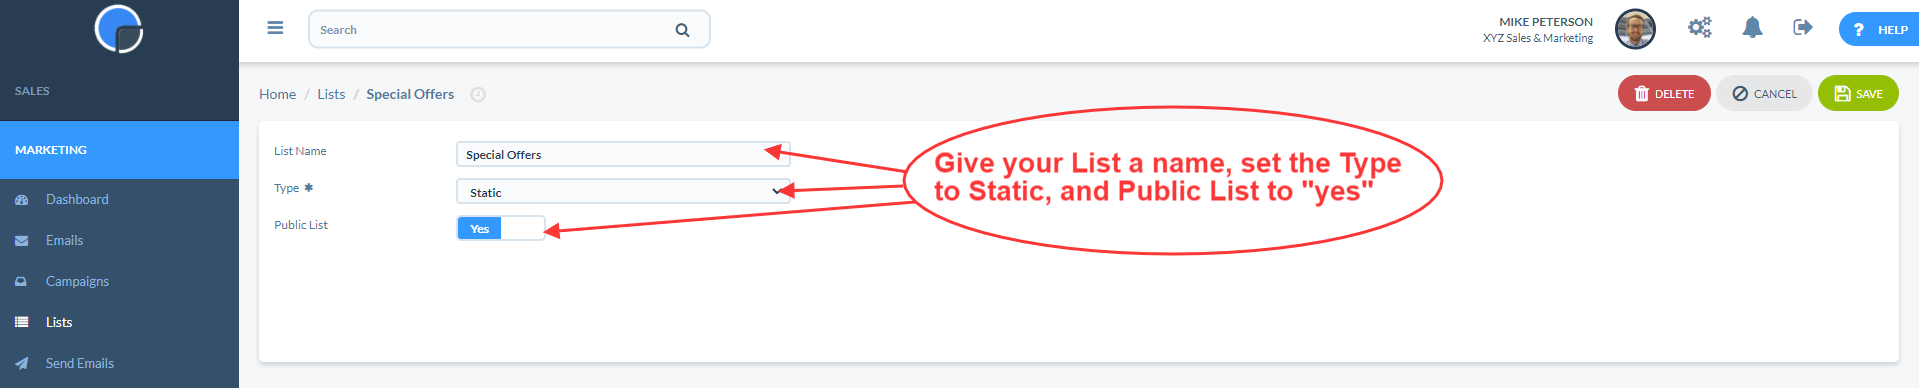
Give your list a name, e.g. ‘Newsletters’, ‘Special Offers’, set the List Type to Static, and use the toggle button to set the list to ‘public’. If set to public, the list name will show as an option on the Mailing Preferences page that your contacts can access from your mailings.
You can add contacts to the list(s) automatically using Web Forms and Web Transactions or you can add them manually from the Contact record in their CRM account.

Select the List that the contact has consented to, the date of consent and description of the consent, e.g. Manual, Online Registration, then save.

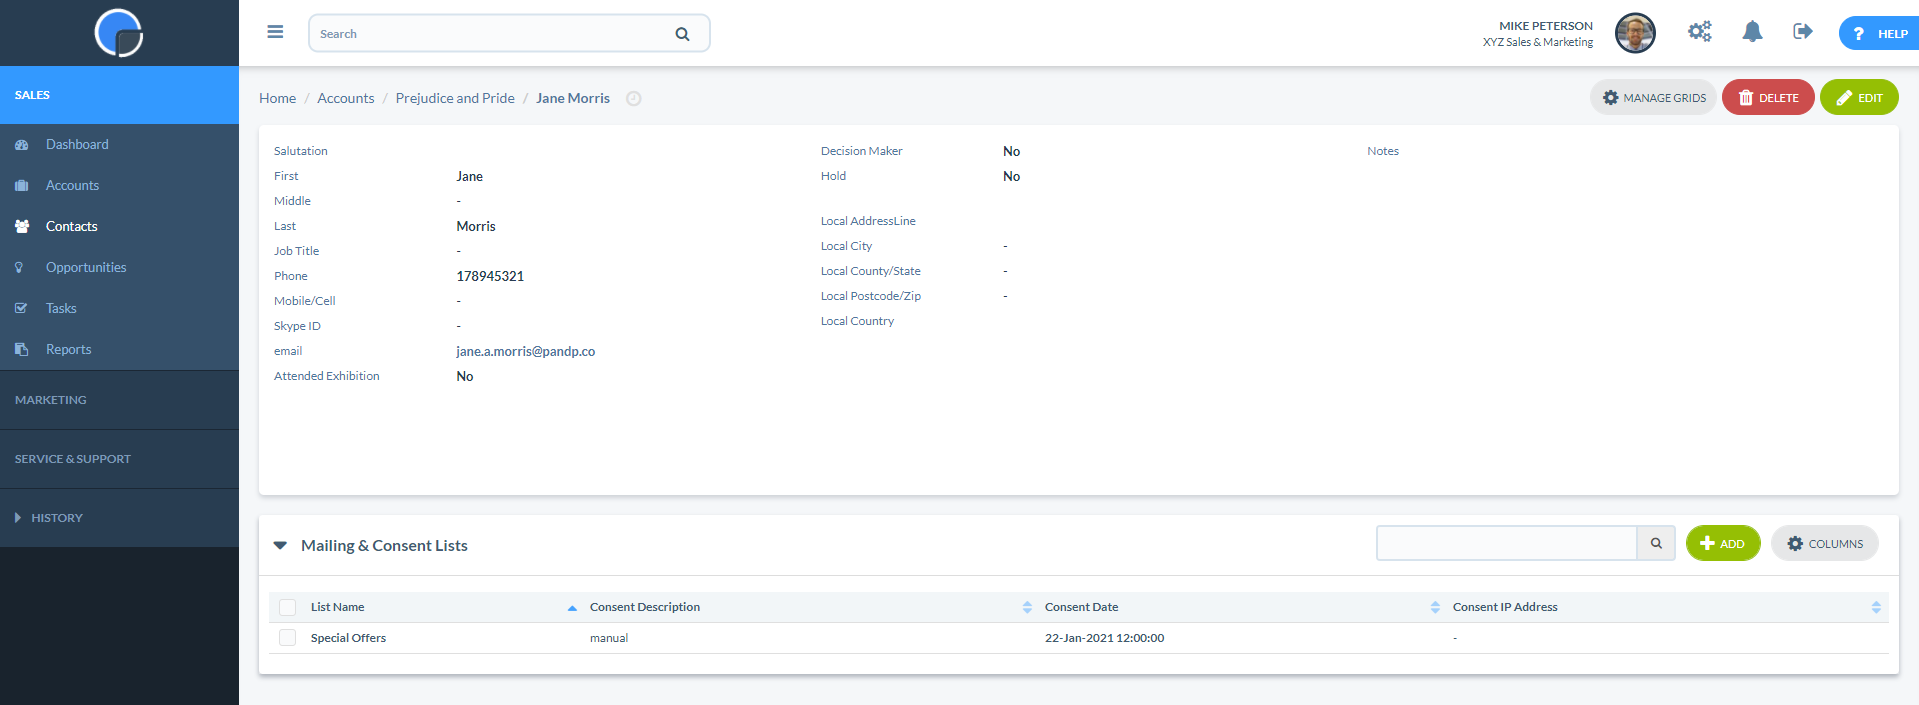
The consent record will show on the Contact record under the Mailing & Consent List section.
If consent is collected via a web form or via an opt-in link from an email it will also show the contact’s IP address on the record.

Collect Consent from your existing contacts
Your existing contacts can give their consent to receive your digital marketing messages, or unsubscribe completely, by accessing your Mailing Preferences page via an email.
A link to your Unsubscribe & Mailing Preferences page (or Unsubscribe only) is added to your email design depending upon your settings.

You can also embed a text link through to your Mailing Preferences page within your email text using the Personalisation feature. In an open text box, position your cursor where you want the link to appear and click the Personalisation button. Select {managemypreferences}.

When your contact opens the email it will display as the link below:

Clicking on the Manage My Preference or Unsubscribe links will take the recipient to your Mailing Preferences page.
 The consent record will show on the Contact record under the Mailing & Consent List section.
Collect Consents from your web site
Using the Advanced Marketing tool’s WebTransactions, you can generate leads from your web site and automatically capture them to your CRM. By adding a compliant checkbox to your registration form you can also use this feature to record consents to your marketing mailings.
To comply with GDPR, you will need to record “explicit consent” which means you cannot use a pre-ticked checkbox. It has to be an unticked box with an explanation of what will happen if you do tick the checkbox. For example:

Contact Record
The Mailing Consent data will be added to your Contact’s record. Each record on the list shows how, when and where the contact gave consent to be mailed.

Click on the Name field to view and edit the contact’s record, or on the Consent Date field to view and edit the consent record.

Mailing Preference Page
Your Mailing Preferences Page is the web page your customers access when they click to manage their mailing preferences from your email, or to unsubscribe.
You can customise the page to meet your business needs. In Settings / System Settings click on Mailing Preference Page, or click Edit Mailing Preferences in the setting tab or the email designer.
Switch the toggle button to “On” to activate Mailing Preferences, and edit the text, add your logo and your web site URL, then save.

Once your contact has given consent the record will show on the Contact record under the Mailing & Consent List section.