Automations Overview
Our CRM Automations feature lets you create automated workflows in your CRM, removing the need for laborious data input and tedious repetitive tasks, streamlining your business processes and improving productivity. You can also automate your marketing activity with automated campaigns and Lead Scoring to maximise your customer potential.
The no-code Automations use a simple graphical interface, rather than traditional computer coding, allowing you to create automated workflows for your business regardless of your technical ability.
CRM Automations are available in our Professional and Enterprise plans. In the Professional plan, you have up to 20 live Automations included, and up to 100 in the Enterprise plan. Additional Automations can also be purchased. There is one Automation included in the 14-day CRM Free Trial – should you need more to evaluate our CRM please contact us.
Please note, you will need to be a system Administrator to create Automations.
Workflow Automation Examples
Automations can be used for a wide variety of processes in your CRM, saving you time, minimising human error, reducing costs and increasing efficiency. How you use Automations will depend on your business and the processes you run.
Here we have listed a few examples of how you might use Automations to create CRM workflows:
- Automatically set a follow up Task for your sales team when a new lead is created.
- When an Opportunity is set to “Won”, automatically send an email to your finance team to raise an invoice.
- If a discount offered exceeds X%, notify the authorising manager for approval.
- Schedule an email to send every day at 9 am reminding a user of their open Cases or Tasks.
- If a Customer Support Case is set to “waiting for customer response” and there is no reply after a week, automatically send a chaser email.
- When a new Account is created, send an email to different users depending on the Account demographics.
Marketing Automation Examples
As well as automating your sales workflows, you can use Automations in your marketing to streamline your lead nurturing process. Using Automations alongside our Web Forms and Drip Campaigns, you’ll be able to capture leads directly to your CRM, send a series of emails to qualify their interest and score each lead before allocating them to your sales team. Here’s a few examples of Marketing Automation:
- Filter and score new leads according to the data recorded, for example, location, product interest, value, company size.
- Add new leads to a campaign, filtered by demographics.
- When an email link is clicked, or a webinar attended, add a value to the Lead Score.
- When a Lead Score reaches a defined target remove the account from one campaign, add them to a new campaign, and create a task to follow up.
- Use data formatting to correct the data collected, e.g. applying sentence case, date formats etc.
Creating New Automations
If you need help to set up your Automations, please contact our Customer Success team on contact@spotlercrm.com.
To create an Automation, go to Settings, Data Management and open Automations.
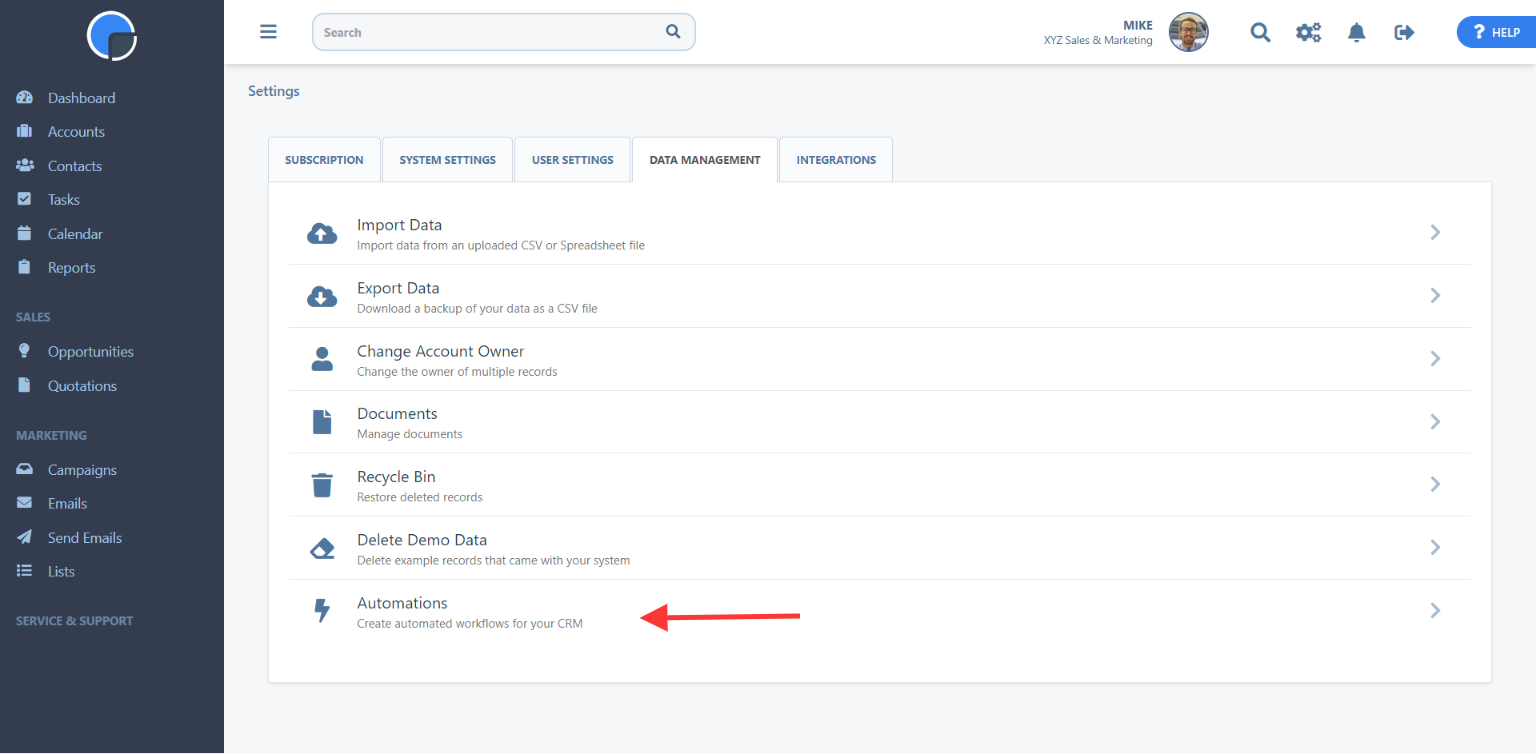
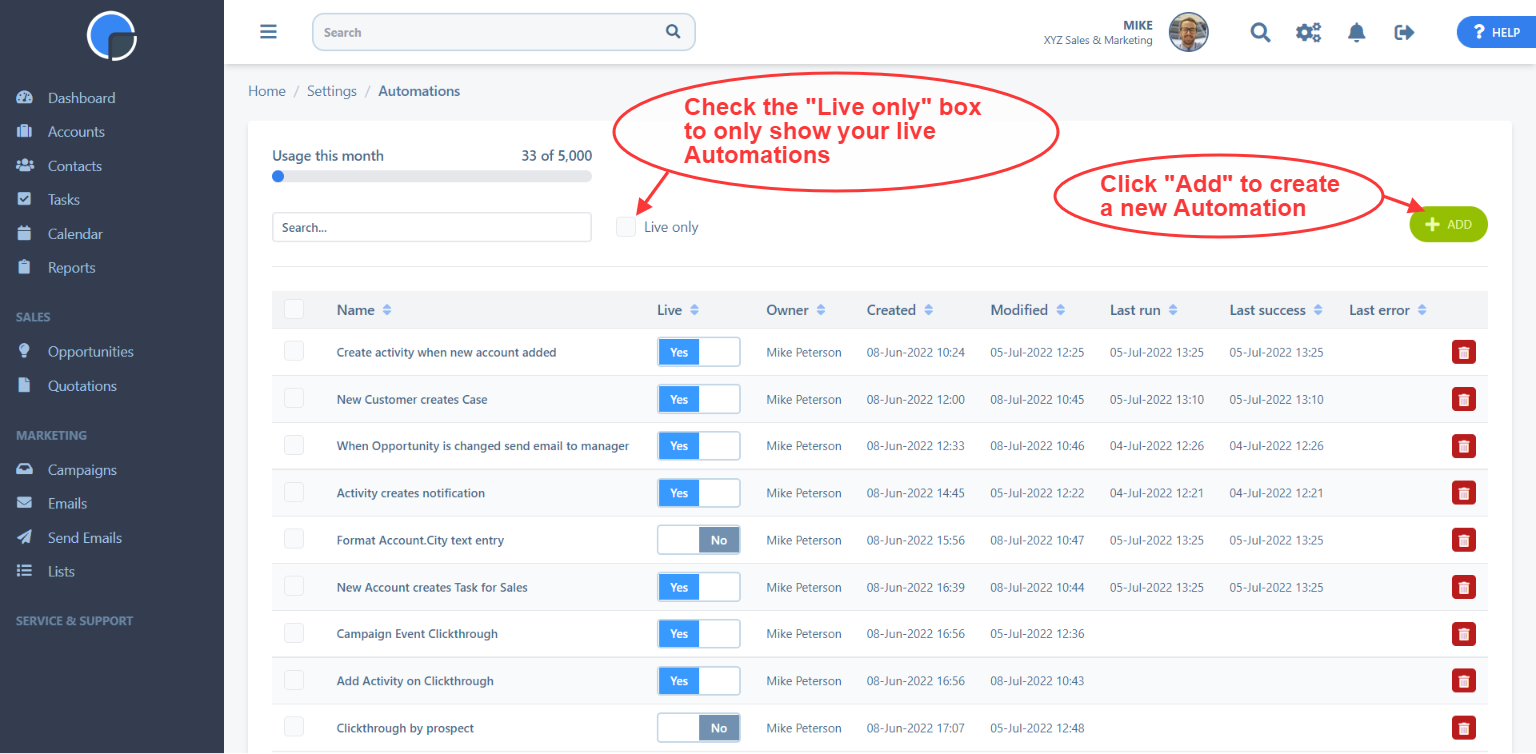
From your Automations Home screen you’ll be able to monitor your Automations usage, and view your recent activity.
Stage 1 – Add a new Automation
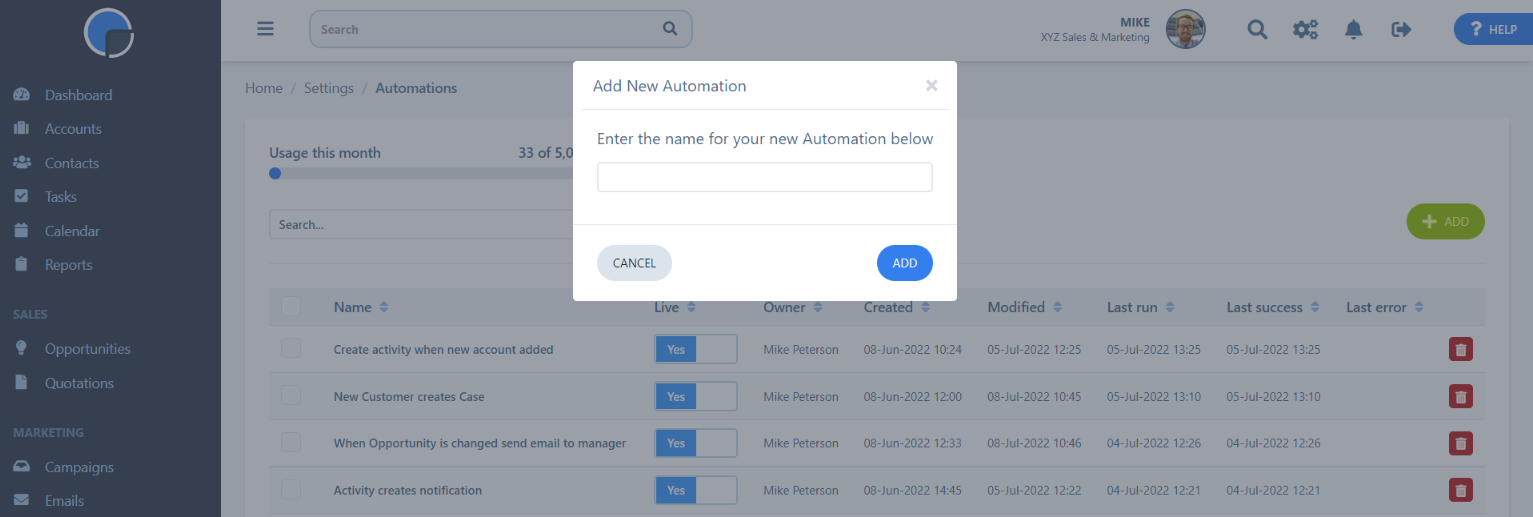
To create a new Automation click “+ ADD”
First, give your Automation a name and click “ADD”
Stage 2 – Set the Trigger
The first step of the Automation is to set the Trigger. This might be an “Event” i.e. when something changes in your CRM – maybe this is when a new Account, Contact, Opportunity, Case etc. has been created, or maybe an update to an existing record.
A Trigger can also be a scheduled date, if you want something to happen to a schedule, for example, send a reminder email at the same time each day.
A Trigger can also be a New Clickthrough, i.e. when a contact clicks through on a link in an email campaign.
Or your Trigger could be a Lead Score, i.e. when your lead reaches a specified score and you want that to be flagged.

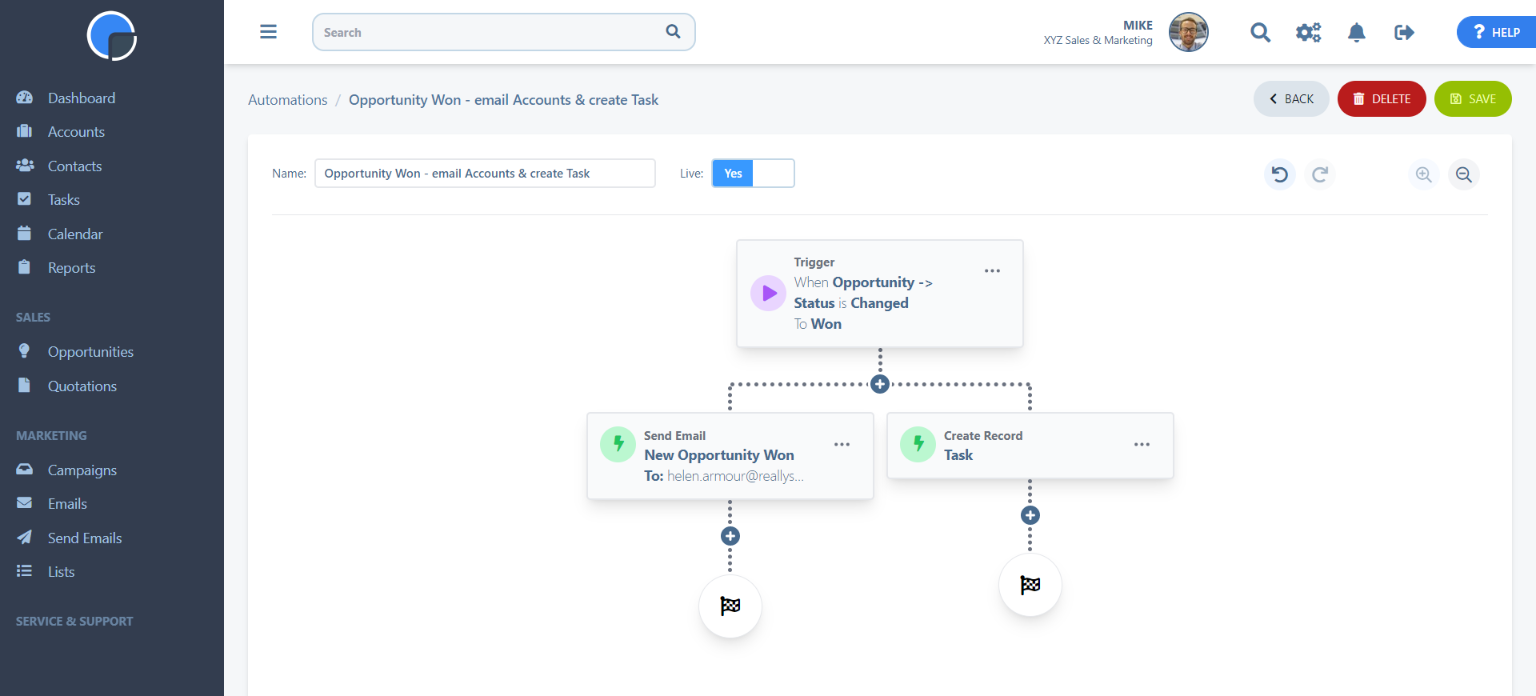
Clicking on the Triggers will open further options, if relevant, to filter your data. In this example, the Event trigger has been used and a filter set for the Automation to be activated when an Opportunity is updated and the status changed to “Won”. Click “CONFIRM” to confirm the trigger.

Stage 3 – What do you want to happen?
To add your Next Step, click the “+” icon.
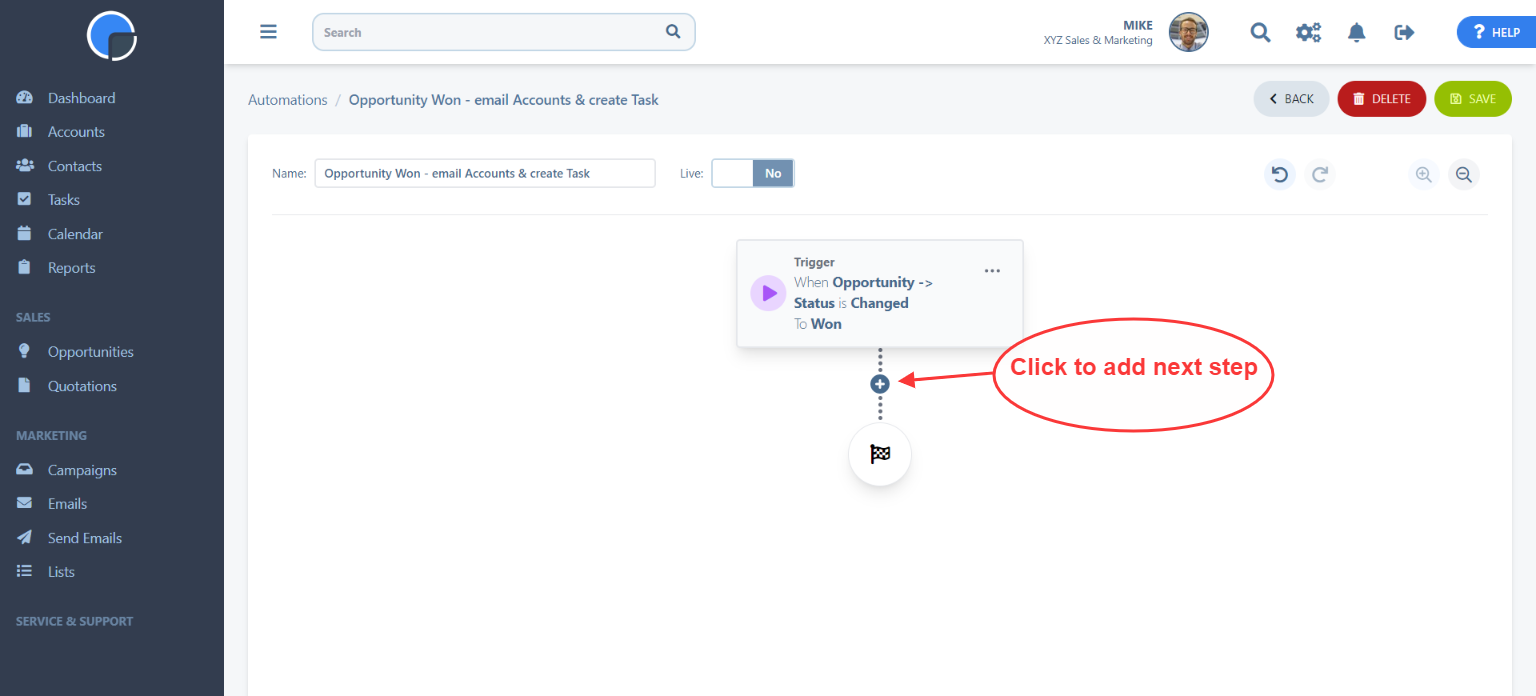
In the Next Step you can set what you want to happen with the Automation. It might be an action to be taken, for example, create a Task or send an email, or you could add further filters, searches and formatting.

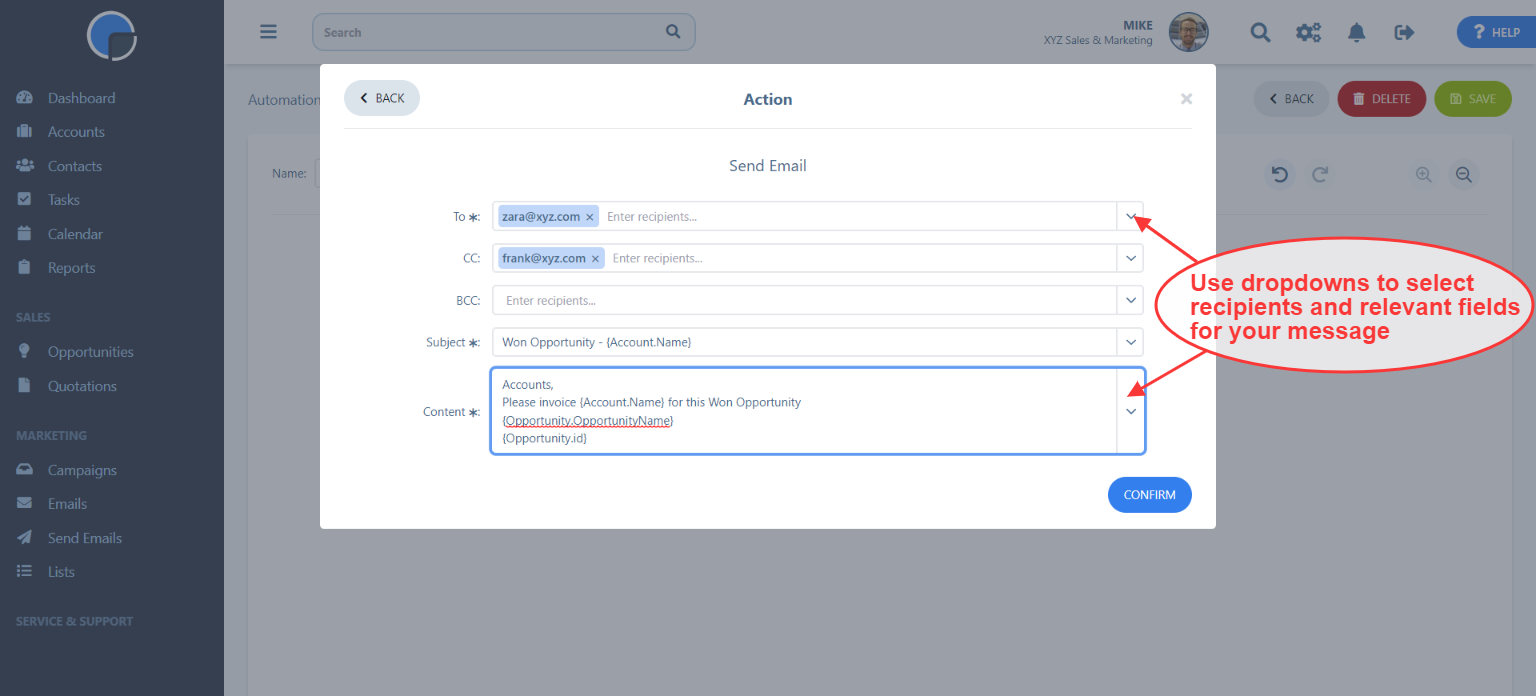
In this example, the Next Step of “Action” has been selected which offers up different options relevant to the Trigger you have set.
N.B. In this example, because the Trigger has been set for the Opportunity, the Contact option is not available to select. However, if your Automation requires data to be passed to/from the Contact record in an Account you can use Dynamic values to filter on this.

The “Send Email” option lets you set up an email to go to one or more people in your team when the trigger is activated. Here the email is set to notify the sales manager of a “Won” Opportunity and the fields are added to show the account fields as required.
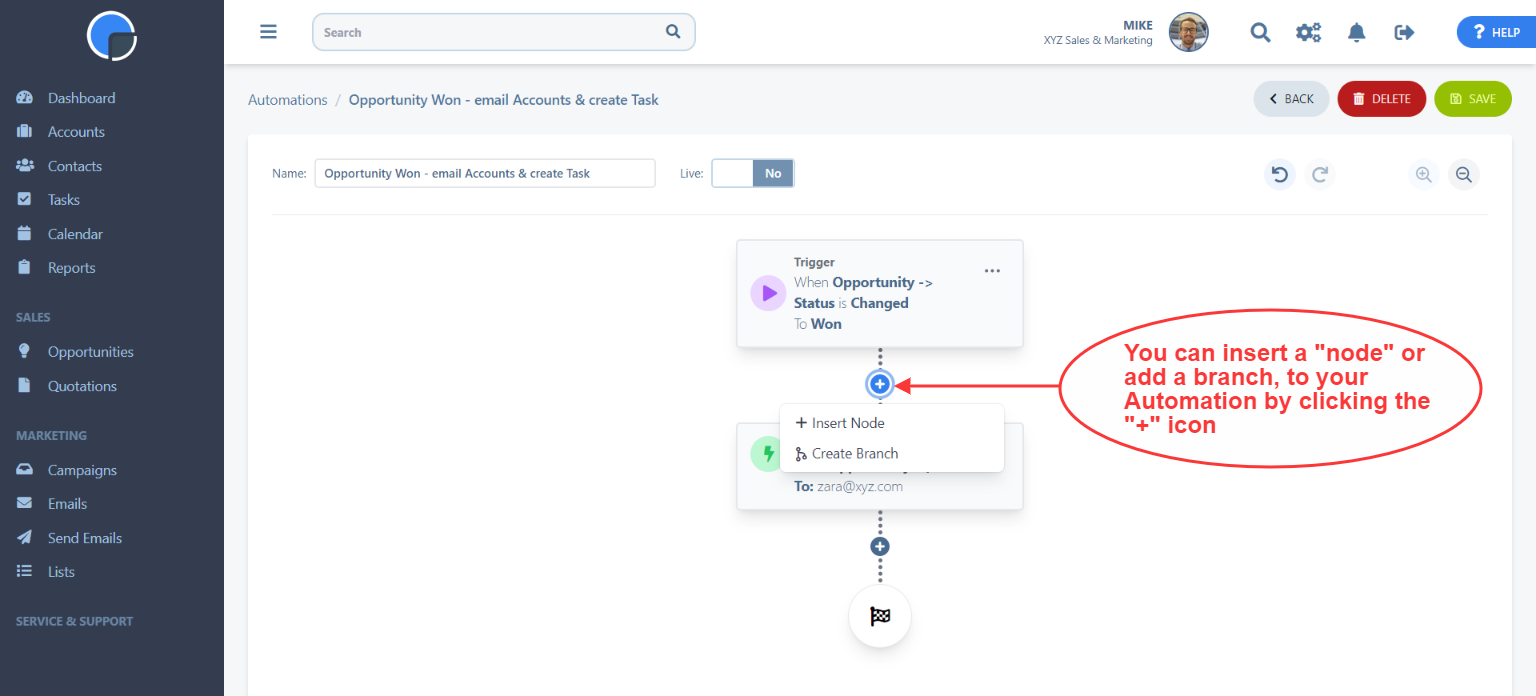
Stage 4 – Add more Steps or Branches
You can add further steps (or nodes) to your Automation or insert steps between those already created.
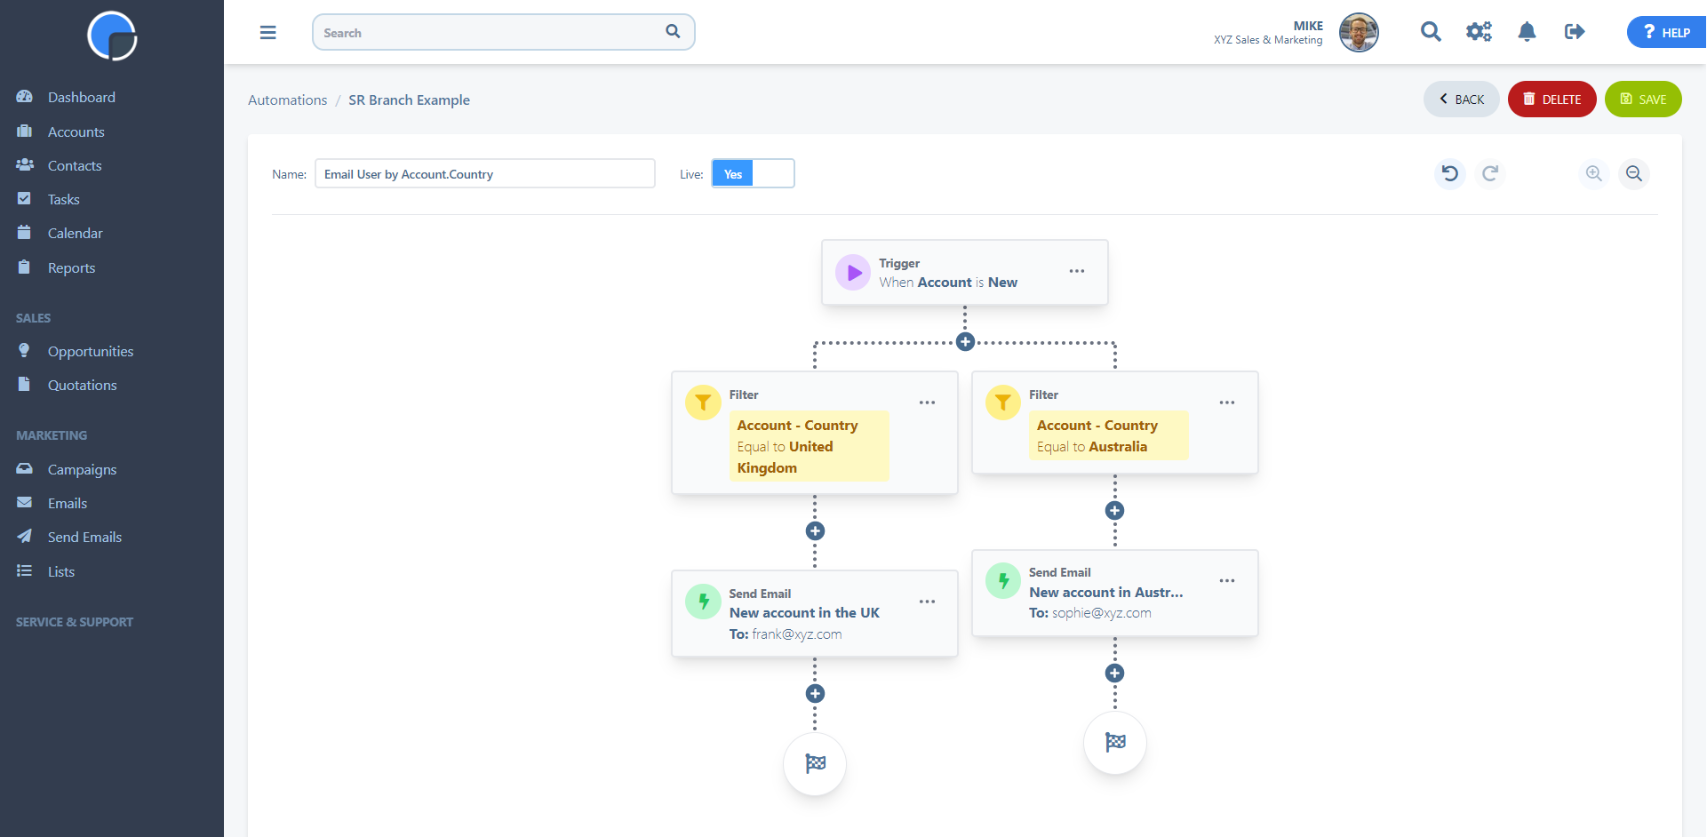
You may also want to create a “branch” that will add a simultaneous action or determine a conditional path, that will enable you to set an Automation where if one set of criteria is matched – do this, and if another is matched – do that.
In this example, when a new Account is created, send an email to Frank if the Account.Country = United Kingdom, and send an email to Sophie if the Account.Country = Australia.
You can add as many stages as you like to build your Automation.
Dynamic Values
When creating your Automations, some Triggers and Steps offer the option to use Dynamic values. Dynamic values let you use special tags to filter or search on your data.
An example of using Dynamic values is with Date fields. Similar to setting Reporting criteria, you can use special tags for “this week”, “next month”, “last quarter” etc. instead of a fixed date. This could be used in a filter when you only want to trigger the action for Accounts created in the last month, for example. The Dynamic date value means you don’t need to select a fixed point in time that would need updating to remain relevant.
In other scenarios, the Dynamic value can be used to include any value from an earlier Step, for example, when using the Account ID from the trigger to search for Contacts belonging to that Account.
Examples
Dynamic Date Fields
Dynamic dates should be presented as one word. For example:
thisweek
thismonth
nextquarter
lastyear

Value from earlier Step
In this example, a Dynamic value can be used to find the Contacts associated with an Account via the Account ID.

Here we have built a few example Automations where you can view the screenshots and instructions step by step, using the various Triggers.
Event Trigger
In this example, the Automation is to create a follow up Task for a CRM user when an Opportunity has been closed and set to “Won”.
To create an Automation, go to Settings, Data Management and Automations.
New Clickthough Trigger
The New Clickthrough trigger helps you to nurture leads that show an interest in your product/service by clicking on a link in an email campaign. In this example, a Contact is removed from one campaign and added to another when they Clickthrough on the email, progressing them through your pipeline.
Lead Scoring Trigger
The Lead Scoring trigger helps you identify your best leads by applying a score according to the engagement and activity of your contacts as they move through your funnel. In this example, a score of 10 is added to the contact record if they click through on a link in an email campaign.
Schedule Trigger
This example sets a schedule to email “Open Cases” to the Case Owner. The example uses our Service & Support module for managing customer support tickets, but similar uses for the Schedule Trigger might be for Tasks, Campaigns, new Accounts etc.
Using Branching
This example shows you how to use the branching option. Here we are allocating new leads/accounts to different account managers based on their location. New accounts based in the United Kingdom are being allocated to Mike and those in the USA are allocated to Sophie. You could chose to create a Task, send them an email or create a system notification, as we have here.