Opportunities Overview
Opportunities are the sales deals that you hope to win.
Opportunities have a monetary value, a close date and a probability of success shown as a percentage. Once you have created an Opportunity it will appear in the widgets on your Sales Dashboard, for example in the sales funnel and the Opportunities and Forecast Summary table. Opportunities can also be reported on in your Sales Forecast Reports.
Create a New Opportunity
To create a new Opportunity, open the Company Account, scroll down to the Opportunities section and click the ‘+ Add’ button.

You can also add an Opportunity by clicking the ‘+ Add’ button on the Opportunities summary table and then searching for the relevant customer account.

Complete the fields on the Opportunity form and save. By setting the Probability, and adding the sale value in the Opportunity Lines your opportunity will appear in the Sales Funnel and summary on your dashboard.

Fields on the Opportunity form:
- Opportunity Name – what you want to call this Opportunity. It defaults to the name of the Account which is fine if it is the only Opportunity for the Account, but otherwise choose another name such as ‘CRM Upgrade’ or maybe an order number
- Close Date – the date you think the Opportunity will close, i.e. be completed/won
- Status – Your Sales Stage. You can customise your Sales Stages in the Dropdown Lists called ‘OpportunityStatus’
- Next Step – free text for you to enter what you have to do next e.g. set up a meeting
- Forecast – you can choose whether or not to include this Opportunity in your Sales Forecast reports. This list can be changed by editing the ‘OpportunityForecast’ Dropdown Lists
- Probability – the probablility is the percentage chance you think that this deal will close. You can edit this as your opportunity moves through the sales pipeline
- Competitor – another free text field for you to add the name your main competitor, if known
- Source – this will default to the Account Source (how the customer came to hear about you), but you can change it as you wish
- Loss Reason – If you lose the deal, record why for future analysis. This is driven by the ‘LossReason’ Dropdown List
- Description – a free format space to add some notes about this Opportunity
- Win/Loss Report – more space to describe the deal after it is won or lost
Opportunity Lines
You can break the Opportunity down into multiple Lines, each with a Quantity, Product name and Unit Price. Saving the Opportunity will total the lines showing the overall value of the deal.

These can be top-level quotations or you can create lines for all your products by creating custom lines using Custom Dropdown Lists.
Quotations
The Quotations feature lets you create, download and send quotations directly from your CRM (available in the Professional and Enterprise plans).
When you create a sales Opportunity, you can generate a quotation directly from the opportunity and send it to your customer or prospect.
The system includes a customisable template where your system Administrator can upload your company logo, and set up your organisation details, bank account and taxation information, so all your quotations are standardised.
Your stored Quotations are included within the document storage limits for your price plan, i.e. for Professional, this is 5GB and Enterprise, unlimited.

CRM Calendars
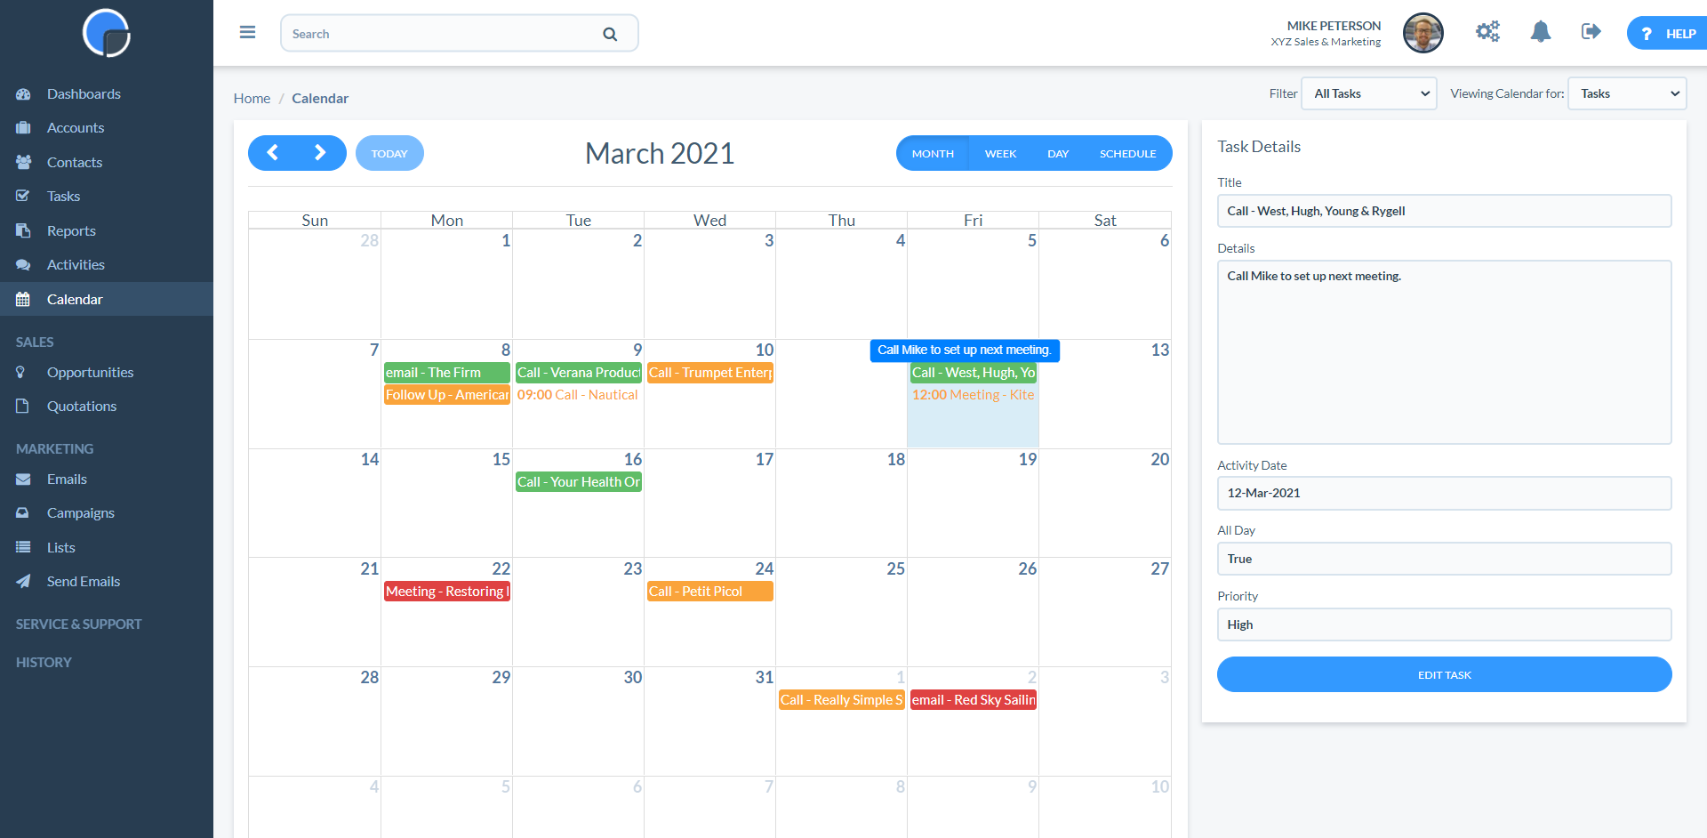
Your CRM calendar lets you view and prioritise both your CRM Opportunities and Tasks
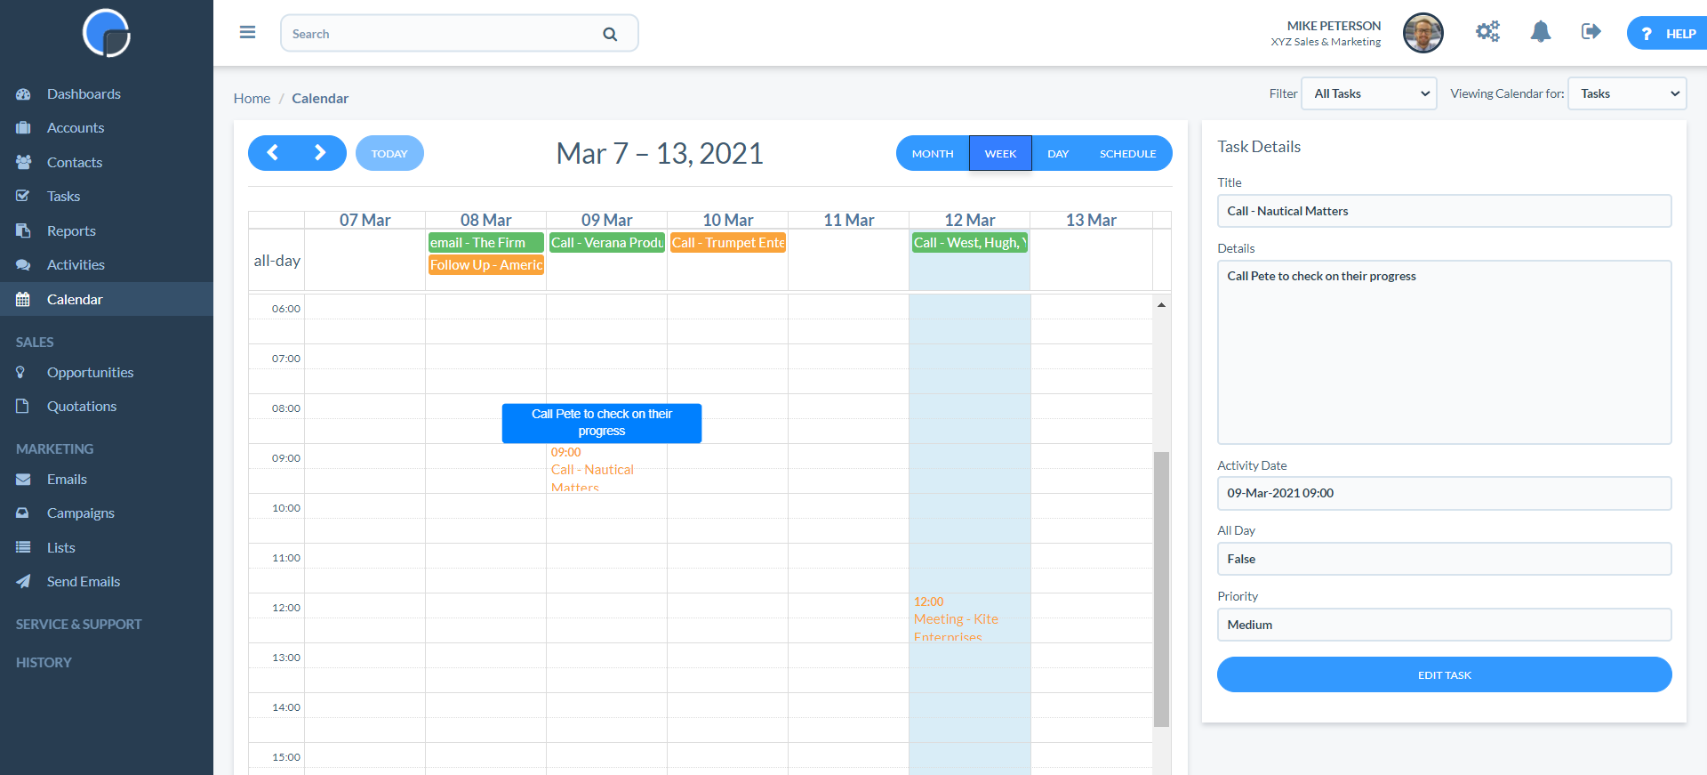
Clicking on an Opportunity from the calendar will display the details on the right hand panel, where you can also click through to edit.

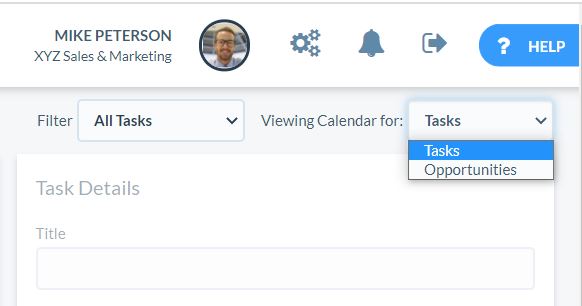
You can easily switch between the different calendar views. i.e. Tasks or Opportunities, and filter to show My Tasks/Opportunities, My Group’s Tasks/Opportunities, or All Tasks/Opportunities.
You can display you calendar by Month view, Week view, Day view or as a Schedule for your day.


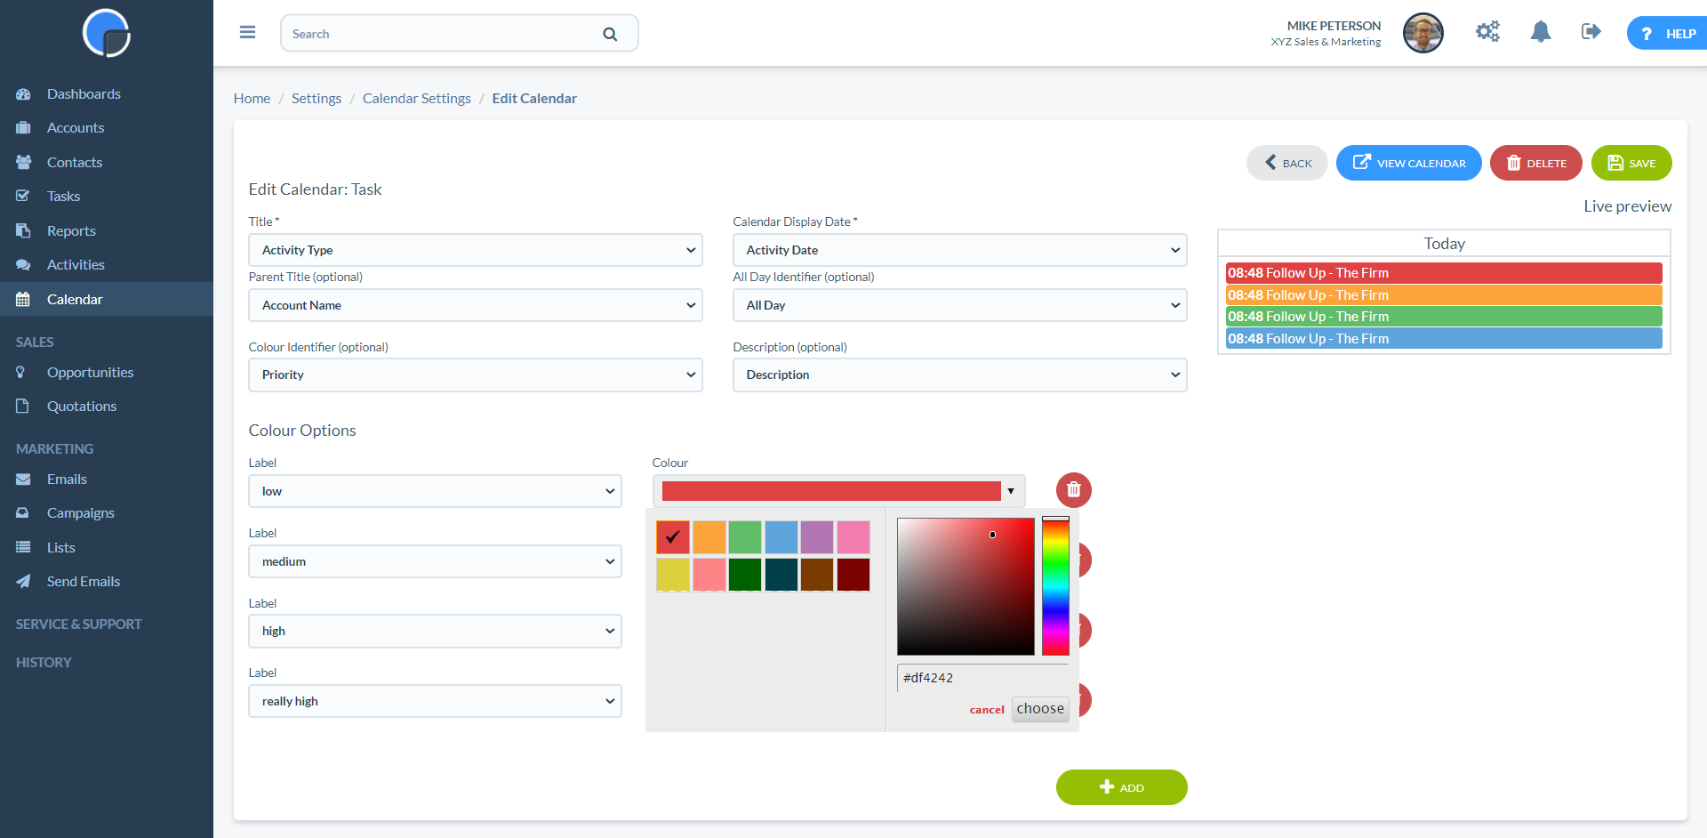
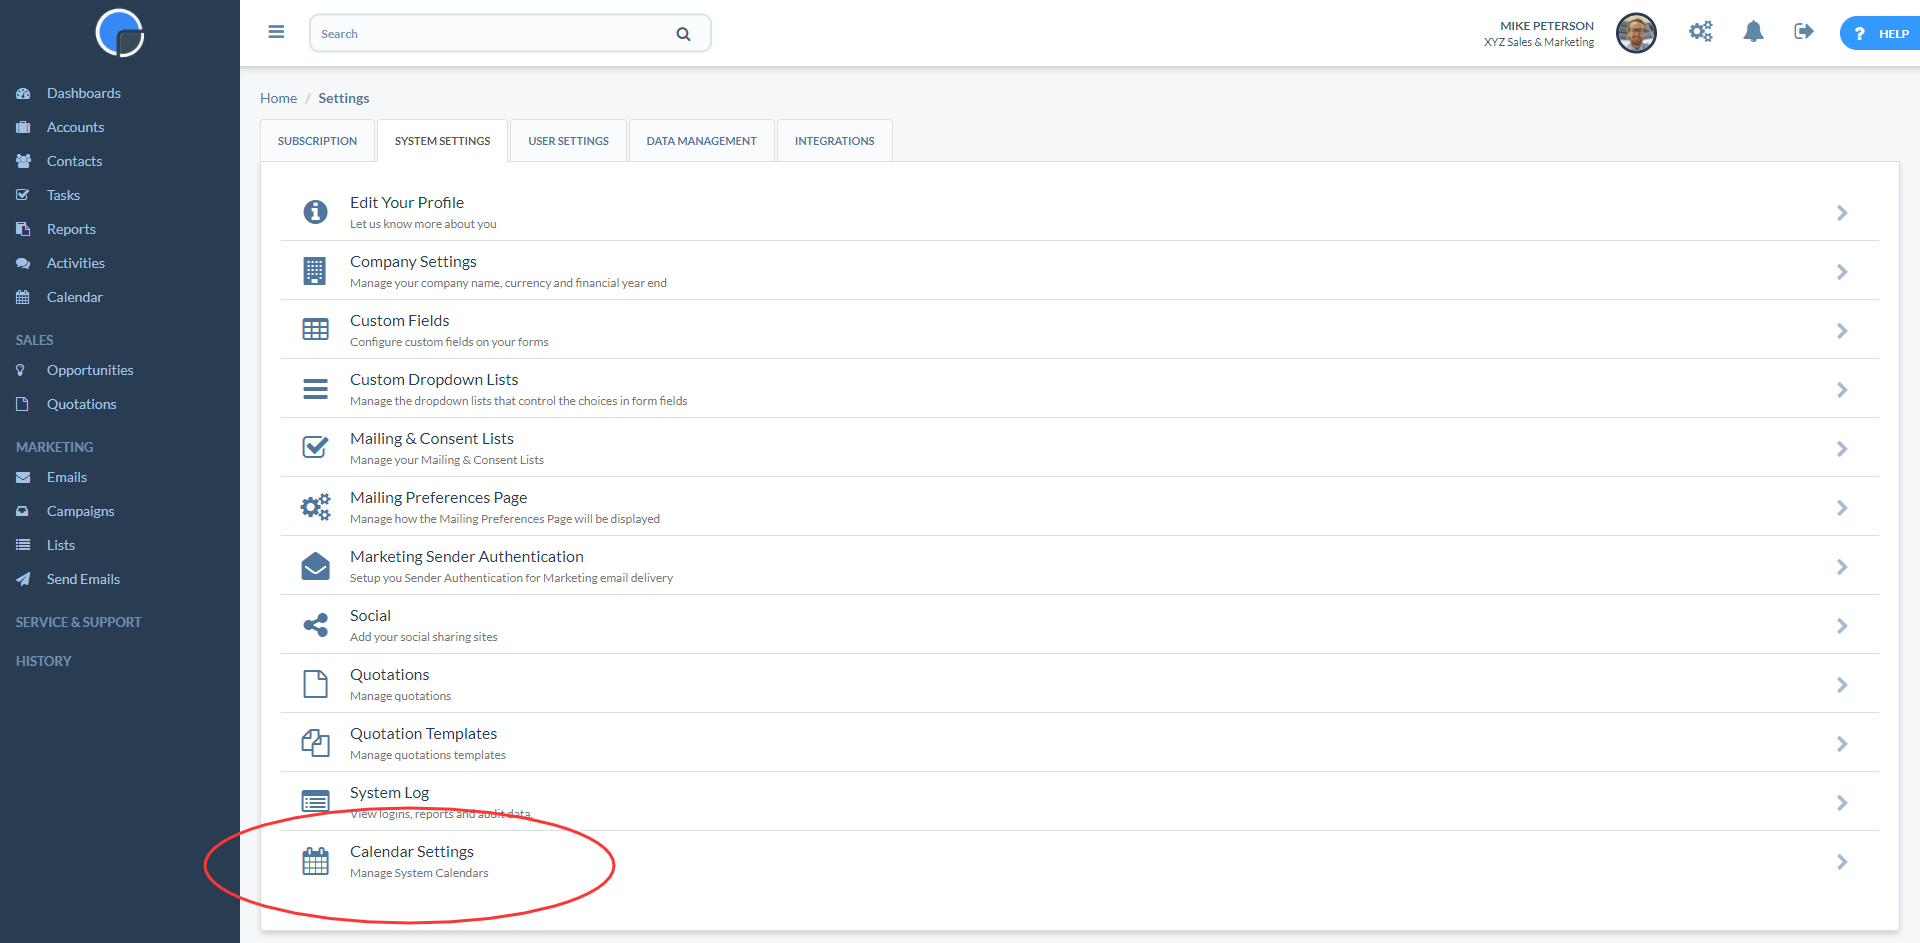
Calendar Setup
To set up your calendars you’ll need to be a system Administrator. Go to Settings, open Calendar Settings on the Systems Settings tab.
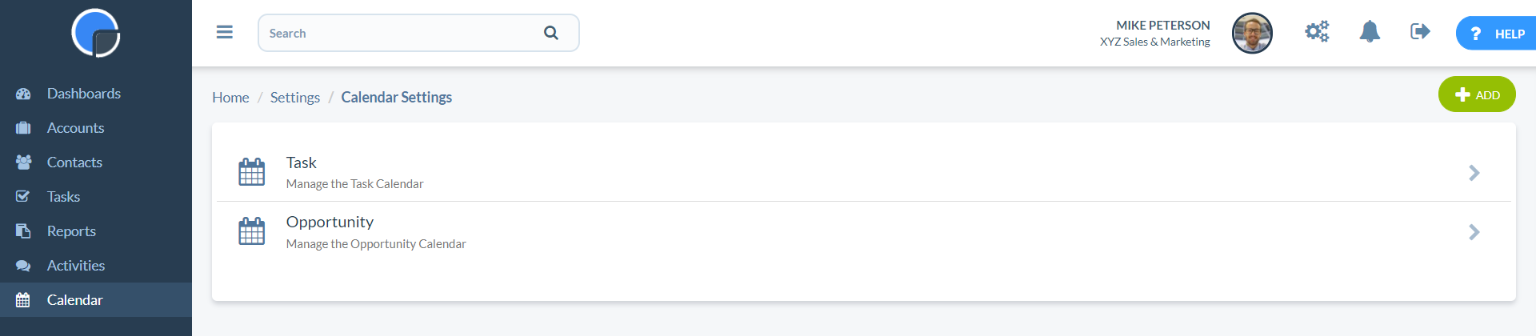
Next, select either Tasks or Opportunities to determine the settings for each calendar.
Opportunity Calendar Settings
The calendar settings include various fields where you can use dropdown lists to set up the information you wish to see. For example, in the Title Field you might set this as the Opportunity Name or maybe the Opportunity Status.
For the calendar Display Date field you have the option to set this to the Close Date, but also to the Created Date or Modified Date, should these be important to how you manage your Opportunities.
There are further optional fields where you can add other details to the calendar entry (e.g. the Account Name).
In the Colour Identifier field you can select to identify your Opportunities based on the Status, Forecast, Campaign or Contact Name.
Once you have completed the setup, click save then ‘view calendar’.
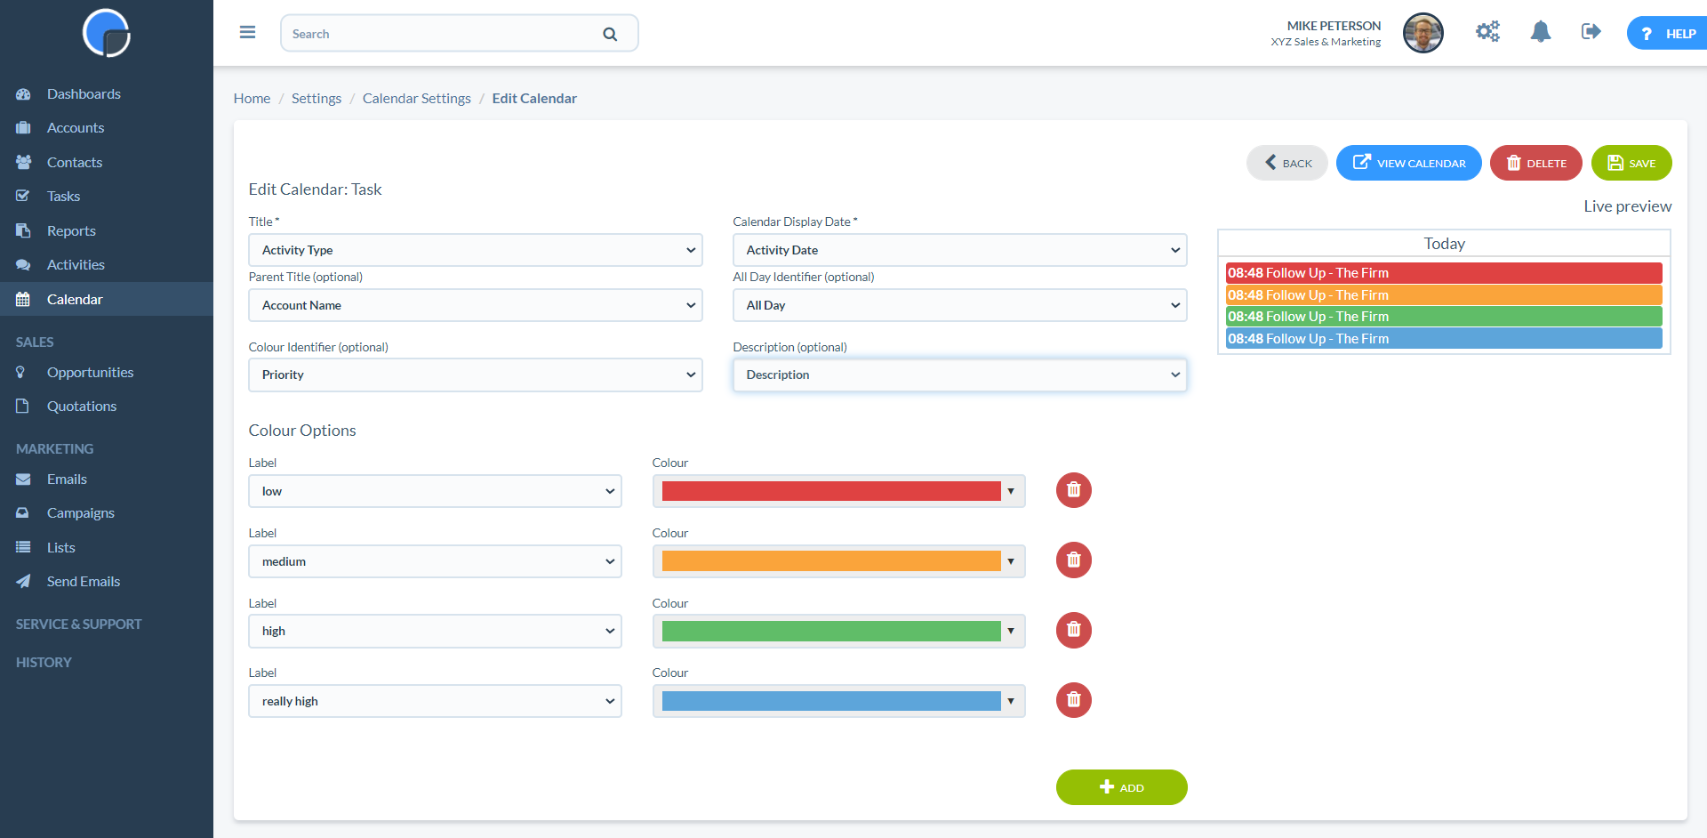
You can customise the colours you wish to use by clicking on the dropdown list or by clicking on the colour picker window.