Single Sign-on is available with the Enterprise plan, via our Single Sign-on parter OneLogin. Single Sign-on gives you unified access across all your apps letting you login from a single portal.
You can also use OneLogin to set up Two-Factor or Multi-Factor Authentication for your users, increasing your security with policy-based access control that recognises individuals and not just a password.
OneLogin Integration with SpotlerCRM
The OneLogin integration with SpotlerCRM replaces the standard login process with a login from the OneLogin portal.
The OneLogin integration is available in the Enterprise Plan only.
1. Enabling OneLogin for SpotlerCRM
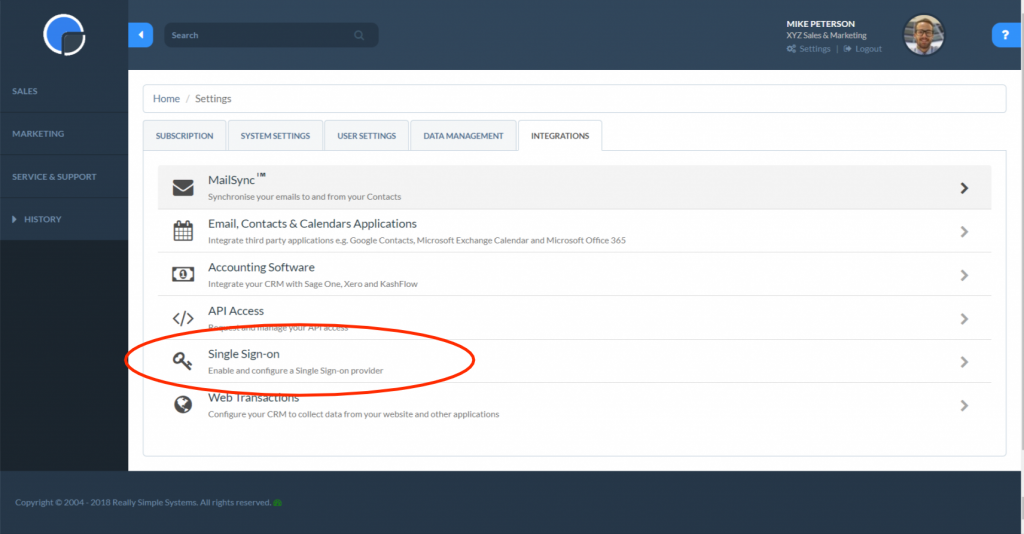
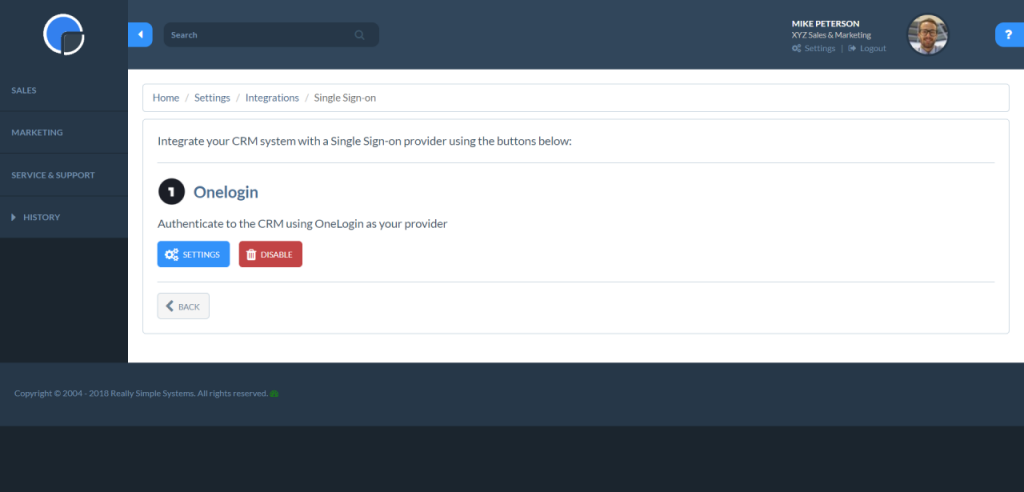
To set-up OneLogin on your CRM, first check that it has been enabled. In SpotlerCRM, go to Settings, then Integrations and click Single Sign-on. If there is no Single Sign-on option on the Integration menu, please contact our Customer Support team to enable it.
2. Create a OneLogin Account and Portal
Create an account at OneLogin.com and add your details. You’ll be sent a message to verify your email address. Simply follow the instructions on the email and set up your password and user information.
3. Configure the SpotlerCRM App
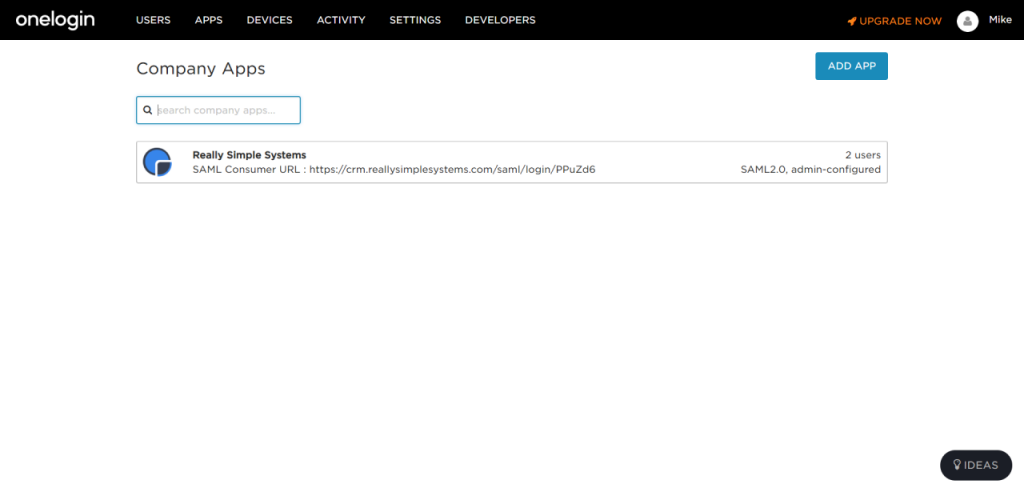
Log-in to OneLogin.com and open ‘Apps’ on the nav bar, then click the blue ‘Add App’ button. Type SpotlerCRM in the search bar, and click on the app name, then save. There is no need to import any icons.
4. Configure One-Login in your CRM
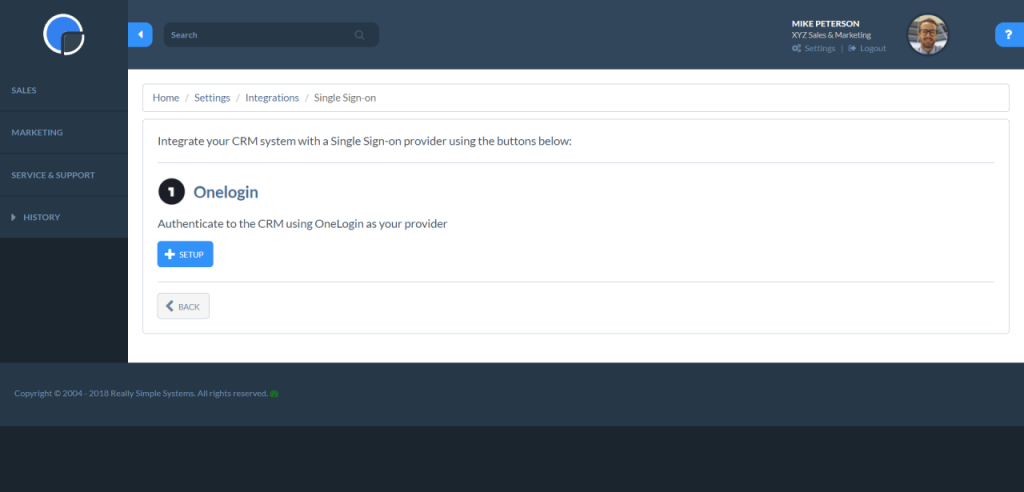
In your SpotlerCRM OneLogin integrations page, click the blue Setup button.
Enable SSO (Standard Strength Certificate)
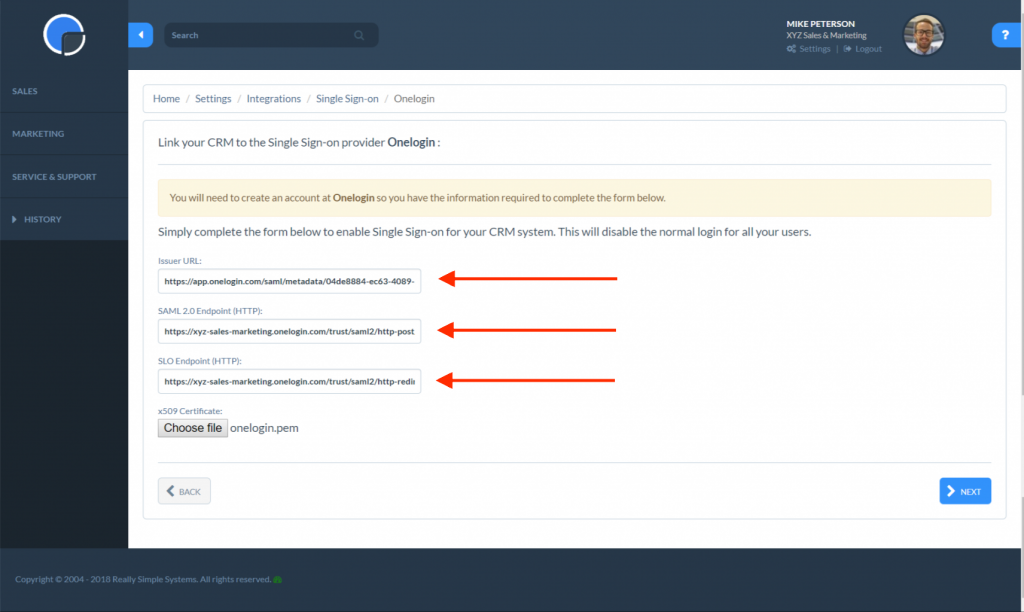
Back in your OneLogin account, on the secondary nav bar, click SSO and you’ll see three URLs: Issuer URL, SAML 2.0 Endpoint and SLO Endpoint.
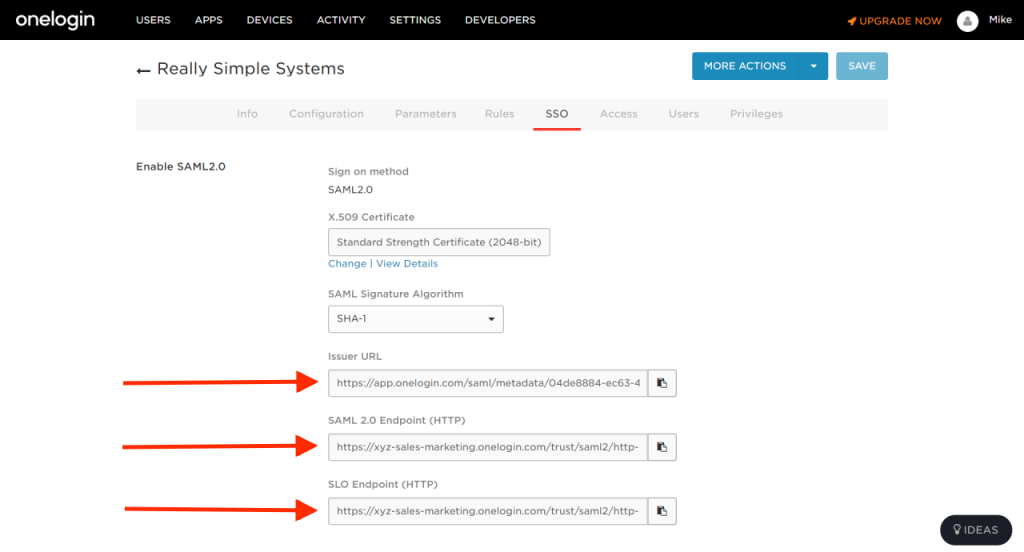
Copy the three URLs from OneLogin and paste into the three fields in the CRM integration page.
Download and Importing the Certificate
Back in OneLogin, click the ‘View Details’ link under the X.509 Certificate and then click the Download button next to X.509 PEM dropdown list. This will save the certificate on your computer as a .pem file.
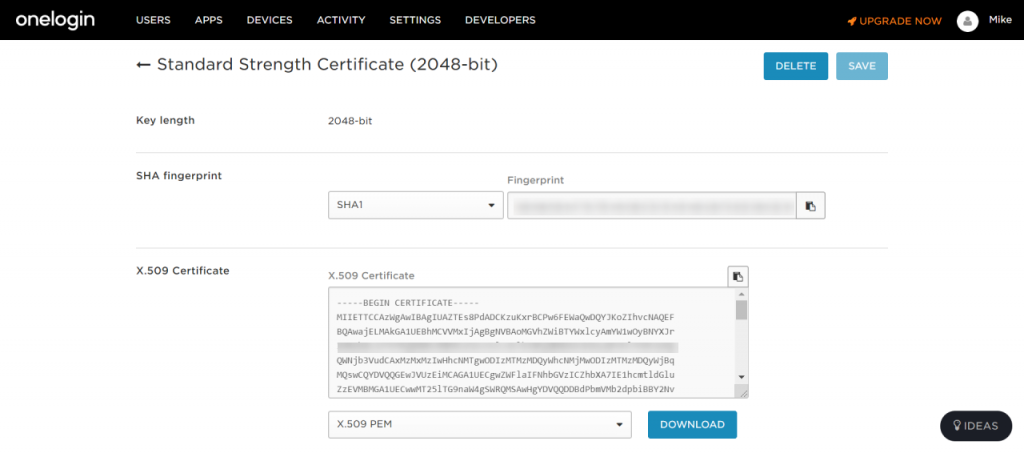
Back in your CRM, import the certificate into SpotlerCRM by clicking the ‘Choose File’ button and uploading that file.
Finally click the ‘Next’ button in SpotlerCRM and copy the displayed login URL, highlighted in blue.
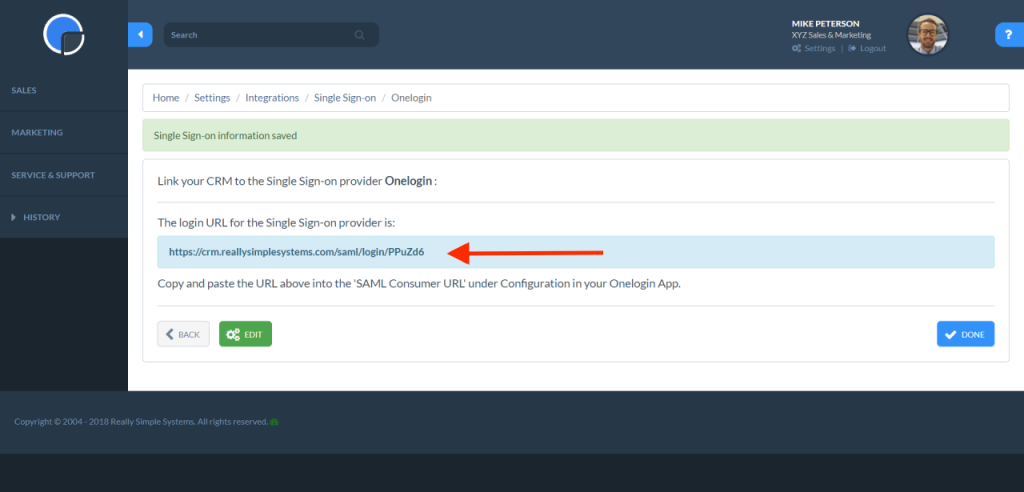
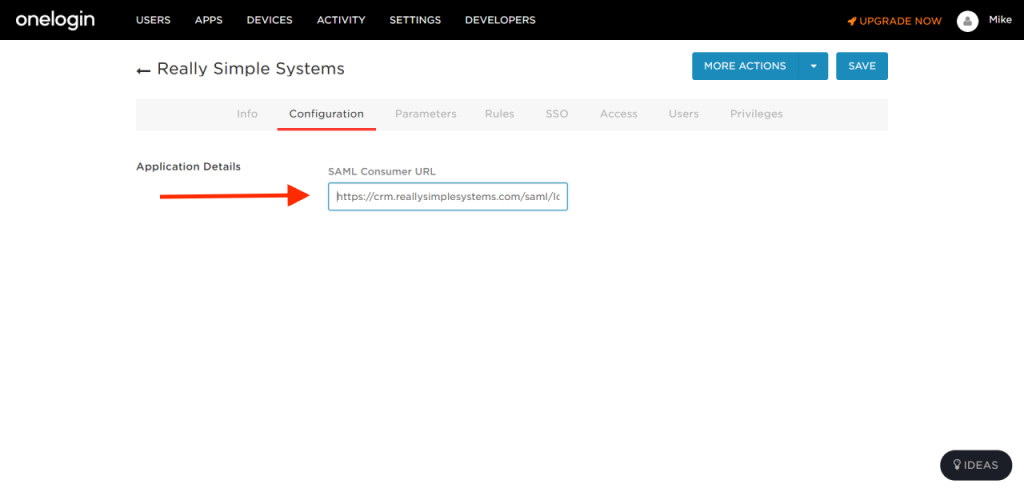
The paste the URL into the SAML Consumer URL field under the Configuration tab in OneLogin, and click the Save button.
Finally, click the Done button in the CRM to complete the set up.
5. Your CRM Sign-in
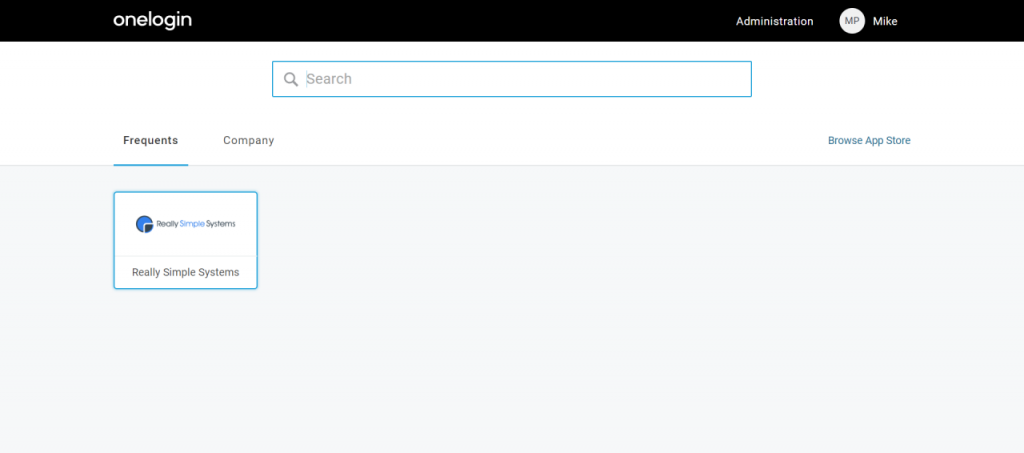
From your OneLogin portal you can add the SpotlerCRM app to you and your users by selecting it from the Apps/Company Apps page. If you have other apps you are accessing through OneLogin these will also show on this page.
6. Add Users
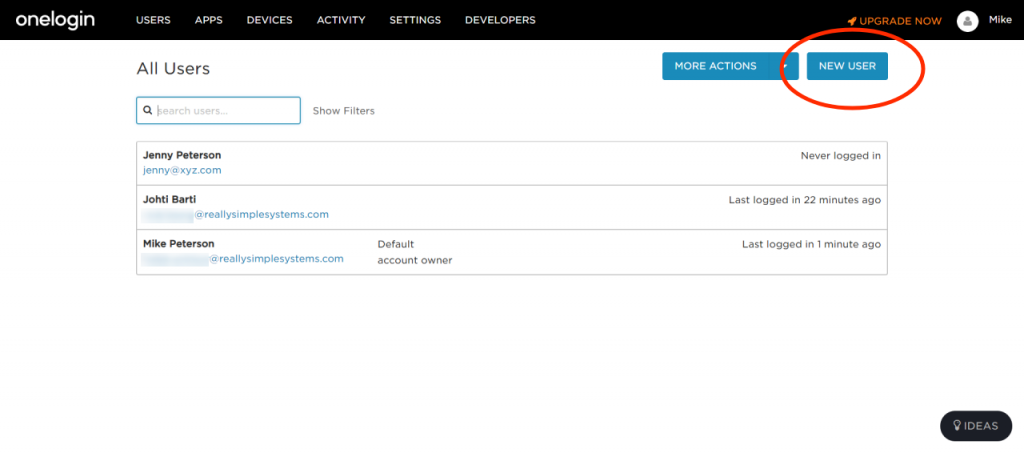
You will need to add each of your CRM users to OneLogin. In OneLogin open the Administration page and click Users, then New User. Complete the user details form and click Save user. If you have numerous users you may want to import their records from a .csv file.
N.B. Once you have enabled OneLogin none of your users will be able to log into the CRM except via OneLogin. Before logging out of Really Simple Systems, check the integration by logging into the CRM from OneLogin.
Disabling OneLogin
To disable OneLogin, in SpotlerCRM go to Settings, then Integrations and open Single Sign-On. Click the red Disable button. Logins for all users will revert to the standard logon page.
Notes
The email address that users use to log into OneLogin must be the same as the user’s email in the CRM, otherwise you’ll get a login error.
If a user tries to log into SpotlerCRM using the standard login page, they will be redirected back to OneLogin.
