What is Azure?
Azure is a set of cloud services built by Microsoft to help organisations meet various business challenges.
It allows businesses to build, manage and deploy applications on the Azure network using different tools and frameworks.
Azure Integration Overview
The Azure integration is available with the SpotlerCRM Enterprise plan.
Using Microsoft Azure, it is possible to unite your applications with a Single Sign-on if the apps are able to integrate with the Azure Active Directory. Once enabled, your users will have a Single Sign-on (SSO) on Azure which will provide full access to your SpotlerCRM account.
Note: Once completed, users can only sign and access SpotlerCRM by logging into the Azure Portal.
SpotlerCRM Azure Integration
To integrate SpotlerCRM with Azure, you’ll first need to sign in or create an account in the Azure Portal.
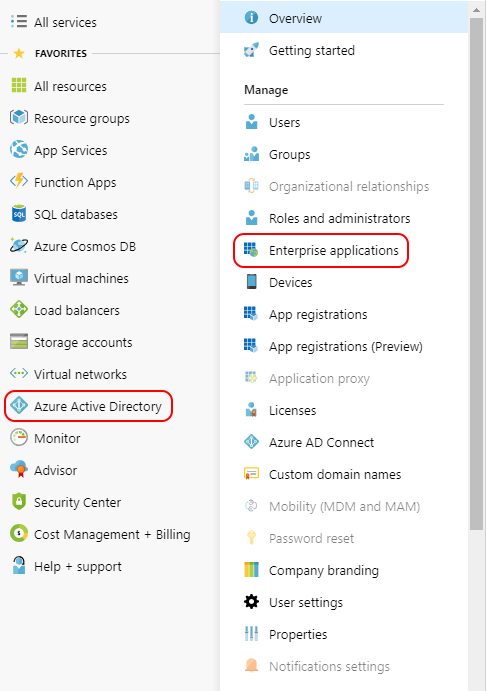
Once logged in, look to the menu on the left side of your screen and click on “Azure Active Directory” and then “Enterprise applications”.
In the Enterprise applications overview, click “+ New application”.

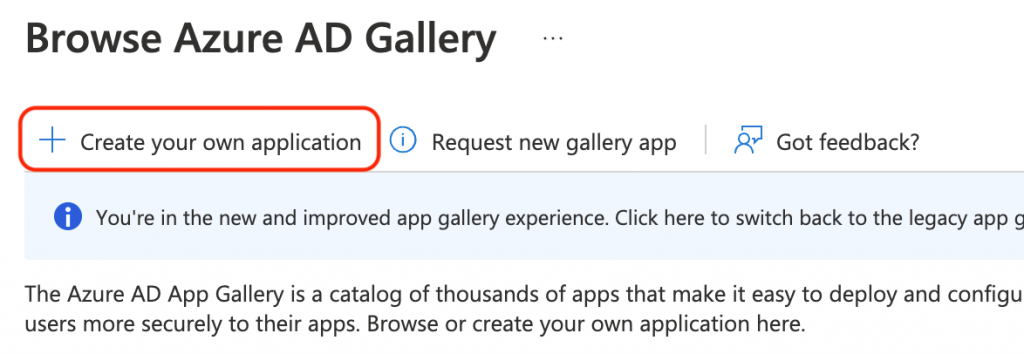
This will take you through to ‘Browse Azure AD Gallery’. Select the ‘Create your own application’ option.
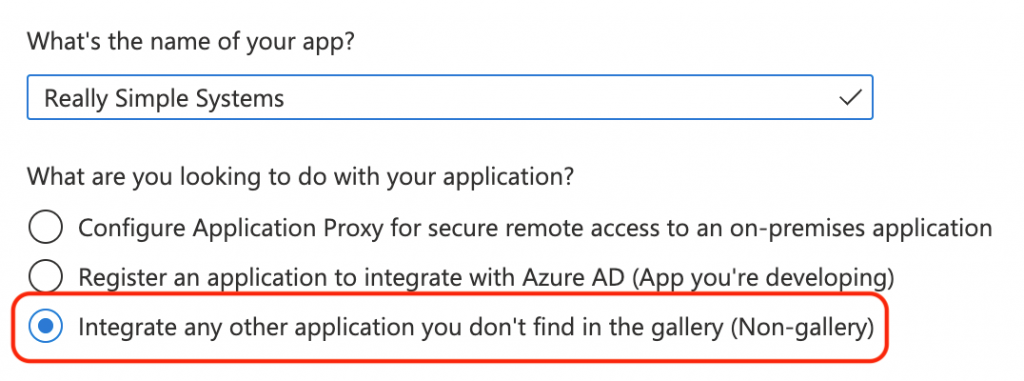
Enter ‘SpotlerCRM’ as the name of your app and make sure you have the ‘Integrate any other application you don’t find in the gallery (Non-gallery)’ option selected.
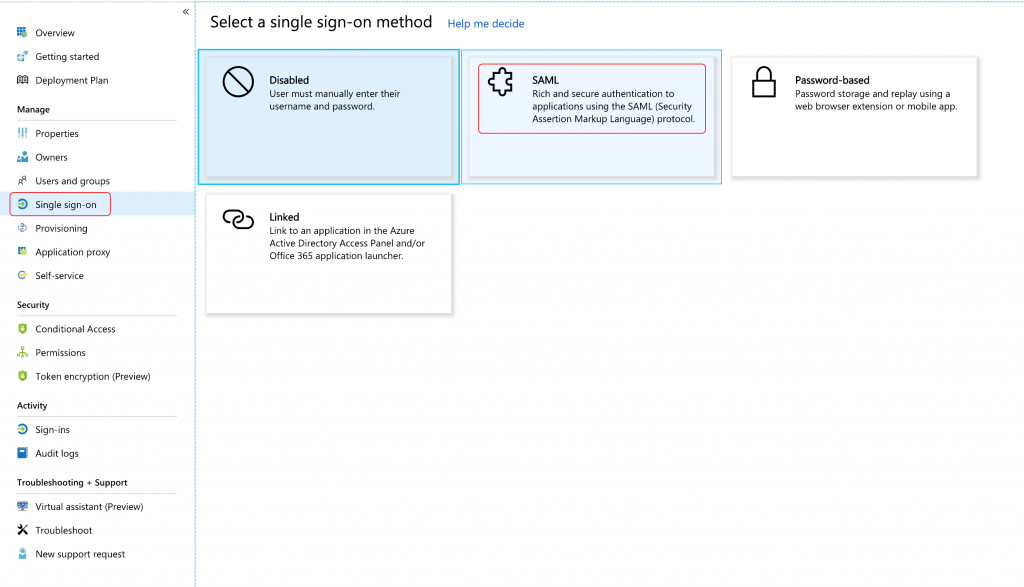
You will now have a menu for your new Really Simple Systems Azure application. Click on “Single Sign-on” and then select your sign in method as “SAML”.
You will next see a 5-Stage process.
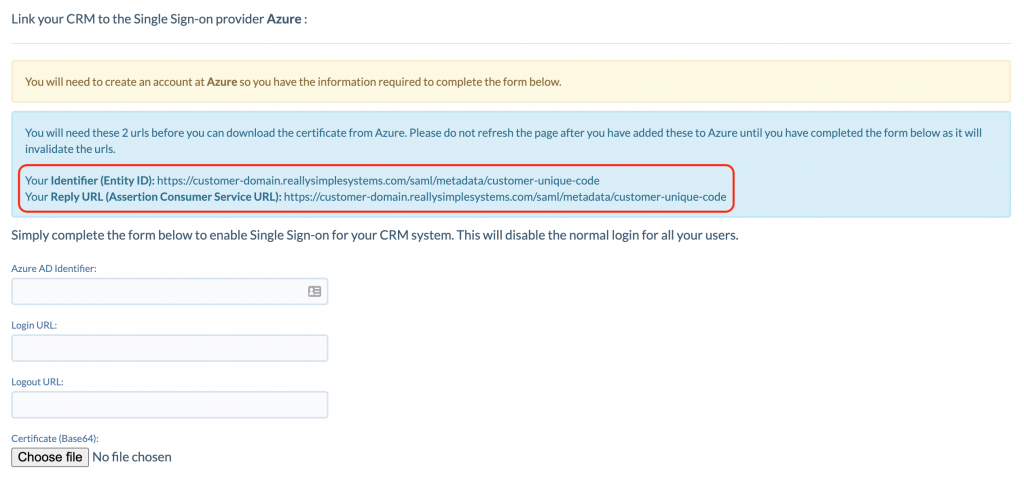
In Stage 1, there are 2 required fields that need to be completed, the Identifier (Entity ID) and the Reply URL (Assertion Consumer Service URL). These can both be found in your CRM when setting up your Azure integration.
Keep this browser window open while you log into your SpotlerCRM. Once logged in, go to Settings, then Integrations, and then Single Sign-on, and click on “SETUP” for Azure.

You will next see the 2 URLs you need for Stage 1 in the Azure window, in a blue alert box. Copy these and add them to Azure, then click save.
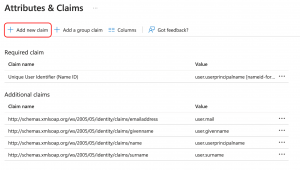
In Stage 2 in the Azure window, you will need to add a claim. Click “Add claim” on the Stage 2 screen.
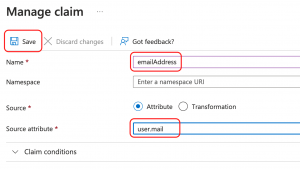
Fill in the Manage Claim form with the information below and click “Save”.
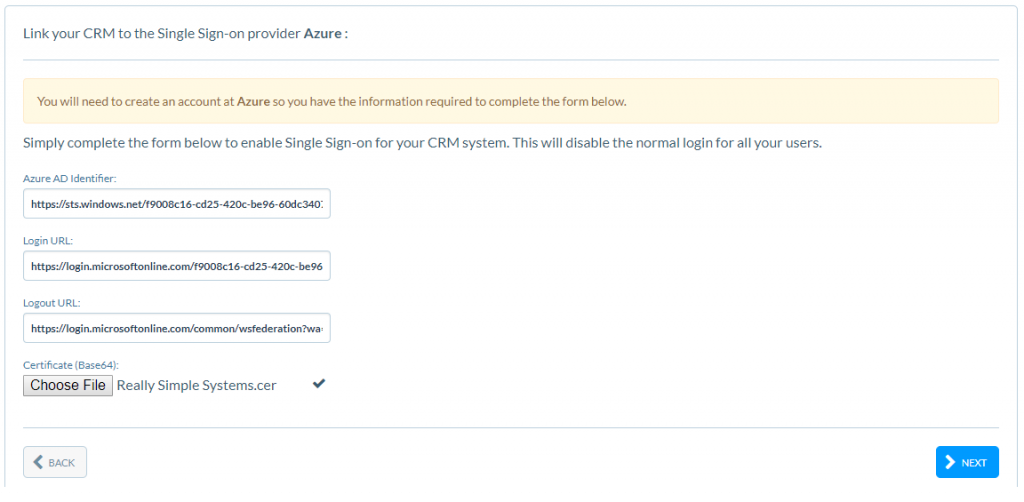
Back in the SpotlerCRM window, the 2 URLs copied for stage 1 are followed by 3 fields that also need to be completed, plus a requirement to upload a Base64 Certificate.
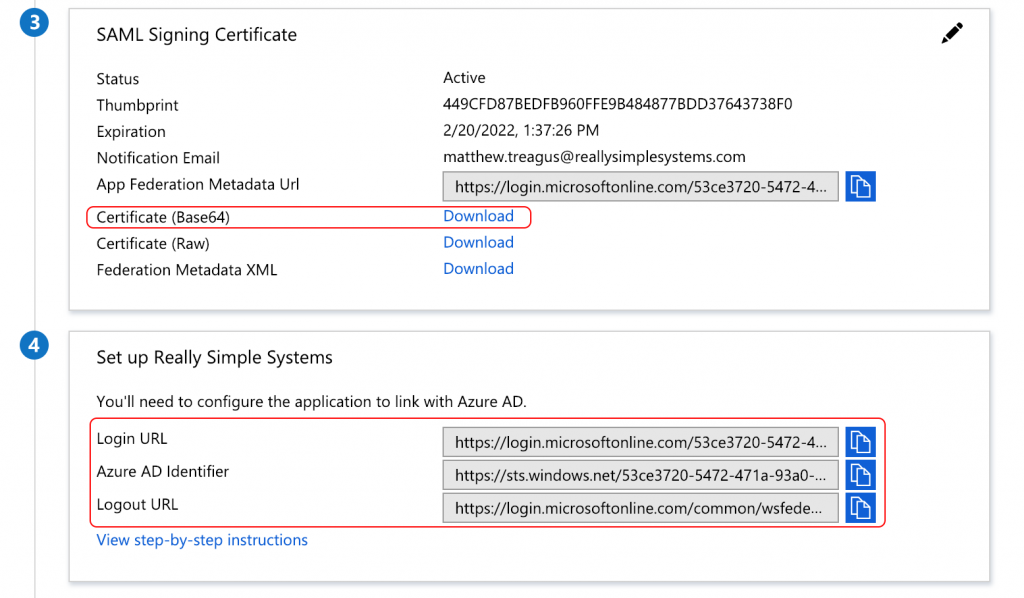
Fill the SpotlerCRM fields by copying and pasting the URL information from the matching fields in Stage 4 of the Azure window. In order to upload the Base64 certification, you will first need to download it from Stage 3 in the Azure window.
Once the Azure information has been copied, press “Next”.
The next stage in the SpotlerCRM window will display the two URLs added in Stage 1 of the Azure window, in case you need them again, though you shouldn’t need to.
Click ‘”Done” in the SpotlerCRM window and then in the Azure window, scroll to Stage 5 and click “Test”.

If the test is successful, the SpotlerCRM Microsoft Azure integration is now enabled.
N.B Once Azure is enabled, none of your users will be able to log into the CRM except via Azure.
Disabling Azure
To disable Azure, in SpotlerCRM go to Settings, then Integrations and open Single Sign-on. Click the red Disable button. Logins for all users will revert to the standard login page.
Notes
- The email address that users use to log into Azure must be the same as the user’s email in the CRM, otherwise you’ll get a login error.
- If a user tries to log into SpotlerCRM using the standard login page, they will be redirected back to Azure.
- Make sure to add your Azure users into your Azure SpotlerCRM Application in “Users and groups”. Without this, users will not be granted permission to use the Application.
- In Azure, you can find your new SpotlerCRM App in myapps.microsoft.com
- Azure Base64 certificates, expires after 2 years, set yourself a renewal reminder.
For any technical difficulties in Azure, please contact their Support Team.

