Generate Leads Online with Web Transactions
You can capture new leads online with our CRM feature Web Transactions. This powerful facility within the CRM allows you to automatically collect data via a Web Form or incoming email, generating your leads online or inquiries.
Web Transactions is included in the Advanced Marketing tool and Service & Support tool.
The feature enables compliance with international data protection legislation, including the EU’s General Data Protection Regulation (GDPR), by letting you record mailing consent from a form.
Web Transactions Uses
With Web Transactions you can capture a new inquiry from your web site and automatically create a Company Account with their Contact details in your CRM system. This may subsequently create an Activity, recording when the form was completed and a Task for one of your team to contact them.
Each Web Transaction can include multiple actions to process the data of your new enquiry. So, as well as creating an Account and Task, you might also create a new Opportunity.
You might also add the new lead to an automated Drip Marketing campaign, sending them a welcome message and follow up messages at pre-defined times. If you are using the Service & Support tool you can use Web Transactions to create automated support Cases.
Use Web Transactions to:
- Capture inquiries from your web site or incoming emails to your CRM
- Create new Accounts or merge the data to existing Accounts
- Add an Activity for the transaction to the Account timeline
- Automatically create a Task for a sales person to contact the inquirer
- Create a new Opportunity from the lead
- Add the lead to an automated marketing campaign
- Automatically create a customer support Case
- Record marketing consent from Contacts

Web Transactions Setup
You can create a Web Transaction by creating a Web Form and this will trigger an Account, Contact and Activity to be created in the CRM when the form is submitted. The associated Web Transaction will have the same name as the Web Form and you can edit this and change the settings.
You can also create Web Transactions independently of the Web Forms feature, setting up your own online form. The Web Transaction is run when the web browser loads the ‘image file’ (a webtrans gif), normally placed on your web site ‘Thank you’ page. You may need the help of a web developer to do this.
To set up a Web Transactions, go to Settings / Integrations, and open the Web Transactions tab.
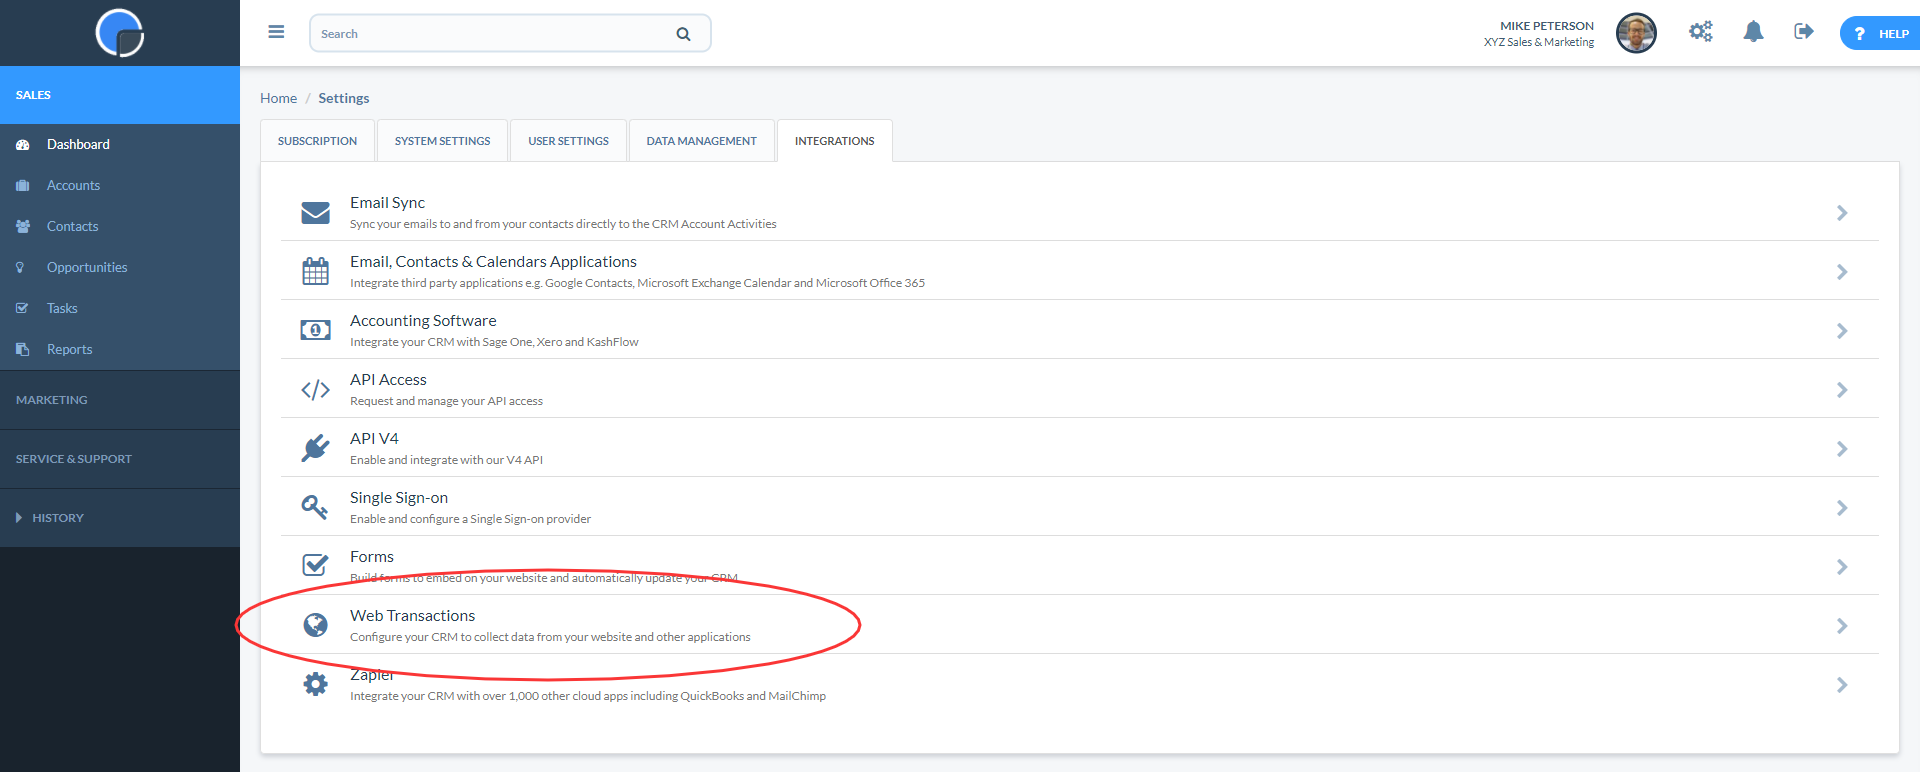
The data table here will list any existing Web Transactions.
To create a new Web Transaction, click the ‘+Add‘ button. This will open a Web Transactions form that you will need to complete with the parameters of your Web Transaction. For example, you can set it to match against an existing Account, create a new Account, create a Task, add it to a Campaign and so on.
You may want to get some help from our Customer Support team the first time you do this.
![]()
Web Transactions are created from your web page by including an ‘image file’ from the CRM. The transaction parameters are contained in a query string passed via the ‘image file’.
The ‘image file’ a webtrans gif, http://webtrans.spotlercrm.com/webtrans.gif, reads the query string and executes the Web Transaction. The query string contains your customer number, the name of the web transaction and then the parameters that you want to pass to the CRM.
For example, if you have an inquiry form on your site that captures the person’s first and last names, email address and organisation, your query string would look like this:
<img
src=’http://webtrans.spotlercrm.com/webtrans.gif?c=1024&t=enquiry&email=mike@xyzconsultants.com&name=Mike%20Peterson&
organisation=XYZ%20Consultants’
/>
- 1024 is the number of your CRM system
- enquiry is the name of the Web Transactions
- and the other fields are those captured from the form and mapped in the Web Transaction definition to fields in the CRM
You can get the number of your CRM system from our Support Team.
You can pass other fields to the CRM such as source, country and http referrer if you have captured them on your web site.
For help in setting up Web Transactions do contact our Support Team and you may also want to seek the advice of your web site administrator.
Collecting Consents and Mailing & Consent Lists
To comply with international data protection legislation, you can use Web Transactions as part of the Advanced Marketing tool to capture consent from your contacts to your Mailing & Consent Lists.
You can add a Contact to a Mailing & Consent List from a Web Transaction by mapping a checkbox on a web form to the List. In “Update Field Name” scroll to the end of the list to find the Consent field for the Mailing & Consent List you want to use. Then map this against the field on your form for the checkbox.
For example, if you have a Mailing & Consent List called “Newsletter” and a checkbox on your form called “Subscribe” you can match “Consent.Newsletter” to “Form.Subscribe”.
Then, at the bottom of the Web Transaction form, add your Consent Description in the Consent Text box so this will be picked up on the Mailing & Consent List. For example, “Newsletter Signup”.
If the “Subscribe” checkbox on the web form has been ticked, and the value in Consent Text is “Newsletter Signup” then the Web Transaction will add that Contact to the specified List, together the date, IP address and “Newsletter Signup” as the Consent Description.
